- Author admin caroline@plants-knowledge.com.
- Public 2023-12-17 03:39.
- Last modified 2025-01-24 12:45.
The castor bean plant (botanically: Ricinus communis), also known as the miracle tree, Roman bean, dog tree or Christ palm, belongs to the spurge family and is originally native to the subtropics and tropics. In Central Europe it is often kept as an ornamental and container plant because of its striking leaves and flowers. The castor bush requires a lot of space and plenty of water. Otherwise it is quite easy to care for. However, its seeds are poisonous, while the non-toxic oil obtained from them is used in cosmetics and medicine.
Location
The castor bean plant needs a location in full sun that should be protected from the wind so that the large leaves do not tear in strong winds. Their shoots could also break off if there is too strong a storm. The castor bush also tolerates a partially shaded spot in the garden or in a pot on the terrace, as long as it is protected from the wind.
Floor
The soil for the castor bean tree should be deep, permeable and rich in humus and nutrients, as it is a so-called heavy feeder. That's why a substrate mixture with manure or compost is ideal for him.
Tip:
Make sure the soil is well permeable so that no waterlogging can occur. Soils that are too compacted can be improved with a little perlite. However, the water must not seep away immediately. Therefore, thorough mixing of the substrate is necessary.
Pouring
The miracle bush can reach a considerable size in a very short time. In addition, its large leaves evaporate a lot of water. That's why regular watering is essential for him. However, waterlogging should be avoided! It also survives longer dry periods. However, it doesn't grow as quickly.
Tip:
So that the water in the soil does not evaporate too quickly, you can cover it with a layer of mulch made of chopped wood, leaves or pieces of bark.
Fertilize
- weekly fertilization with conventional liquid fertilizer
- regular composting is just as good
- If you like, you can also use a slow-release fertilizer
- Slowly stop fertilizing in September
Cutting
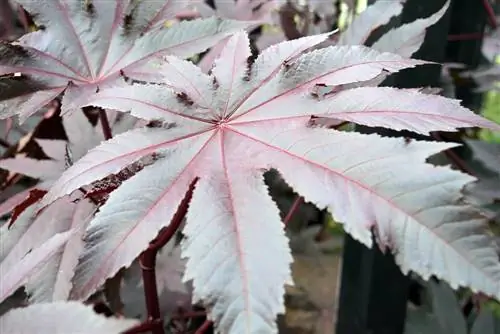
The castor bean tree does not need to be cut. If you cultivate it as an annual plant, you can add it to the compost in autumn. Otherwise it can overwinter in the garden with a cover. Hobby gardeners who have a lot of space at their disposal like to overwinter it in a pot in the house.
Wintering
The castor bean plants planted in the garden lose their above-ground plant parts in winter, while the roots remain in the ground and survive the winter there well if it is not too harsh. In harsh areas and in severe frost, the castor bean must be covered with a thick layer of leaves, brushwood, mulch or other options for frost-free wintering.
Overwintering as a container plant
- sufficient light and plenty of water
- Let the substrate dry a little between waterings
- large winter garden best suited
- Use appropriately sized planters
- Avoid waterlogging
Caution: Castor bean seeds are poisonous
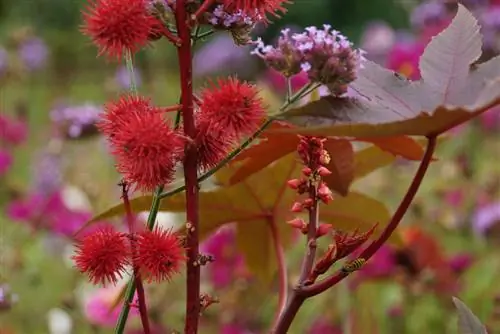
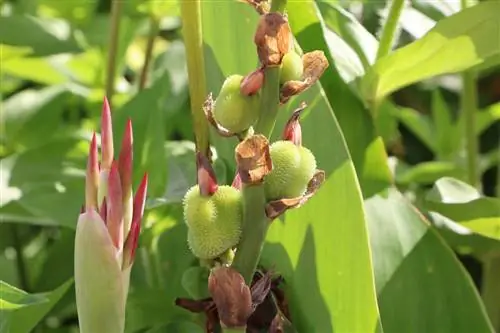
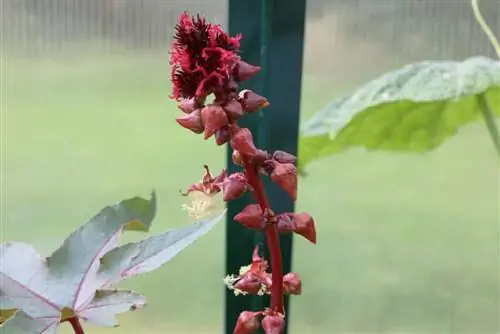
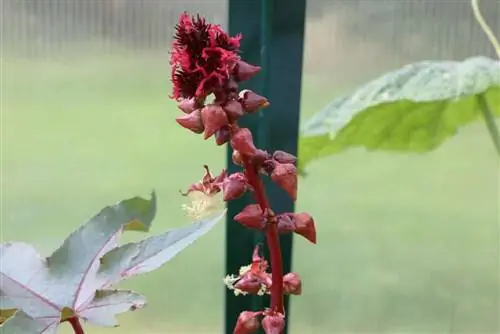
The castor bean plant blooms in panicle clusters between July and October.2 cm large capsule fruits then form, which contain 3 reddish-brown marbled seeds. In addition to a hard shell, the seeds have a root-like appendage, the so-called caruncula, which is considered a characteristic of a spurge plant. The seeds of the castor bean plant are also called castor beans and are extremely poisonous to humans and animals! Because they contain highly toxic, deadly ricin, which is considered one of the most toxic protein substances that occur in nature. Even though Roth-Daunderer-Kormann only counts the seeds as deadly plant parts in their standard work “Poisonous Plants - Plant Poisons”, it is better not to grow a castor bean tree if children and pets often play in your garden!
Propagation
The miracle tree is best propagated by sowing. So that you can plant a strong plant in the garden in spring, it is advisable to start sowing early in the year. It is therefore best to sow the castor bean at the end of January or beginning of February. Be sure to wear gloves so that you do not absorb the poison from the seeds through your skin.
You can get castor seed from specialist retailers or you have saved seeds from last year's self-planted castor bean. You can store this seed for about 3 years. That's how long it remains viable. Because of its hard shell, you should place the seed in a bowl of water for a few hours or, better yet, overnight so that it can pre-swell. This also promotes its ability to germinate.
Distribute potting soil into small pots. Then press one seed into each pot. Put some soil on top and press it down lightly. Spray the soil with a fine mist of water so that it is well moistened. Place foil on the pots to prevent evaporation. Place the containers warm and bright. The castor bean seeds germinate very well at temperatures between 20 and 26 °C. Ventilate the films every now and then to prevent mold from forming. As soon as the seedlings are visible, remove the foil completely. One to two weeks later, depending on the speed of growth, the plants are transplanted into larger pots and acclimated to the outdoors. As soon as there is no more frost, the castor bean trees can be planted in the garden soil.
Planting out
The planting distance for the miracle tree should be at least 1 m. It's best to incorporate horn shavings or compost straight away as a long-term fertilizer. Planting it near the bank or too close to the edge of the road is quite unfavorable because it has very extensive roots. Some hobby gardeners plant the castor bean tree as a solitary plant and some use it as a background plant in perennial beds because of its impressive size.
Bucket keeping
If you want to plant the castor bean in a pot, make sure you choose a very large pot so that its large roots have enough space and you don't have to repot so often. The bucket should have a drainage hole. A piece of pottery shard is placed on top, followed by a layer of perlite, expanded clay or gravel. This layer serves as a drainage layer. Place a layer of fleece on top and the actual planting substrate, which is well-drained and contains a few handfuls of compost, is placed on top of the fleece.
Tip:
If you use coasters, regularly pour out the excess water that collects in them. This counteracts “wet feet” on the castor bean plant and waterlogging in the container.
Castor bean varieties
- Ricinus communis 'Apache' (small, only grows to approx. 1 m high)
- Ricinus communis 'Carmencita Bright Red' (up to approx. 3 m high, shiny metallic, red-brown leaves and bright red fruits)
- Ricinus communis 'Gibsonnii Mirabilis' (small, dark red)
- Ricinus communis 'Impala' (red-leaved, higher than 1.50 cm, fruits colored red)
- Ricinus communis 'Sanguineus' (approx. 2 m high, purple-red flower stalks and green leaves with burgundy-red nerves, rose-red seed capsules)
- Ricinus communis 'Zansibariensis' (particularly large leaves)
Planting combinations
The castor bean bush can also be planted in beds. However, due to its size, it should be given a spacious place in the back area so that it does not take away any light from the other plants. As a background plant it goes well with:
- Lunchflower
- Lavender
- Columbine
- larkspur
- Atlas Flower
- Marguerite
- woman's coat
Conclusion
The castor bean bush is a gigantic, perennial, easy-care plant. It can grow up to 4 m or more in height. Its large leaves and inflorescences are noticeable from afar in the garden or in the pot on the terrace. It needs to be watered abundantly and regularly, but it can also survive drier periods. In winter it moves in and needs to be covered with winter protection. If you want, you can also overwinter it in a bucket in the house. Its seeds are dangerous because they contain highly toxic, deadly ricin. Therefore, the castor bean tree with seeds must always be kept away from children and animals! As a precaution, if you have children or animals in the house, it is better not to sow a castor bean plant!
Information coming soon
Location of a castor bean plant
The castor plant likes a sunny location
Cheap plant substrate
- Soil rich in humus is suitable as a planting substrate. The nutrient requirements are high. Loose, permeable soil is favorable.
- Planting time is in spring. This allows the plant to form sufficient roots until winter.
- You can plant in the garden, but also in a correspondingly large pot.
- A large bucket protects better against frost in winter and does not freeze so quickly.
Watering and Fertilizing a Castor Bean Plant
- Watering must be done regularly and abundantly. The large leaves evaporate a lot of water.
- When temperatures are warm, you need to replenish water every day!
- Waterlogging must be avoided at all costs!
Wintering
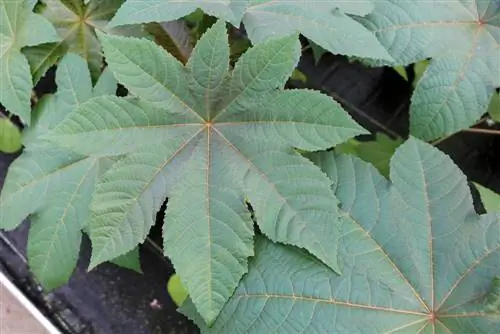
- The above-ground part of the plant dies completely.
- The root ball must be protected. You cover it with a thick layer of leaves, hay or even paper. Everything has to be secured well, it's best to put bricks or stones on it.
- A pot with the plant must also be baked well, preferably in several layers. The bucket should under no circumstances be placed on the ground. Always put something underneath!
- When the plant overwinters in the winter garden, the leaves are preserved. The castor plant is evergreen. She then needs a lot of light. The plant continues to grow quickly. So there must be enough space at the top!
- If this is not the case, it makes sense to grow a new plant from the seeds next year.
Propagation of castor beans
- Propagation is best done by sowing. You can buy seeds or use your own.
- Sowing will begin at the end of January.
- So that the seed germinates well, place it in warm water overnight.
- The next day, place seeds in plant pots, preferably with sowing soil and only cover them lightly with substrate:
- If there is plenty of light (no sun) and temperatures around 20 ˚C, the seeds will germinate within two to three weeks.
- The soil must be kept evenly moist, but not wet. It's best to just spray the substrate.
- As soon as the temperatures are permanently above 5 ˚C, the young plant can go into the garden.

