- Author admin [email protected].
- Public 2023-12-17 03:39.
- Last modified 2025-01-24 12:45.
The name worm fern may not sound particularly exotic and evokes associations that have little to do with this great plant. Despite all this, the fern with its evergreen fronds offers a great splash of color in the garden and in the great outdoors.
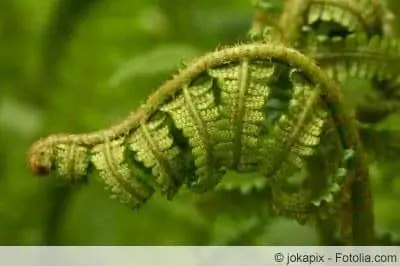
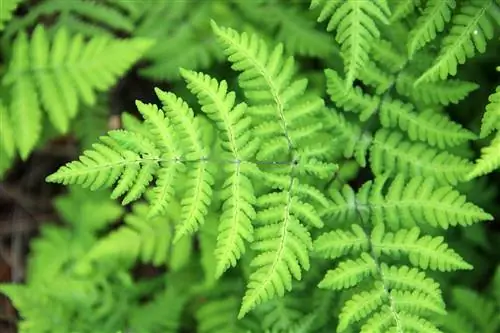
Botanically speaking, the worm fern is one of the warm ferns, of which around 150 different species are known. The fern is particularly widespread in the northern parts of the world, such as in Europe, in large parts of Asia or in North America. It grows in forests in open spaces or on slopes and of course in gardens. The worm fern can reach a height of up to one meter, which makes it a pleasant privacy screen, for example around the pond or in front of unsightly walls or fences. The leaves, which have double or single pinnation, are reminiscent of a palm frond and create an exotic flair around the plant. Many gardeners love the worm fern because it is very robust and has few demands on its location. Others love it because of its size and the ability to beautify larger green spaces without much effort.
The Location
Since the worm fern feels particularly comfortable in our home gardens, you should look for a suitable location for it right from the start. It particularly likes to grow in shady or semi-shady places where it is not bothered by direct sun all day long. The worm fern can therefore be placed on walls, house walls or under trees.

In addition, the worm fern can be used very well to green larger areas thanks to its sprawling shape. In particular, all those areas that can only be cultivated to a limited extent and are therefore referred to by experts as “dead areas” are an ideal location for the worm fern. And if there are already tall perennials in the garden, planting the worm fern next to the perennials could create a great contrast.
But it's not just the location that's important. The ground conditions also have to be right. Since the worm fern is very undemanding, dry to fresh soil is sufficient. It should never be too wet. The soil should also be quite light and loose. Many ferns grow in the forest and benefit from the light forest soil. A heavy clay soil is therefore unsuitable and should be enriched with sand before planting the worm fern.
Good soil permeability can also be achieved by adding compost, bark mulch or lighter soil, among other things. The pH value of the soil plays a minor role. Whether the soil is slightly acidic or not doesn't really bother the worm fern.
Tip:
If the worm fern has problems with the location despite its undemanding nature, it can be moved easily. However, you should check in advance why the problems exist. Maybe it's not the location that bothers him, but rather a disease or pest that has attacked him.

Ideal locations
- under trees where flowering plants previously grew, which now offer an excellent location for worm ferns
- ideal humus-rich soil can be created, for example, using bark mulch or bark culture substrate as well as your own natural compost
- the soil is loosened as deeply as possible and then piled up with the substrate to a height of at least 5 centimeters
- The substrate is then carefully incorporated.
Care
The worm fern with its undemanding nature requires little care. Despite all this, the service life can be significantly extended by following a few rules. The soil should be enriched with horn shavings or bone meal every now and then. These can be scattered directly around the plant and ensure that the s alt content in the soil is always at an acceptable level.
If the worm fern is in the growth phase, the irrigation water can be enriched with milk once a week. Milk contains many nutrients that help the worm fern grow.
Tip:
It is enough to add a spoonful of cow's milk to the water.
In spring, all wilted and withered fronds on the plants should also be removed. The fern can give more of its strength to the he althy fronds and shoots and the plant grows better. The fern can also be cut back in a targeted manner. However, do this before the first new shoots so that the new shoots are not cut off again straight away. Pruning should only be done on plants that are not wintergreen. Wintergreen species only need to be cleared of old and withered fronds.

No special protective measures need to be taken around the worm fern in the winter. It survives our winter without any problems and can withstand even large temperature differences without causing much fuss. However, if the winter is particularly hard and long, the plant may need a little more time in spring until it sprouts again.
The Multiplication
The propagation of worm ferns can be done in different ways. This is how the
- Division of older plants
- propagation via spores and
- propagation by breeding cuttings
an. Spring is a good time to divide the worm fern. In order for this to succeed, the worm fern must be dug up. The roots should be free of soil so that they can be pulled apart by hand and without pressure. Each part must have at least one of its own fronds. After division, the worm fern should be replanted as quickly as possible. To ensure rapid growth, water regularly in the first few days.
When propagating with the help of spores, they must be collected from the lower side of the fronds from July to September. These are then laid out in the place where the new fern is to grow and sprayed with a little water. Nature takes care of the rest.
Tip:
So that the wind does not carry the spores away, a small container should be placed over the affected area in the first few days. However, the container must be translucent so that the spores can sprout.

If propagation takes place via cuttings, they simply have to be separated from the worm fern. These are then placed in a flower pot with moist soil. Root formation takes about 5 weeks. If there are enough roots, the small cutting can be planted in the garden. Here, too, watering must be carried out regularly in the beginning.
Propagation of Worm Ferns
Within their native environment, worm ferns reproduce using spores. In a garden, these plants are propagated during spring or autumn by dividing the rootstock. It is also possible to collect the spores and grow them in breeding pots. Since worm ferns are poisonous, they are by no means suitable for gardens where small children or pets stay temporarily or permanently. Otherwise, worm ferns are extremely valuable wild perennials that generally do good for nature.
Frequently asked questions
Is the worm fern hardy?
Yes. The worm fern survives our winter without any problems without having to move to winter quarters or be covered.
Does the worm fern need to be fertilized?
In principle, it is sufficient to add some compost or bark mulch around the worm fern every now and then. You can also add a small shot of milk to the water. And if you want, you can sprinkle bone meal or horn shavings around the plant, which regulate the salinity of the soil.
Which variant of propagation is the easiest?
The worm fern is easiest to divide. To do this it has to be dug up. But it grows back quite quickly and will be able to shine again in its full glory within a few days.
Care tips in brief
- The fern requires a shady to semi-shady location and nutrient-rich, not too wet soil. The soil can be slightly acidic and does not have to be particularly lean or nutrient-rich.
- Worm fern only needs to be watered when it is dry for a long time. When fertilizing, care must be taken not to fertilize too much. Ferns don't like too many s alts in the soil.
- The worm fern is absolutely hardy. It does not need winter protection. It also tolerates large differences in temperature and a wide range of humidity.
- Forest ferns need a cover of leaves in the fall to survive, so don't rake away the leaves around the ferns!
- The worm fern contains the enzyme thiaminase, filicin and aspidine. Poisoning can occur, resulting in nausea, vomiting, stomach and intestinal problems with diarrhea, visual disturbances, fainting spells, heart failure and impaired breathing.
- The plant was previously used as a remedy against worms, hence its name.


