- Author admin [email protected].
- Public 2023-12-17 03:39.
- Last modified 2025-01-24 12:45.
With unorthodox growth, the seapot gives home gardeners a headache when planting in the garden pond. Leaves and flowers are enthroned above ground on flowing, meter-long stems. Below the water surface, the floating leaf plant is partially rooted in the bottom of the pond. These instructions explain in practical terms how to properly plant your native aquatic plant. A detailed guide highlights exemplary care from A-Z.
Interesting facts
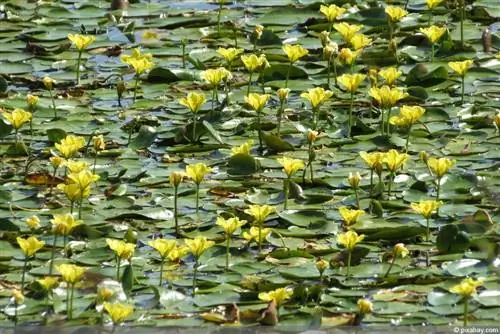
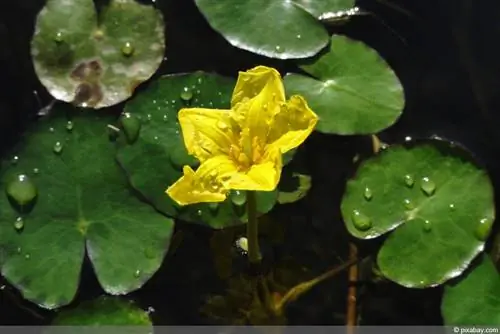
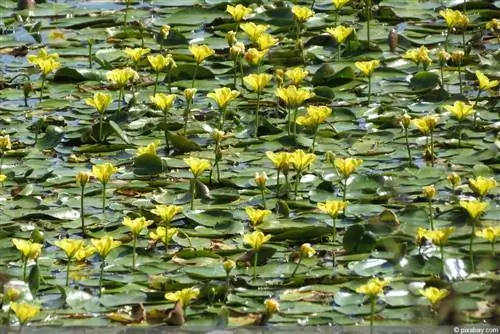
With shiny green, round-shaped leaves and bright yellow flowers, the seapot is reminiscent of a water lily. In fact, the native aquatic plant is one of the fever clover plants with robust winter hardiness. Stagnant and moderately flowing bodies of water with clean water are their territory. Wherever sea jugs feel in good hands, they conquer their territory above and below the water. Flowing stems up to 150 centimeters long bear numerous lush green floating leaves. In summer, yellow flowers appear from June to September. The petioles usually reach down to the bottom of the pond in order to root there. There are countless hydropotents on the undersides of the leaves, which are useful as busy “water drinkers”. The tiny glands constantly filter excess nutrients from the water and deprive annoying algae of their livelihood.
The seapot has become rare in the wild. Larger deposits can still be found along the Danube and in the Upper Rhine Plain. In the rest of Central Europe, floating leaf plants have become so rare that they are protected. One more reason for the environmentally conscious home gardener to plant at least one seapot in his private water world and in this way contribute to the preservation of the charismatic pond plant.
Location and pond size
Seapots are at their best in a sunny to partially shaded location. Under the shady conditions of a cool pond, you will look in vain for the distinctive starry flowers and shapely leaves. The plants also cannot fulfill their useful function as natural algae killers in areas with little light. Since the magnificent water beauties tend to form large-scale extensions, the water surface should extend significantly beyond a mini pond. A medium-sized pond between 5 and 15 square meters and 60 to 80 centimeters deep offers sea cans enough capacity for magnificent growth with lush flowering.
Tip:
Seapots are excellent problem solvers for naturally shading a pond in full sun. The floating sun worshipers like to catch the sunlight with their decorative leaves. Less sun-loving plants and animals in the garden benefit from this.
Water quality
Before planting young seapots, please check the water quality. The rarity value, which is worthy of protection, is due not least to an unsuitable degree of hardness and the pH value of our waters being too high. This is what the ideal pond water should be like:
- Slightly acidic to neutral pH between 6 and 7
- Soft water with a hardness below 10° dH
Water tests that are easy to use are available at garden centers and pond supply stores. Please carry out the inexpensive and uncomplicated test even if the water is clear and clean. The two criteria mentioned are essential for vital growth and cannot be determined with the naked eye.
Soil texture
Only in combination with the right soil conditions will your water world receive the approval of a seapot. A boggy to boggy pond bottom offers ideal conditions for the rhizomes if it is nutrient-rich and humus-rich at the same time.
Plants
The best time to plant seaweed is in spring, when the pond water and shallow water zone have completely thawed. Pre-grown young plants are usually in a nursery pot, which is not suitable for expert planting. For this purpose, special plant baskets are available for the perfect planting of pond plants. The practical baskets also score points with the advantage that they keep the growth of large seaweed runners in check. Although the native aquatic plants are used in the shallow water zone, they migrate unerringly to regions with a water depth of 80 to 100 centimeters. Repotting and planting go hand in hand when sea cans find their way into the garden pond. This is how you proceed in an exemplary manner step by step:
- Fill the plant basket with aquatic plant substrate or ericaceous soil
- Unpot the young plant and plant it in the middle, maintaining the previous planting depth
- Spread lime-free gravel on the substrate to protect against washout
Position the plant basket on the bottom of the shallow water zone. In this area the water is between 20 and 40 centimeters deep. Do not anchor the basket. After a transitional phase of acclimatization, the self-confident floating leaf plant looks for its favorite place on its own. If this process is not in your interest, immediately fix the plant basket in the species-appropriate water zone from a depth of 60 centimeters.
Tip:
Associate sea jugs with aquatic plants that have similar requirements. Together with cattails (Typha), swamp iris (Iris pseudacorus) and pikeweed (Pontederia cordata), you can create a varied and natural appearance for your water world.
Fertilize
Fertilizing is rarely part of the care program for sea jugs. The picturesque pond plant gets its nutrients from two natural sources. With long, slender rhizomes, it roots through the nutritious substrate, where dead plant parts, microorganisms and fish excrement are continuously converted into valuable humus. The undersides of the leaves, which are equipped with hydropotents, extract plenty of nutrients from the water in order to create energy reserves inside the plant. Well-balanced pond water eliminates the need for additional nutrients, as is common for conventional garden perennials.
Yellowed leaves, stunted growth and sparse flowers, however, signal deficiency symptoms. In this exceptional case, the suffering seaweed benefits from a special liquid fertilizer for aquatic plants. Only apply the fertilizer for a limited time to avoid triggering unwanted algae blooms. If the deficiency symptoms subside, stop supplementary nutrient intake as soon as possible.
Cutting
Planting in an escape-proof plant basket alone is not always enough to curb the growth of seaweeds. If the runners spread uncontrollably on the water surface, note pruning on the care plan. The good-natured cutting compatibility allows any desired cutting extent. Larger cuts can be powdered with charcoal powder or ground rock to disinfect them. By regularly removing dead leaves and wilted flowers, the floating beauty will always shine with a well-groomed appearance.
Wintering
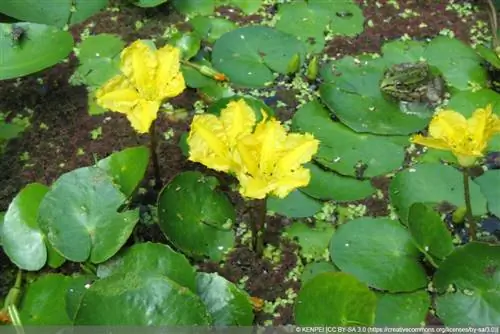
Before the onset of winter, sea jugs get rid of their leaves and retreat to the bottom of the pond. Thanks to hardy rhizomes, the native aquatic plants survive the cold season undamaged. It is only in spring that the long, thin petioles emerge from the rootstock. Floating leaves only sprout shortly before the flowering period begins in June. This process does not require any special wintering arrangements. To ensure that the dead leaf mass does not affect the natural balance in the water, regularly net dead leaves.
Propagate
Seapots can be propagated using both generative and vegetative methods. Just one specimen in the water is enough to breed a whole flock of magnificent offspring. Both procedures are explained in more detail below.
Sowing
If you are aiming for a larger number of new sea cans, sowing seeds is a good idea. In this case, there is no need for long guesswork about the final result, as it is a pure species and not a combination of different parent plants. In autumn, a Nymphoides peltata releases numerous ciliated seeds that have ripened underwater in fruit capsules. Each seed is equipped with small air chambers so that it can float on the surface of the water. You can either collect the seeds or purchase them from specialist retailers. This is how sowing works:
- Fill the waterproof seed tray with ericaceous soil or low-lime potting soil
- Press seeds 1 to 2 cm deep into the substrate at short intervals and sieve over with potting soil
- Press the substrate lightly with a flat board
- Fill in lime-free water up to 1 cm above the soil surface
- Place in a partially shaded location at 18 to 22 degrees Celsius
- Check the water level in the bowl regularly and refill if necessary
Germination begins within two to four weeks, visible as green leaf tips breaking through the soil. If your pupils grow beyond the surface of the water, it is time to separate them into a pot with aquatic plant soil. Place the pots in a bowl filled with soft water until planting time begins in spring.
If seeds refuse to germinate, a cold stimulus triggers growth. To do this, place the seeds on the winter balcony for four to six weeks, protected by a transparent hood. In regions with harsh winters, subject the seeds to the necessary cold stimulus in the vegetable compartment of the refrigerator. At 0 to 4 degrees Celsius the cotyledons don't take long to appear.
Division
Seapot propagation is easier via division. The best time is in spring, after the end of the main frost period. Get the mother plant and the plant basket out of the water. Then take the rhizome in your hand to remove soil, stones and dead roots. Use a spade, knife or scissors to divide the cleaned rootstock into several segments with a length of 10 to 20 centimeters. You can now plant each section in a separate plant basket and place it in the water at the desired location.
Diseases and pests
As a rule, you won't have to complain about illnesses with a sea pot. Among the pests, water lily aphids (Rhopalosiphum nymphaea) brazenly target other floating leaf plants and do not spare sea pitchers. The infestation can be recognized by light spots on the leaves and curled leaf edges as a result of suction damage. Of course, the lice themselves are more noticeable than the symptoms. The 1-2 mm small, black to dark green insects colonize foliage and stems in droves. Unfortunately, aphids excrete honeydew, which serves as a target for black fungi and clogs the leaf pores. Fighting with chemical insecticides is not permitted due to the risk to fish and microorganisms in the pond. However, you are not completely defenseless against the lice invasion.
How to act correctly:
- Hose affected plant parts with a sharp jet of water
- Treat the top and bottom of the leaves
- Strip the lice off accessible leaves
- Repeat control measures daily for a period of one week
Seapot gardeners report good success using horsetail broth. You can purchase the purely natural remedy from specialist retailers as a ready-made solution or make it yourself. Apply the spray every 5 to 10 days until no more aphids can be found.

