- Author admin caroline@plants-knowledge.com.
- Public 2023-12-17 03:39.
- Last modified 2025-06-01 06:48.
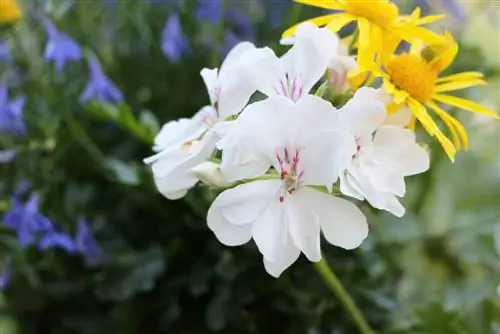
Pelargoniums, better known as geraniums, decorate countless balconies. They bloom profusely and grow quickly. But many people lack the space to save the beauty over the winter. Timely propagation through cuttings can help here and save your favorite geraniums in a space-saving manner.
Variety of colors and frugality, plus an unusually long-lasting flower - geraniums have many advantages to offer. Since they are not hardy, they need some space after the summer, which not everyone can offer. Propagation through cuttings is a space-saving alternative. But anyone who wants to admire their favorite pelargonium in larger numbers can quickly achieve this through cuttings. Neither a lot of knowledge nor effort is necessary. The following instructions show how to do it.
Time
Geraniums can be propagated by cuttings from the first shoots in spring until autumn. Just as long as the pelargoniums still have green shoots. However, if you want to use the propagation to save space over the winter for the plants, you are well advised to do it in August. This gives the young plants enough time to develop roots and become strong enough until winter.
Substrate
When propagating geraniums, many hobby gardeners swear by using special potting soil. This is quite low in nutrients and is therefore only suitable as a substrate for the first few months. Others have also had success with commercial potting soil or potting soil. If you want to be on the safe side, you should still use potting soil.
Water cultivation
When propagating from head cuttings, it is often advisable to propagate in water. Not so with geraniums. Although this variant can be successful, it is not certain. However, it makes sense to place the freshly cut shoots in water before inserting them into the substrate. Planting can take place after about half an hour. This measure allows the cuttings to soak up properly and thus have an initial cushion.
Taking cuttings
The removal of the head cuttings from geraniums does not have to be done specifically. Shoots that have been snapped by storms or the like can also be used. Provided they are at least ten centimeters long and have some well-developed leaves. The ideal head cuttings should therefore meet the following requirements:
- 10 to 15 cm long
- strong and green
- well leafed
- free from diseases and pests
Preparation
As easy as it is to propagate geraniums, the cuttings cannot simply be stuck in soil after they have been cut or broken. Instead, they require some preparation. First, the interface needs to be designed correctly. It must be smooth, i.e. cut with a sharp knife. If it is frayed or bruised, it reduces the chances of success. It should also be designed at an angle. This means the surface area is larger - more roots can form more easily.
The lower end of the stem must still be freed from leaves. These can be broken off or cut off. The final step is to remove all buds and flowers from the cutting. These would only draw unnecessary force during propagation and hinder root formation.
Instructions
Once the cuttings are prepared, the actual propagation of the pelargoniums begins. All you need are a few simple steps.
- The prepared head cuttings are placed in water for about half an hour.
- Provided with moisture, the shoots should be inserted individually into the selected substrate. A depth of about two centimeters is sufficient. If several plants are in one pot, the leaves must not touch each other.
- The soil is pressed down around the stem and slightly moistened. If the cuttings are quite long, they should be attached to thin rods so as not to fall over.
- The planters are then moved to a bright location. Here they should receive a lot of light but be kept away from the blazing sun.
- If the location is right and the substrate is kept evenly moist but never soaked, the first roots will form within three weeks. Externally, this development is noticeable through a plump appearance and new leaf bases.
Around eight weeks, when the young geraniums have already grown a bit, they can change the substrate. This makes sense if the propagation initially took place in potting soil and before August. If you plant from August onwards, the change no longer has to take place before winter.
Wintering
If the cuttings were planted in August at the latest, the young plants can be overwintered just like their adult relatives. To do this, they should be placed in a bright room with temperatures of 5 to 10 °C. Care during this time is limited to occasional, sparing watering. The cuttings can be left dry, but the substrate should never dry out completely. If you reproduce very early - around June - the young plants should change the substrate before they go into winter dormancy. However, not too shortly before setting into winter quarters. It would be better to plant in fresh soil about two months after the shoots were planted.
Tip:
Geraniums do not need a cool winter rest, they can also be cultivated on the windowsill.
Preparing for spring
So that the young geraniums bloom early, they should slowly be made brighter and warmer from February onwards. As the temperature increases and exposure to light increases, watering should also increase. Between February and March, young plants that have not yet been repotted must also have their substrate changed.
Diseases, pests and care errors
In the initial period, i.e. directly after planting the cuttings until the first substrate change, the young geraniums are still very vulnerable. However, only against a small number of dangers. When it comes to pests, snails can become a problem because they are attracted to the new greenery. But this is rarely the case on the balcony. Rot can also occur if the plants are too wet. This disease only shows up if there is no appropriate watering.
Frequently asked questions
What is the difference between geraniums or pelargoniums?
The names geranium and pelargonium mean the same plant. The name geranium has simply become more popular for pelargoniums.
Can geraniums still be saved after frost damage?
Geraniums usually survive short and slight cold snaps that only damage the leaves. But if the stems are affected or even the roots are frozen, the plant can no longer be saved.
What you need to know about geranium and pelargonium cuttings
Geraniums, both standing and hanging, are by no means just annual plants and can easily be overwintered in the garage, stairwell or basement. It just has to be bright and cool - that’s the only requirement. But not everyone has the space for it - and so many geraniums end up in the organic waste bin. Cultivation from cuttings is ideal here: the small plants need little space and you have geraniums for next year (after the pelargoniums have overwintered) - for free!
Instructions
- From a he althy, abundantly flowering geranium, a finger-long shoot with four large leaves is cut off just below the last leaf node.
- Make sure that the cutting tool is absolutely clean to avoid fungal infestation. The lowest and all very small leaves are broken off.
- As well as the flower stalks and any buds. This is the only way the cutting can devote all its strength to rooting.
- Now the cuttings are placed two centimeters deep (no deeper - otherwise they will rot) in potting soil and pressed down well.
- The choice of container is not crucial; plastic pots are just as suitable as clay pots.
- Several cuttings can also be put together in a larger container for the first time, as long as the leaves do not touch each other.
- Water gently and keep slightly moist for the next few weeks. Too much wet is harmful!
Choose a bright place for the offspring: an east or west window is ideal. The little ones would burn if they had a sunny window - they wouldn't have enough light if they had a north window. Roots will have formed in about two to three weeks. You can tell this because the shoot tips then look tight and fresh. Did you feel like it? Then it's best to get started right away, because August is particularly favorable for quick rooting.

