- Author admin [email protected].
- Public 2023-12-17 03:39.
- Last modified 2025-01-24 12:45.
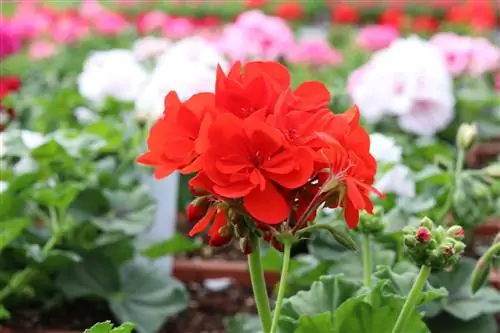
Geraniums, also known as pelargoniums, are the most popular plants for balcony boxes or other flower containers. The classic among balcony plants has countless color variations from dark purple to snow white. Overall, the plant is easy to care for, other than the occasional plucking of old leaves and inflorescences. All pelargoniums can be propagated as desired, which is a good alternative to space-consuming overwintering.
Introduction
Geraniums can be easily propagated by cuttings. The topic of wintering is addressed here. Not everyone has space to accommodate the large flower boxes with the large geranium vines in winter. Many are disposed of in organic waste or in the compost. But it is precisely from these sticks that cuttings can be taken and re-cultivated before overwintering. These cuttings are so small that they can easily fit in the cellar.
The right time for cuttings
On the whole, the geranium is an undemanding plant. Anyone who plants it should just make sure that it is not exposed to heavy rain after a long period of heat. Many varieties are so beautiful that you want to cultivate them. It is a good idea to take cuttings. Cuttings guarantee identical offspring. Cuttings can be taken from the geranium at any time of the year. However, the mother plant should be of sufficient size so that a finger-long shoot can be cut off. The stem should have five large leaves, it should be as long as your middle finger.
The preparation
If you want to grow the most beautiful geraniums for next year, it's best to take cuttings. To do this, choose a shoot that is finger-long and has 4 to 5 large leaves. Using a sharp knife or secateurs, cut off the shoot below the last leaf node. It is important that the cutting tool is really sharp. Otherwise it can happen that the cut surface is torn, which can lead to diseases and pests. If shoots were separated due to external influences such as storms or something else, the break point should also be cut off smoothly, on the actual broken branch. Before you can process the cutting further, it needs some cosmetic repairs. The lower leaves must be removed cleanly, even the very small ones. If there are still buds and flowers, these must also be carefully separated. Only if the small leaves, the leaves in the lower area and the flowers are removed can the cutting root and grow well. If there were still buds and flowers on the cutting, they could hinder the rooting process or not make it possible at all.
Once the geranium cuttings are prepared, they can be planted. You should use a special potting soil. The cuttings are now placed about 2 cm deep in the soil and pressed down well. If you plant several cuttings, care should be taken that the leaves of the individual cuttings do not touch each other. If the cuttings are potted, they are watered lightly. The important thing is that the plants are only moist and not wet. Too much watering is harmful and can lead to rot. Therefore, pulling roots in a container with water in it is not possible, or if it is then it works from time to time.
Implementation at a glance
- Cut finger-thick, he althy shoots with a sharp knife, under a leaf node.
- Remove all flowers and flower bases from the cuttings.
- Remove leaves from below, 1-2 leaves can remain.
- Allow the lower cut surface of the cuttings to dry a little.
- Plant geranium cuttings in well-drained soil.
- You can but you don't have to use potting soil, normal soil will do too.
- Do not water too heavily during the following period to prevent rot or impede root formation.
- Do not place the cuttings in the blazing sun, initially in the shade, but not completely dark.
- If the room climate is hot and dry, you can put a transparent plastic bag over the cuttings to create a warm, humid climate that promotes rooting.
- The rooted cuttings should be overwintered before frost. At 5-10 °C in a bright room is optimal.
- Make sure that the cuttings are not too soft and have a light green color, the cuttings will then no longer be as active and will root more poorly.
Tip:
The young plants can be fertilized with “children’s food” after root formation. To do this, use a 0.05 to 0.1 percent complete fertilizer solution.
Care and cultivation of cuttings
As already described, cuttings can be taken all year round, as long as the mother plant is strong and vigorous. But if you want to have early-flowering plants in spring, the cuttings should be taken in autumn or very early in the beginning of spring. Before the first frost, the geranium cuttings must overwinter in a bright room at 5-10 °C. Bright room is actually relative, a little light is enough. Only a little should be watered. Remove the dead leaves from time to time. The following spring, plant the rooted geraniums in fresh soil. Then they can be taken outside in a warm place. It should also be noted that the cuttings are completely dry, but the substrate should not dry out completely. If the propagation has been carried out very early, for example by June, the young plants should change the soil before winter. To ensure that the young plants bloom early, they should be moved to a warmer room with more light from February onwards. If temperatures and light increase, watering should be increased.
Pests and care errors
Shortly after the cuttings have been planted until the substrate is changed, they are still very vulnerable. Among the pests that can be a problem are snails, which are attracted to the new greenery. This is rare on a balcony. If the plants are too wet, rot can occur.
Problems with cuttings
Sometimes there are problems with propagating the cuttings. People tried to propagate the geraniums using cuttings, but they all turned yellow leaves or rotted. It should be said that geranium cuttings rot easily, especially when they are not yet fully mature, i.e. H. These are shoots that are too fresh or too soft. They can be recognized by their light green color. These shoots often appear during overwintering as they grow very quickly behind the window pane when exposed to sunlight. That's why you should take cuttings that are already mature, so-called half-ripened cuttings. Half-ripe cuttings are optimal; they are already brownish, but do not yet show any woodiness. Otherwise they would not root or become heavy. If the cuttings do not root, geraniums can also be propagated by dividing. To do this, you take a sharp knife and cut off shoots that are already rooted.
Frequently asked questions
Can you grow geraniums hydroponically?
It should be said that planting hydroponically does not make sense. The reason: geraniums cannot tolerate standing moisture, which is the case with hydroponics.
The geraniums are already sprouting in mid-December, what should happen to the shoots?
The geraniums are then too bright. These so-called horny shoots must be removed because they require an unnecessary amount of water and cause the plant to dry out over the winter.
What you need to know about sowing geraniums
With just a few seed packets you can get a large number of balcony plants at a low price. If you sow them in the greenhouse, you will have young plants by the end of May that can be transplanted outdoors. Since most balcony plants require a temperature of 15-17 °C to germinate, the greenhouse should be heatable, even if you use a heated propagation box. Some balcony plants can also be sown in an unheated greenhouse when temperatures rise. You should use a special sowing soil and plant the germinated seedlings in small pots or seed boxes. When sowing, you shouldn't make it too cold.
Growing young plants
Growing balcony plants is easy because they can be grown seedlings at low temperatures and under less precisely specified conditions. Young plants that you buy from a garden center or nursery should be kept warm and brought home quickly. When purchasing by mail order, the plants must be unpacked as soon as they arrive and planted in individual small pots with a universal substrate. Place the pots in a location that is as bright as possible and at least 15 °C. Keep the substrate moist but not wet to prevent plants from rotting at the base. Later they will be repotted into larger pots.
Tip:
Before you finally put the plants outside, they should first be hardened off by gradually exposing them to cooler temperatures. Under no circumstances should you bring them outside too early.
Procedure in 3 steps
- Cut cuttings: Cut cuttings with 3 - 4 leaves just below the last leaf from he althy, strong shoots. Cut straight through the stem with the knife. Allow the cut surface to dry to prevent the risk of rot. Remove flowers, buds and the last leaves.
- Place in potting soil: Place cuttings either individually in pressed peat pots or several in bowls filled with a soil/sand mixture. Moisten the soil and place it in a bright, but not sunny, place. Never water too much afterwards. Ventilate when temperatures rise.
- Transplant in spring: The young plants are overwintered in a bright, 5 - 10 degree Celsius cool place. After the new shoots, trim again and place in pots or boxes after the ice saints.

