- Author admin caroline@plants-knowledge.com.
- Public 2023-12-17 03:39.
- Last modified 2025-06-01 06:48.
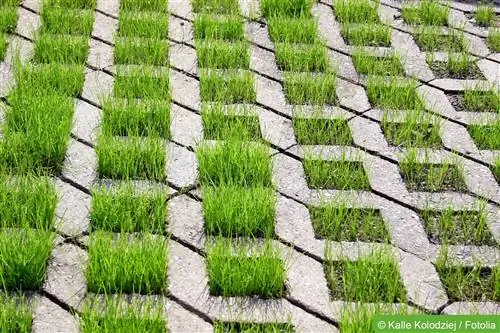
Lawn stones, also known as lawn grids or lawn paving stones, are an interesting way to attach an area and still create an attractive look. These stones can be easily laid yourself even without prior knowledge, as they are very handy and no complex tools are required for laying. They look very discreet and adapt to any environment.
Lawn stones - can be used in many ways
Lawn stones can be used in all areas around the house. They are ideal as a surface for a car parking space. The stones also look great as a walkway or as an area in front of a house. Lawn grids are also ideal for securing an area in the area of the garbage cans, in front of a garden shed or around the compost. With a little skill and creativity, the stones can also be used to bring very interesting accents to a garden by laying them over a larger area and perhaps using light balls to illuminate this area. This makes it possible to create an interesting garden area, especially for people who are looking for an alternative to the classic flower beds.
Laying lawn stones - preparation
First of all, of course, the area that is to be laid must be measured in order to obtain the appropriate amount of lawn stones. Due to the small and handy shape of the stones, it is not absolutely necessary to have the stones delivered to you. A trailer, which can often be rented from a hardware store, is sufficient to transport the stones. In addition, the following materials are required:
- rubber hammer
- straight board at least 50 cm long
- Shovel
- Stomper
- several small horse mackerel, herrings or similar
- Twine
- Spirit level
- some sand
- lawn seeds or gravel as required
The somewhat experienced do-it-yourselfer has most things in his toolbox, but others can also be helped. The board is used to level the earth and can be made of wood, sheet metal or similar. The tamper is also used to straighten uneven areas; a container filled with sand or similar can also be used for this purpose. The horse mackerels are used for marking, here too the material is irrelevant, they just have to be at least 10 cm high when inserted into the ground. Once everything is ready, you can get started.
Laying lawn stones - step by step
- First, the surface must be prepared: Depending on the situation, plants have to be removed, other stones have to be removed or existing lawn has to be dug up. The earth, which serves as the base, should be loosened well before it is then tamped firmly again. To get the surface as straight as possible, run a board or something similar over the surface and remove excess soil. Keep flattening in between. The easiest way to do this is with a tamper, but if this is not available, you can also use a bucket full of sand, the back of a shovel or something similar. It is important that the loosened soil is compressed as tightly as possible so that no air holes form that could sink later. Depending on the surface, a few shovels of sand can be mixed into the ground to help straighten it out.
- Once a hard, straight surface has been created, horse mackerel, pegs or something similar should be stuck into the ground at least every fifty centimeters around it. It is particularly important that they face each other in a straight line. The opposite sticks are then connected with twine or something similar. Accuracy is very important in this work because the threads serve as a guide so that the lawn stones are then laid straight. This means that if the first section is crooked, the entire area could potentially become crooked. If available, modern laser measuring devices can also be used here, but a board or something similar would be necessary, which is placed upright so that a fixed point can be fixed.
- Once the cords are just stretched, you can get started and lay the lawn grids. Start with a straight line and work your way stone by stone. The tensioned threads now ensure that the lawn stones are not laid crooked and that the lawn grid creates a straight pattern.
- So that the stones settle a little, a rubber mallet is used when laying them. The lawn stones can be tapped into place optimally without a too hard blow driving them too far into the ground. A spirit level can be very useful here so that the surface has a height and every stone is level. Stone by stone, a beautiful and even lawn grid will be created.
Greening lawn stones - sowing lawn seeds
Let the lawn stones sit for a night or a few days before sowing the lawn. You still have the opportunity to repair any unevenness. It may be necessary to spread some soil on the lawn stones, which must be distributed with a broom into the gaps in the lawn grid so that there is enough breeding ground for the lawn seeds. However, this is not always necessary. If the soil is already high enough or there was already a lawn under the lawn grid, the seeds can now simply be spread over the lawn stones and then distributed evenly with a broom.
In the next few days you must not forget to water the area regularly, then the seeds will germinate quickly. If the growth is too high, the lawn stones can simply be removed with a lawnmower.
A nice alternative to the lawn is to fill the lawn grids with small gravel or gravel. This is now available in many colors and can also create beautiful accents. With a leaf vacuum, the lawn grid can be cleaned quickly, even in autumn.
Conclusion: Things worth knowing about laying lawn stones
- Lawn stones are a practical and versatile option for all outdoor areas. They are easy to install yourself and are also very comfortable to care for.
- Lawn stones come in all sorts of shapes and sizes, with different resilience levels. The lawn stones are also available from different materials such as concrete or plastic.
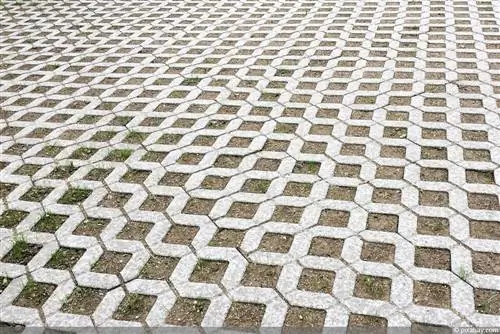
- Concrete lawn stones have regular hole inserts. After laying, the cavities are filled with soil or soil-sand mixtures up to the top edge and the lawn is then sown there.
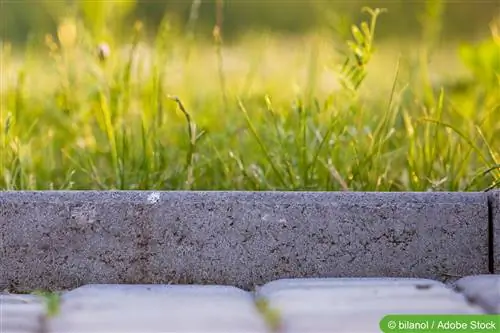
- The later lawn surface lies slightly below the concrete edge due to the natural settling process and is therefore in a kind of protection zone.
If the soil is light, you can lay the stones directly in a layer of sand about five centimeters thick. If the soil is heavy, a 15 centimeter thick layer of gravel should serve as a base before laying. If the lawn stones are lying on the ground, they should be consolidated with a vibrator.
Plastic lawn stones are much easier to lay than concrete stones due to their low weight. The biggest difference, however, is that with plastic, complete greening is possible and the gray concrete walkways are eliminated. Visually, more lawn can be seen than is the case with concrete lawn stones.
- Laying the plastic lawn stones is easy and very quick. Most plastic lawn stones have a hook-and-eye principle, with which the plates are firmly connected to each other.
- The soil structure is very similar to the soil structure of a paved path. The base layer usually consists of a recycled material, the leveling layer of sand or chippings and the plate filling of turf soil.
- Plastic lawn stones generally cannot withstand the force of a vibrator, so consolidation should be done mechanically.

