- Author admin [email protected].
- Public 2023-12-17 03:39.
- Last modified 2025-01-24 12:45.
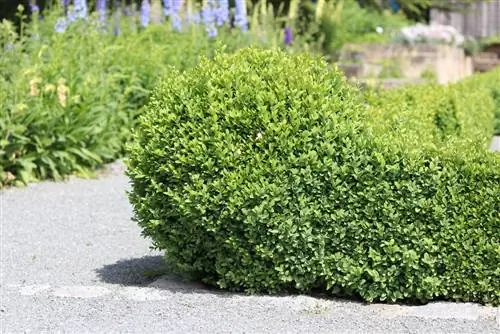
The strictly geometric shape of topiary trees such as boxwood has a relaxing effect on the human eye. They create a touch of elegance and look inviting and well-groomed in every season.
Boxwood balls also look extremely good in flower pots on the terrace or balcony. If only it weren't for the regular cut that some gardeners fear. But even inexperienced laypeople can cut a boxwood ball expertly using the simplest means and without much effort.
Profile
- Botanical name: Buxus sempervirens
- evergreen wood
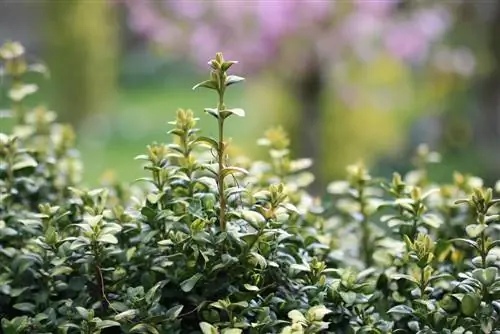
- small, spoon-shaped curved leaves
- popular ornamental plant for topiaries
- Location: shady or semi-shady
Which types are suitable for the spherical shape?
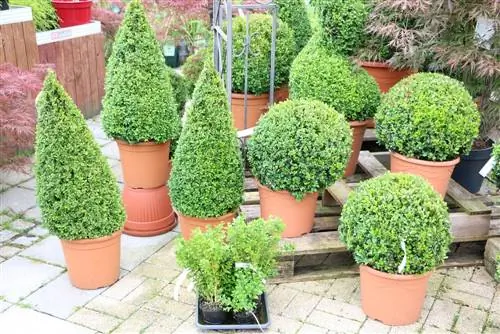
Not every boxwood is suitable for forming a ball. There are clear differences here in terms of growth habit, leaf shape and color. Bushy varieties are particularly ideal for creating a ball. The growth rate should also be adjusted to the size of the ball.
- small balls: Green Gem, Blauer Heinz, Faulkner or Suffruticosa (growth about 5 cm annually)
- large balls: Rotundifolia, Handsworthiensis (growth about 10-15 cm annually)
When should a boxwood be cut?
Basically, the more often a boxwood is cut, the more compact its growth habit becomes. However, the plant also needs time to sprout again and regenerate. This takes about four weeks during which no cutting is allowed.
- Time: only between May and August (requires winter rest)
- about two cuts per year
- best dates: mid-May and mid-August
- prune only on dry, cloudy days (sun damage possible)
Tool
A boxwood not only has a particularly dense growth, but also becomes woody very quickly. In order not to crush or tear the branches, good tools are necessary. This should always be kept clean and very sharp. If you cut the boxwood ball with electric secateurs, many of the leaves will be shredded. That's not good for the book and it doesn't look nice either. If you don't have too many boxwoods or other work, you should make the effort and use hand pruners. The end result clearly shows that the extra work is worth it.
- All-purpose secateurs
- special boxwood shears
- Sheep shears (only for non-woody shoots)
- Cordless scissors (only worthwhile for larger stocks)
How to cut?
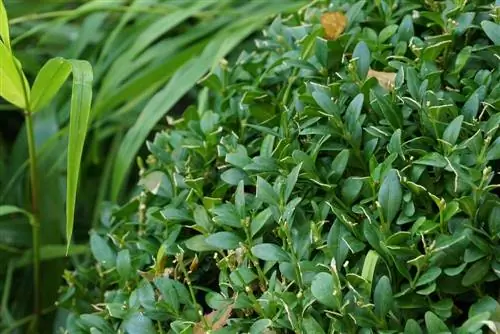
If a spherical shape has already been achieved, only the annual shoots are cut to maintain the shape. These can be recognized by the fact that they have significantly lighter leaves than the rest of the plant. If you want the ball to increase in size, simply leave a few millimeters of these annual shoots when cutting. When cutting, be careful not to accidentally cut too deeply into the old wood. A boxwood only sprouts very slowly from woody shoots.
- never cut too deep into the wood
- no brown spots should be visible after cutting
- always cut from bottom to top
- remove any leftover cut pieces from the ball
- freehand cutting for experienced gardeners
- Stencils for those who are unsure
It is a good idea to first make a few basic cuts. Imagine the boxwood like a globe. First, cut the paths for the equator and four evenly spaced lines of longitude. Once you're happy with their shape, all that's left are the remaining surfaces.
Tip:
It is better to remove individual layers several times and not cut generously into the wood right from the start. A steady hand and a little patience are required here.
Stencils for boxwood cutting
Actually, there is hardly a simpler shape than the ball. In practice, however, drawing or even cutting a circle or sphere evenly is usually more difficult than expected. Most gardeners find it easier when they work with a stencil.
Wire racks
Specialist retailers offer a variety of stencils for a wide variety of shapes such as balls or animal shapes. These stencils are made of wire (usually covered in green) and can remain on the boxwood for a long time. They may still be visible for a certain period of time until the shoots have grown over them. However, a gardener can't go wrong with this shape, as cutting too deep is almost impossible without cutting the wire.
Semicircle stencils
You can also buy shape- and weather-resistant semicircles made of metal or other materials ready-made. These are only needed at the time of cutting. To do this, hold it against the boxwood ball with one hand to make the cut easier. The practical thing about these stencils is that they do not have to remain on the plant, but can be used for several balls of the same size.
homemade stencil
Semicircle stencils can also be made very easily yourself. To do this, it is necessary to measure the diameter of the boxwood ball in order to get a suitable size. The following tools are required: folding rule, pencil, string, scissors or saw. First, measure the height or width of the boxwood ball with the ruler. The result divided by two gives the radius for the template. A wooden board or thick cardboard can be used as a template. Now attach the pencil to the string and measure the radius. Then hold the end of the string in the middle of one side of the cardboard with one hand and draw a semicircle with the pen. This creates a uniform semicircle without much effort. Now the painted semicircle just needs to be cut out.
Tip:
Leave enough cardboard around the semicircle, otherwise the template will be too unstable.
Flowerpot
Some gardeners also swear by large plastic flower pots as templates. To do this, you need a flower pot with an opening of the right size. This is now simply attached to the top or side of the boxwood ball and all protruding shoots are cut along the edge.
Draw your own boxwood ball
If you don't want to spend a lot of money, you can grow a boxwood tree yourself in the shape of a ball. The important thing is that the plants naturally grow higher rather than wide. Therefore, the upper part can be cut into a ball shape quite quickly and easily. However, the lower areas remain quite barren or sparse for a long time. In order to achieve a nice, compact growth habit, a little patience is necessary. The fresh annual shoots are cut back about half of the new growth (light green color) about three times a year (May to August). After a few years, the plant also achieves a bushy appearance in the lower area.
Tip:
The most common mistake beginners make is that they simply let the lower shoots grow so that they quickly become longer. But this only has the effect that they don't branch out!
Conclusion
At first it may seem difficult to keep a boxwood ball in shape. However, with simple tools such as a flower pot or a cardboard template, topiary can be easily accomplished even by beginners. With about two cuts per year, the boxwood ball remains a highlight in the garden all year round.
What you should know in brief
- It is best to prune a boxwood after a growth spurt, usually twice a year - see cutting boxwood.
- The first shoot ends around the end of May, beginning of June and the second one around the end of August, beginning of September.
- If you forget to cut the ball nice and round again during this time, that's no problem.
- The boxwood doesn't take offense if it's cut outside of this time. However, branches quickly start to stick out again.
Do not cut when the sun is shining
What you should definitely note is that a boxwood ball must not be cut when the sun is shining. You can easily place a plant in a pot in the shade, but this is more difficult with planted specimens. You cut them on a cloudy day, otherwise the leaves will burn and turn brown. They hadn't received any sun until then because they were inside. It's best to hang a cloth over it for the following days because the plants are sensitive.
Stencils
To get the shape of a ball exactly, you should use a stencil.
One available commercially is made of metal, the width of which can be adjusted depending on the size of the ball. It works very simply: you turn the template and cut off anything that protrudes. This way everyone gets a perfect ball. If you want to save the 20 euros purchase price, you can cut a suitable template yourself out of cardboard.
Boxwood care
Caring for the boxwood is quite easy. The location should be sunny to partially shaded. Boxwood copes well with most soils. A loose, moist, calcareous soil with clay or sand is ideal. The boxwood needs water regularly, but not too much. You should water more in the sun than in the shade. Standing water damages boxwood like most plants. The best way to fertilize is with compost. In the spring you can also work horn shavings into the soil. If you ever have to transplant it, you have to be very careful so that as few roots as possible are damaged.
Propagate boxwood
Boxwood is propagated by countersinks. This is relatively easy. You simply put the shoots in the ground. They root quite well. Take half-woody side shoots that should be 5 to 10 cm long.

