- Author admin caroline@plants-knowledge.com.
- Public 2023-12-17 03:39.
- Last modified 2025-01-24 12:45.
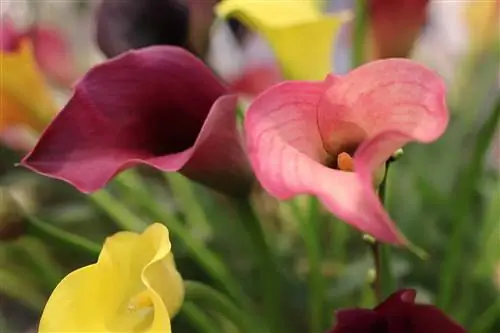
With its simple, elegant calyx blossom, the indoor calla symbolizes purity and beauty in an inimitable way. The Zantedeschia in enchanting colors gives representative bouquets and tasteful flower pots a royal touch. A certain amount of attention is undoubtedly required to encourage African grace to bloom for as long as possible. Anyone who delves into the following care instructions will discover an unexpectedly robust constitution. Helpful tips for brown leaves show how the flawless appearance can be quickly restored.
Care
The Zantedeschia represents a species-rich plant genus whose natural habitats extend across the swampy regions of South Africa. The vast majority of species cultivated in Europe as indoor calla flower from January to April and are known by the botanical name Zantedeschia aethiopica. Summer-flowering species are less common as container plants, such as Zantedeschia elliottiana and rehmannii. Apart from the timing of their flowering, the care of indoor calla lilies is no different. For all species and varieties, the top priority is to differentiate between a moist vegetation phase and a dry dormant period in cultivation.
Location
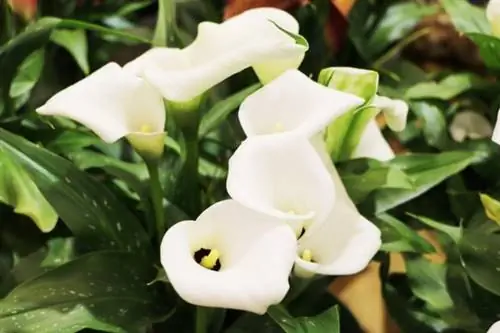
The indoor calla prefers to spread its cheerful floral flair wherever the sun is present. The flower beauty achieves its optimum under the following location conditions:
- sunny to partially shaded location on the south or west window
- existing shading in the blazing midday sun
- During the growth and flowering period, temperatures of 16 to 25 °C
After flowering, the requirements for the location change. Summer-flowering indoor callas like to spend the autumn and winter in the cool winter garden or bright stairwell. Zantedeschias, which bloom from January to April, are carried by prudent hobby gardeners into the garden or onto the balcony throughout the summer. Only when the temperatures fall below 12 °C do the flowers move into the living room to prepare for the coming bloom.
Tip:
A completely leafy Zantedeschia has no objection to a place on the bank of the garden pond in summer. However, it must be kept aside during the winter as its minimum temperature is 10 °C.
Substrate
So that the rhizomes and tubers develop optimally, the potting soil should not be too lean. Commercially available compost-based potting soil is ideal if you add a handful of sand or perlite to it. Since flower bulbs are always susceptible to rot, the substrate should be as permeable as possible.
Pouring
Regulating the water balance requires a little sensitivity. First and foremost, it is important to adapt the moisture content of the substrate to the current vegetation phase in which the indoor calla is currently located. How to do it right:
- water freshly planted and emerging flowers moderately
- let the substrate dry before the next watering
- Increase the amount of water in proportion to the growth of leaves and flowers
- water abundantly during flowering
- optionally place in a water-filled saucer
- Towards the end of the flowering period, gradually reduce the amount of watering
Pamper the exotic grace every now and then with a fine mist of lime-free water. The result is even juicier foliage and more intensely colored flowers. If the calyx flowers have withered and the leaves have yellowed, the dry season for a Zantedeschia begins. Since other flowers now dominate the windowsill, a calla lily moves to the recommended location for the rest period.
Tip:
If a calla lily gets caught in a downpour on the balcony during dry rest, this will not have any negative consequences as long as it is not continuous rain.
Fertilize
When the fresh shoots begin, the supply of nutrients begins. Now the houseplant is happy about a 14-day dose of liquid fertilizer. If the elegant flower presents itself, the rhythm is shortened to a weekly dose. The preparation should not be applied to dried substrate. If the surface feels dry, first water with pure water and then add the fertilizer.
Cutting
Although the withering parts of the plant are not nice to look at after flowering, they should still linger for some time. During this phase, a Zantedeschia assimilates all remaining nutrients into its underground survival organ. She uses this to create nutrient depots from which she will benefit in the next season. Only when there is visibly no life left in the foliage do you cut off the stems with a sharp knife.
Tip:
When carrying out any care work, consider the toxicity of an indoor calla lily. As an arum plant, any contact with the skin or eyes causes serious he alth problems.
Tips for brown leaves
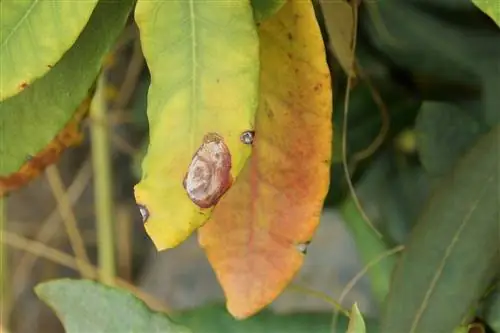
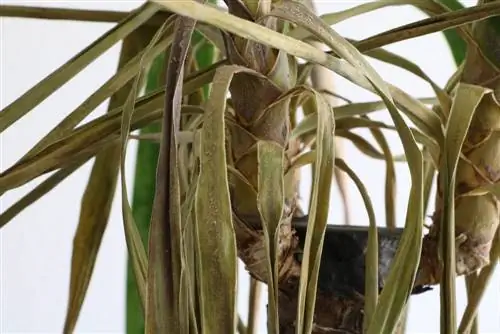
If the leaves of a calla lily turn brown in the middle of the season, this process has nothing to do with the routine feeding after flowering. Rather, the flower signals discomfort in this way. This arises either from a failure in care or a he alth problem. The following pests cause brown leaves:
Spider mites
In dry, warm climates, spider mites spread explosively. The females of these tiny pests lay their eggs on the undersides of leaves. From there, the larvae colonize the leaves and stems to suck out the plant sap. The infestation can be recognized by white webs, yellowish and brown mottling and discoloring leaves. How to ward off the plague:
- Spray indoor calla regularly with low-lime water
- always include the undersides of the leaves in the spray mist
- If the infestation level is high, put the plant in a plastic bag for 8 days
If all gentle control methods do not help, specialist retailers have systemic insecticides available in the form of sticks. You press these into the substrate so that the calla absorbs the ingredient and literally spoils the appetite of the sucking pests.
Aphids
Aphids are sucking and stinging plant pests. What makes them so dangerous is the fact that they strike out of the blue, even without any cause. They come in every color imaginable, from black to red and yellow to green and brown. As if an infestation of your Zantedeschia wasn't bad enough, the parasites subsequently cause viral infections and fungal diseases. If brown leaves appear in combination with aphids on a calla lily, there is an immediate need for action.
- isolate the affected plant immediately
- cut off brown leaves
- spray with a weak soapy water
- Treat with an insecticide based on neem or rapeseed oil
Unbalanced watering
If pest infestation can be ruled out, it is likely that there is an oversupply of water. The only time an indoor calla needs a lot of watering is during the flowering period. Outside of this phase, experienced hobby gardeners only water sparingly or not at all during the dry season. If you water your plant too well and its leaves turn brown, you should repot it in fresh substrate. Here's how to do it:
- Unpot the calla lilies and cut off the brown leaves.
- Pour in fresh potting soil, compost and sand mixture.
- Plant the tuber about 5 cm deep.
- Do not water in the first week to allow the wet rhizome to dry.
Conclusion of the editors
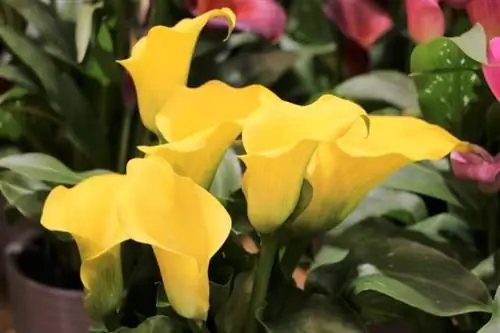
The indoor calla gives every windowsill an elegant touch with its simple and stylish goblet flowers. In order to enjoy this floral splendor, a certain degree of care sensitivity is required. A beginner may not be interested in the demanding water and nutrient supply, nor is the choice of location. For an experienced hobby gardener, however, the Zantedeschia represents an exciting challenge that retains its appeal even after years of cultivation.
What you should know about the indoor calla lily soon
Room callas are no longer only available with white flowers, they are now available in many different colors. The indoor calla is often confused with the swamp calla. The two species are similar, but the indoor calla is not suitable for overwintering outdoors. The plant is a bit tricky to care for. But good care is worth it because of the beautiful flowers.
Care
- The location should be bright and warm. This applies both if you cultivate it as a houseplant all year round, but also if you put it outdoors as a potted plant in summer.
- White calla lilies like temperatures around 16 ˚C, colored types around 18 ˚C. At temperatures above 21˚C, the flowers wilt very quickly and the beauty of the plant is lost.
- Normal potting soil is sufficient as a plant substrate.
- It needs to be watered regularly. Scholars argue about the amount. Some recommend not to water too much, others that even water should remain in the saucer. You probably have to try this out. It is important that the soil never dries out during flowering!
- Stop watering after flowering!
- You fertilize the calla during the growth phase until it blooms. The fertilizer application is then stopped.
- The plant doesn't like dry air at all. Illnesses occur quickly.
- Caution: The indoor calla is very susceptible to spider mites and aphids!
Wintering
- Reduce watering after flowering and stop completely later!
- The leaves dry up. You can cut off any leftovers.
- The tubers are removed from the ground and are best stored in a cool, dry and dark place.
- As soon as the first shoot tips appear in spring (usually January), the tubers are replanted and watered regularly. Fertilizer applications are also useful.
- After planting, place the calla at 10 to 14 ˚C for about 3 months.
- Then make it warmer!
Be careful when handling the indoor calla lily
The plant releases excess water through special cells through the leaves. If you come into contact with the moisture, it can cause hives. The result is reddish, extremely burning and itchy hives on the skin. The juice contains highly irritating substances. In combination with light, the effect is enhanced.

