- Author admin [email protected].
- Public 2023-12-17 03:39.
- Last modified 2025-06-01 06:48.
Vapor barrier and vapor barrier are intended to prevent too much water vapor from penetrating the walls and causing moisture damage. It is attached between the insulation material and the wall cladding, so it is no longer visible after the wall or ceiling has been clad. However, errors can easily occur during installation that are detrimental to the protective function and can even accelerate and worsen moisture damage.
Moisture
Vapour barriers or vapor barriers are installed when moisture exposure is to be expected. This stress is always present indoors. Showering, cooking, but also breathing air and house plants ensure that the air is moist. The moist, warm air settles in cold places and condenses here. So the walls get damp. On the one hand, this can cause mold to form, which is harmful to he alth and the masonry. In addition, the masonry can suffer and heating costs can increase. To avoid such problems, special films are used between the insulation material and the wall cladding.
Vapour barriers
Vapor barriers are intended to ensure that no moisture or water vapor can penetrate the wall. It therefore serves as complete protection and is intended to keep the wall completely dry. The potential problem here is errors during installation or subsequent damage. Even a small hole in the vapor barrier can allow moisture to penetrate. However, due to the film, it is difficult for this to evaporate again. In this case, the wall is kept moist. This can cause significant damage. Decay and mold growth can even be accelerated and increased. Extreme care must therefore be taken when attaching it.
Vapor retarders
Unlike vapor barriers, vapor barriers are not intended to completely prevent the penetration of moisture, but rather merely reduce it. The films used are therefore permeable. This means that the moisture can be released again after it penetrates the wall and evaporate. This regulates the room climate.
Whether a lock or a brake is used depends on the conditions on site. Vapor barriers are only required in old buildings and in exceptional cases when there is a high static moisture load. This is the case, for example, with saunas, steam baths and cold rooms. Otherwise, a vapor barrier is used if necessary. Among other things, this may be necessary when renovating roofs.
Attachment - step by step

Before applying an appropriate film, professional advice should be sought. On the one hand, this is important in order to determine the type of film or to match it to the wall. On the other hand, it determines exactly where the film has to be attached.
To attach the vapor barrier or vapor barrier film, proceed as follows:
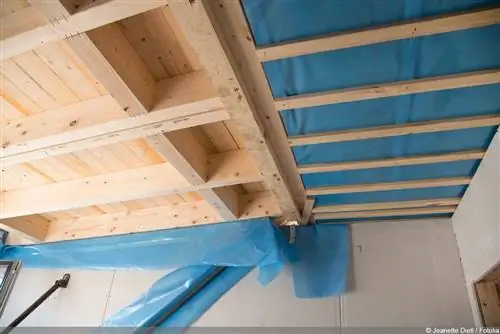
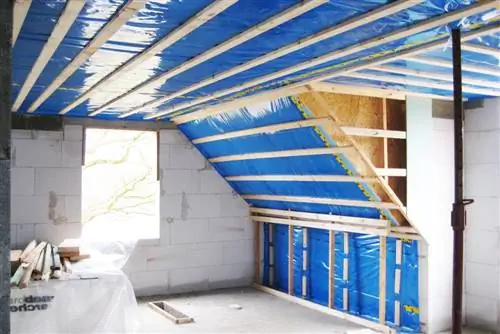
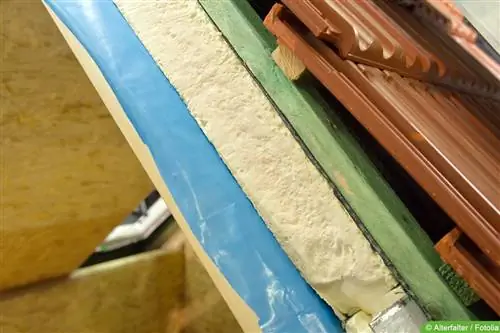
- The film is aligned on the inside of the wall structure and is usually applied over the insulation material.
- The wall structure is provided with a sealing stapler tape. Alternatively, special adhesive tape or foil adhesive can be used.
- The film is rolled out and attached to the prepared wall structure. If sealing stapler tape was used, it is secured with wide-head pins or stapler clips. In this variant, the tape ensures airtightness. When using adhesive tape or glue, the film is stuck in place.
- After the first film strip is fixed, the second strip is attached. It should overlap the first strip by at least ten centimeters.
- The transitions between the panels are connected to each other using special adhesive tape or foil adhesive.
- Apertures, for example for sockets, are cut out and the foil around them is fixed airtight.
- Finally, the counter battens are attached, on which the wall paneling will later sit. Particular care must be taken here to avoid damaging the film with battens, tools or nails and causing it to leak.
Tips for installation
When attaching the vapor barrier or vapor barrier films, various points should be taken into account. These include:
- the film must not be taut
- it should be loose and have a few centimeters of play
- At every step of the fastening, attention must be paid to airtightness (both on the wall structure and on the overlapping edges of the membrane)
- careful sealing must be carried out around pipe openings, connections and windows
- separate lanes can also be used
- Wrinkles in the film should be avoided when applying
Tip:
A blower door test can be carried out to check the tightness and, if necessary, detect any unnoticed holes or weak points. This differential pressure measurement method initially means a further investment, but in the long term it can prevent damage and therefore repairs.


