- Author admin [email protected].
- Public 2023-12-17 03:39.
- Last modified 2025-01-24 12:45.
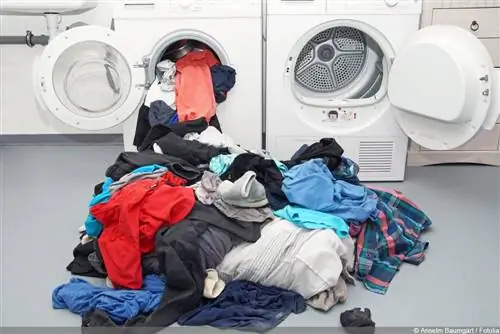
A laundry chute in the house makes life easier. Instead of carrying dirty laundry in a basket to the washing machine in the basement, it is simply thrown into the shaft and, following gravity, goes directly to the washing machine - regardless of the floor on which it was thrown. Building such a laundry chute is not particularly difficult, but it does require a few points.
Planning ceiling breakthrough
If you want to build a laundry chute in your house, ideally you have already taken this into account when building the house. The reason for this: As a rule, such a drop takes place over at least one, but usually even over several floors. As a result, a ceiling breakthrough is required between each floor. It can also be installed later, but it is much easier and involves less mess to integrate it while the ceiling is being poured. In principle, a ceiling opening is nothing more than an opening in the ceiling or floor slab, through which the shaft is then led throughout the entire house. It's logical that the individual openings then have to be exactly on top of each other. It is important to take this into account when planning. The ceiling opening itself should be approximately 40 x 40 cm.
Tip:
It's best to have the architect plan a ceiling breakthrough at the same time. He will draw it into the plans and thus provide the appropriate template for the construction workers.
It is also important when planning that the shaft is always placed somewhat out of the way in a room. A pipeline will later be led through the shaft towards the basement. If this line is centrally located in the room, it will only be a nuisance and difficult to disguise. Proximity to a wall is ideal. A place in the corner of the room usually turns out to be almost perfect.
Note:
If the ceiling breakthrough has to be carried out later, this should definitely be done by a specialist, as special tools are required.
Pipeline
As already mentioned, the laundry chute is nothing more than a pipe that leads more or less directly to the washing machine. There should be access to the pipe on every floor, through which laundry can then be thrown in. In order to save costs, plastic pipes that can be plugged into one another are recommended. Specifically, you need the following material:
- pluggable plastic pipes with a diameter of around 30 cm
- one door chute tube per floor
- Telescopic wall mounts
- Dowel
- Screws
- Mounting foam
Most of these materials are easily available at any hardware store. The door chute tubes may need to be ordered first. This is a pipe onto which a metal box has been attached at a 90 degree angle. Laundry will later be thrown in from the side using this box. The PVC pipe is covered with drywall panels so that it is not visible. An opening and a door are integrated into this panel at the height of the door chute tube to enable easy access.
Tip:
If you use shiny steel or aluminum pipes for the shaft instead of plastic pipes, you can save yourself the need for cladding. They look great and don't need to be hidden.
Pipe installation
The pipe installation essentially consists of attaching the telescopic wall brackets and then plugging or fastening the individual pipes together. Specifically, the following work steps are necessary:
- Drill holes for the wall brackets
- Provide holes with matching dowels
- Screw in wall brackets
- Run pipes through the wall brackets
- connect the individual pipe elements together
- Seal connection points with assembly foam
At least two wall brackets should be planned per pipe element in order to ensure a certain level of stability. At its core, every wall mount is a large clamp that encloses the pipe. To ensure it sits securely, the clamp is screwed tightly using screws. The diameters of the clamps and pipes must of course match each other. How many wall brackets are needed depends on the length of the laundry chute. If possible, the door chute tubes should be installed in such a way that the opening can be easily reached later. Hip height is ideal.
Disguise
By now it should have become clear that the laundry chute is actually just a line made of pipes. If one still speaks of a shaft in connection with a laundry chute, this is because the pipes are located behind a shaft-like panel. You can also build this paneling yourself. To do this you need:
- cut drywall panels
- Wooden strips or square timbers
- Mounting screws
- Sealing tapes
- Plaster
The cladding is carried out using dry construction. To do this, commercially available drywall panels must be cut to size so that they can be used to assemble a shaft that completely encloses the line. If the cable runs in the corner of a room, only two sides are necessary. If it doesn't run in a corner, but directly against a wall, three sides are required. In order to be able to attach the panels to the floor and walls, square timbers must be attached there as a supporting frame. The panels are then screwed to these square timbers. Where the individual edges meet, it makes sense to seal them with a sealing tape or plaster. For the door chute tubes, an opening must be cut into the panel using a jigsaw. The cut out element can later be used as a door.
Tip:
The installed drywall panels can be easily plastered, covered with wallpaper or painted after priming.
Workload
If you want to build a laundry chute, you have a lot of work to do. In fact, you shouldn't underestimate the amount of work involved. The most important thing is to work very carefully. Above all, the perfectly straight pipe run plays a major role. Theoretically, it is also possible to change the pipe route, but this can result in the laundry falling less easily or even blockages. Depending on the number of floors, the cost of the laundry chute is around 350 euros - assuming the ceiling openings are already in place. If these have to be carried out later, the costs will of course increase significantly. With this measure, the entire house usually becomes a shell again.


