- Author admin caroline@plants-knowledge.com.
- Public 2023-12-17 03:39.
- Last modified 2025-01-24 12:45.
A podium not only creates a very special resting place, but is also an eye-catching design element for the apartment. You can build it yourself without any problems, for the simplest platform you don't need more than a hammer, but experienced do-it-yourselfers are also presented with much more complicated variants and equipment options:
The super quick and easy platform to build yourself
You can find a lot of building instructions for a platform on the Internet, with long lists of materials and tools and sometimes also information about which people are allowed to use these building instructions. Absolute beginners, advanced users, experts on the way to becoming professionals - and then the tool list for the beginner often corresponds to a detailed picture from the tool cabinet of the full professional; If the building instructions are part of the service section of a hardware store's website, the beginner should after all shop first.
The beginner doesn't need any of this, who will definitely and consciously remain a forever beginner when it comes to DIY activities - here are the building instructions for a platform for which you don't need any more tools than a hammer.
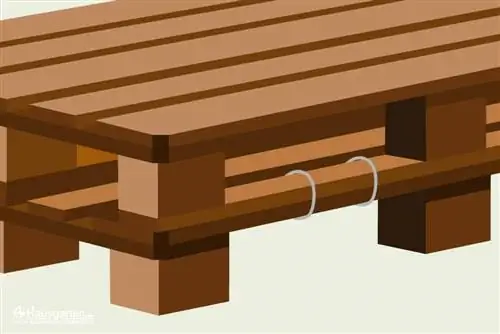
The platform made of Euro pallets that are laid out next to each other/stacked on top of each other. A Euro pallet is 1.20 m long, 80 cm wide and 14.4 cm high and is either given away in a classified ad or sold (also by commercial transshipment centers) for a few euros.
Four Euro pallets are almost 4 square meters (3.84 square meters) of platform. They can fill the entire width of a narrow room, just the right dimensions for a slightly secluded computer workstation or the wing chair for cozy hours of reading in front of the window. Of course you can make it bigger, simply place more Euro pallets next to each other, and if a height of just under 15 cm is not enough, add another layer of Euro pallets on top. The Euro pallets should be connected, the pallets lying next to each other with each other and the upper pallet with the lower one.
Hammer & Nails
With nothing but a hammer in the tool cabinet, this works with cable ties and the right nails:
- The horizontal connection also becomes a vertical connection if you lash the four longitudinal boards lying next to each other or on top of each other with a cable tie. Once (or twice) between the front and middle intermediate beams, once or twice between the middle and rear intermediate beams, long thick cable ties can withstand a lot.
- The pallet above can be connected to the pallet below using anchor nails and a hammer.
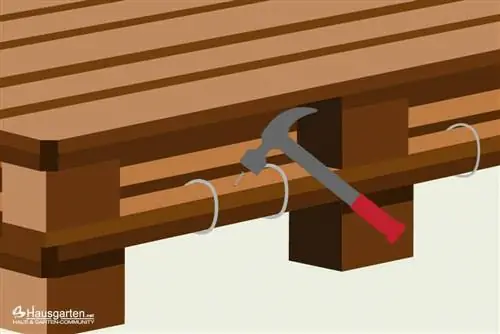
The anchor nails are available in a length of 4 cm, the longitudinal boards of the pallets are 2.2 cm thick. You can connect two of these boards with a few blows of a hammer - anchor nails have small barbs on the shaft with which they hold together anchor in the subsurface (adhesive nails work similarly).
Screwdrivers & screws
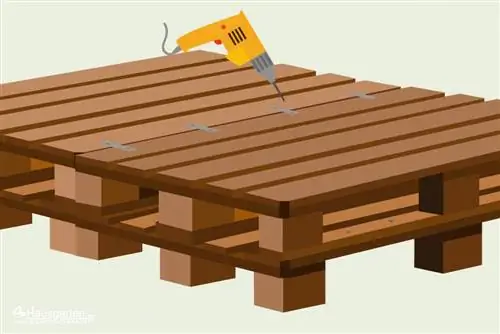
If you also have a drill and a cordless screwdriver in the tool cabinet, you can screw the Euro pallets together:
- For the horizontal connection you either need flat metal connectors that you screw from the inside to the intermediate timbers of two adjacent pallets.
- Or you can take a long 6 mm wood drill with which you drill diagonally through one intermediate wood into the other and thus screw two intermediate woods together with long screws.
- The connection from top to bottom can simply be screwed through the longitudinal boards:
This platform can e.g. B. be covered with a piece of carpet. If you buy a carpet the size of the podium area + 15/30 cm side overhang, you can attach the carpet to the podium sides, depending on the thickness of the carpet, with adhesive nails or with roofing felt nails (or with a staple gun).
The material list for such a platform is very clear:
- Euro pallets depending on the desired area and height
- Long strong cable ties, 2 or 4 pieces per connection of adjacent/on top of each other pallets
- Hammer and nails as desired/material
- Ev. Flat connector, cordless screwdriver, drill, wood drill, screws
- Carpet as a cover
Variations for the Euro pallet platform
There are a few possible variations for this simple pedestal:
- If you want your platform to be higher, you can place four wooden blocks per pallet at the desired height on the intermediate pieces of wood at the corners of the pallets.
- Instead of carpet, you can sand the surface of the platform smooth and place suitable boards in the gaps between the longitudinal boards. The entire surface can then be waxed, glazed or painted and thus becomes a uniform floor surface.
- Around such a platform - with a carpet or wooden floor - you can place a frame made of 15 or 30 cm wide, correspondingly long boards.
- On the long sides of the pallets there are two cavities each 7.8 cm high, 38.25 cm wide and 80 cm deep. If you have the missing floor e.g. For example, if you fill it with a stiff green insulation mat made of Styrodur, you can accommodate any box up to 7.8 cm high, up to 38 cm wide and up to 80 cm deep. For example, at Ikea you can almost certainly find a ready-made box that fits.
- If you find drawer rails that can be mounted on the lower longitudinal boards 1 and 2 (40 cm depth) or 1, 2 and 3 (80 cm depth) or on the intermediate timbers, you will also find the drawer rails that match these drawer rails here, 7.8 cm flat drawers have their place. Ikea has e.g. B. the Förvara drawer, whose rails could be mounted on the intermediate timbers. The drawer is 7.0 cm high and 36.4 cm wide, + rails could be 38.25 cm quite well, if necessary you would have to adjust the gap a little with strips or a chisel (but Ikea has a lot of drawers).
For 4th and 5th, the respective side of the podium must of course remain accessible, the frame around the podium would simply remain open on this side; But then the now visible side of the palette needs some decoration with paint, for example.
It's easy with the carpet cover, the carpet is simply not attached to this side and can be folded up.
Podium with shelf: instructions
As I said, you can find a lot of building instructions for a pedestal on the Internet, with strange dimensions of e.g. E.g. 2.74 x 2.23 m, which then causes subsequent dimensions like 1.87524 x 97.455 (slightly exaggerated, but something like that, and in long lists). Passionate do-it-yourselfers can convert such measurements to their personal needs, but they don't actually need such construction instructions. Non-enthusiastic do-it-yourselfers need building instructions and can of course convert the dimensions themselves, but for inexperienced people this takes a long time and isn't really fun.
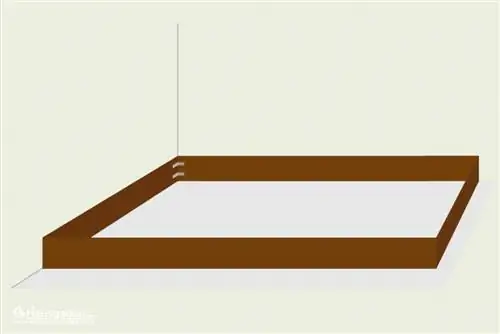
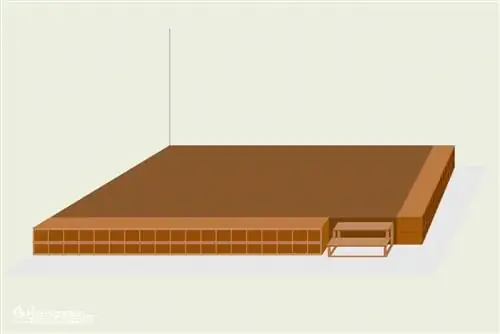
The following describes a platform that is 2.50 x 2 m in size and 40 cm high (with horizontal shelves as a border, the area becomes larger, more on that later). This description will make it easier for you to adapt the dimensions of the individual components to the size of the platform, which you can build to fit your room perfectly.
The tool
For this platform you only need a manageable tool cabinet:
- Cordless screwdriver
- pencil
- Drilling machine with drills, countersinks (5, 6, 8 mm) and matching screws
- Shelves to create
- Angle
- Sandpaper, coarse and fine
- Spatula + wood filler
- Jigsaw with guide rail
- Inch rule
- Cover: wood or carpet, possibly L-edge for the frame
- Cover: Or wooden lid, hinges, square timbers
- Wall connection: dowels and screws, felt buffers or similar.
- Finish: Ev. Wax, glaze, varnish, painter's tape, paint roller, brush
- Underbody: Possibly. Carpet
The frame
First you build a frame and a substructure that looks like a kind of lattice structure. However, a fairly stable grid, your platform should be able to withstand a lot.
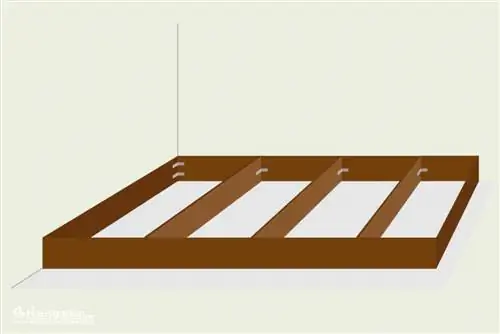
The platform is built from untreated glued wood, a highly resilient, inexpensive, harmless and easy-to-work material. That lasts a long time and can be installed differently in the next apartment, where you don't have to worry about whether there might be harmful substances in pressed layers, and whose surface you can design in many different ways. The following information is based on spruce wood (beautifully simple and restrained in color).
The frame is built from boards with a thickness of 28 mm - almost 3 cm, that's quite something, but as I said, you can use the wood again and again. And it's good for people to have solid furniture and furniture structures around them that are ultimately cheaper and yet more durable than all the plywood stuff covered with a little fake wood. You can also build the entire structure out of solid structural timber or glued laminated timber, which might be a little cheaper.
For the frame you need the following boards:
- 2 x 2, 50 m x 40 cm x 28 mm, 44, 90 €, 1 sqm=0, 1 sqm 4, 49
- 2 x 2, 00 m x 40 cm x 28 mm, 22, 32 €, 0, 8 sqm=0, 1 sqm 2, 79
This frame is connected with screws (place 2.50 m boards on the head sides of the 2.00 m boards) and angles.
The substructure
The frame is now filled with 18 mm thick boards for the substructure:
- 3 x 2 m x 40 cm x 18 mm, 14.39 €, 0.8 sqm=0.1 sqm 1.79 (6 x 1 m x 40 cm x 18 mm would be more expensive: 11.69 € for 0.4 sqm=0.1 sqm 2.92)
- 18 x 60 cm x 40 cm x 18 mm, 4.29 €, 0.24 sqm=0.1 sqm 1.78
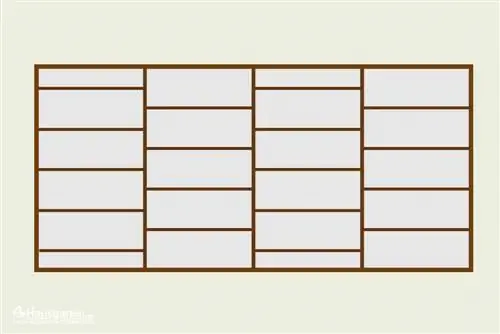
You need many, but very small, angles for the substructure. It's best to call up the item list and sort it by price. Actually, all you need is small chair brackets or wicker fence holders, they only cost a few cents each.
The shelves
Depending on which shelves you place lengthwise on the floor in front of the long sides of the platform, the total area of the platform increases.
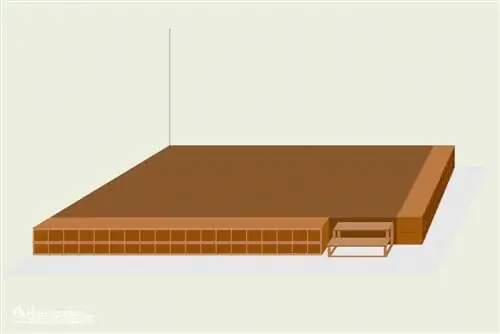
On the short side of the pedestal we have planned 2 Gnedby CD shelves from Ikea, one above the other, with 2 x 20 cm cm, these shelves are 202 cm high/long. Makes two rows of up to a dozen (depending on how many of the shelves you insert) 17cm deep compartments. Just right for CDs, books, wool, chocolate, chips etc. 2 Gnedby CD shelves are also placed on the long side of the pedestal, which creates two rows of compartments.
On the long side there is now space for a small staircase, we suggest Ikea Molger, 41 cm wide, 44 cm deep, 35 cm high. But you can also find instructions on the Internet on how you can build a simple step (a “box”) yourself. You should always be very careful if there are screws on the tread, as this usually results in one broken sock or nylon tights after another (and in the worst case, even wounds in the soles of your feet).
On the 2.50 m side, 2 Kallax shelves from Ikea could also be placed next to each other, 42 cm wide (high), 39 cm deep and 147 cm long, although they protrude above the platform on the side 44 cm, but maybe that will fit well in your rooms. Or 2 Besta carcasses from Ikea, 38 cm wide (high), 40 cm deep and 120 cm long, which fit with a remainder of 10 cm on the long side.
The shelves should be fixed to the frame using screws.
The Cover
A wide field because you can make your platform usable in very different ways with different cover options. Or rather not usable, because the simplest covering is of course made of wood, from tongue-and-groove profiled timber to OSB laying panels, which are laid over the entire area to the floor surface. Profile timber or laying panels are laid right up to the edges of the frame, so you need material for an area of 2.5 x 2 m. After screwing, you can finish by adding an L-edge as a surrounding frame.
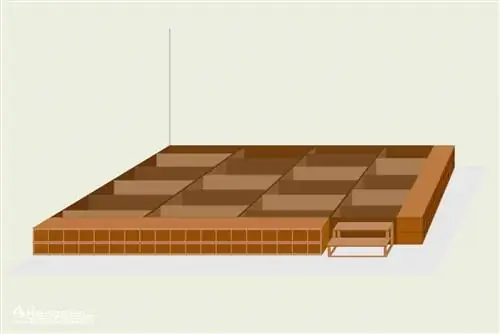
If you don't feel like carefully sinking all the screws and making them "sock-tight" with wood filler, you can lay a carpet cut to size on the floor area of the platform, which if necessary goes down to the floor on the visible sides and on the best simply stapled in place.
You can also handle your “compartments” in the substructure in a completely different way: At the top of the crossbars, screw small square pieces of wood as a support, made from screen-printed panels, for example. For example, you can cut pretty, matching “lids” and attach them with hinges so that you can use the entire substructure as storage space. A carpet that is not too light can be used as a cover and can be folded aside to fill the compartments.
The wall connection
Most platforms hit a wall somewhere. They should also be doweled there, preferably with a little buffer made of felt or something similar in between so that the wood does not rub against the wall. Of course, skirting boards on the wall must be removed first.
Finish
The pedestal can be waxed, glazed or varnished, you can put carpet on it and also underneath it.
Drawers for the pedestal
If the flaps from 5. are too fiddly for you because you would rather lay the floor area in one piece, you can add drawers to this pedestal (without shelves in front of it, of course) on all sides you want. You know the size of your compartments and now look for drawers that fit as well as possible for the compartments on the outside.
The front of the frame boards now needs to be cut out to exactly the right size for the drawer. If it is not quite as wide as the compartment, you will need strips that you can screw on to the right and left to compensate. Then the drawer can be mounted, only then is the base area (cover) of the pedestal closed.
If you don't feel like assembling drawers, you can also cut away every second frame board in the lower area (so that the frame still goes through at the top) and get suitable boxes that simply slide into these compartments.

