- Author admin caroline@plants-knowledge.com.
- Public 2023-12-17 03:39.
- Last modified 2025-01-24 12:45.
You can save a lot of money if you do the chimney cladding yourself. However, you should definitely be free from dizziness and not afraid of heights, otherwise the savings project could end badly. In order to be able to take the right steps from planning to execution, the following instructions have been created for you by the DIY experts. With this, cladding your chimney becomes almost child's play.
Security
When working at heights, it is essential to pay attention to safety. This results from the accident prevention regulations, UVV for short, as they apply to everyone with statutory he alth insurance and companies. These include, for example:
- Scaffolding on the building
- Fall protection on scaffolding
- Securing equipment/objects from falling from the scaffolding
- Scaffolding on the roof or attached safety harness for self-safety
Tip:
Inquire in detail from the construction trade association (statutory accident insurance) before starting work about the regulations for roof or chimney work so that the insurance does not cause you any problems in the event of an accident.
Planning
If you can meet all safety-relevant factors and are confident enough to work on the roof, you can move on to planning. The main points are as follows:
Look of the fairing
Chimney cladding primarily serves to protect against the effects of the weather. This should always be the focus of your project. In the second instance, appearance is important. Here you can base your material/color questions on, for example, the roof tiles, the roof window surrounds or the walkway and adapt the cladding accordingly.
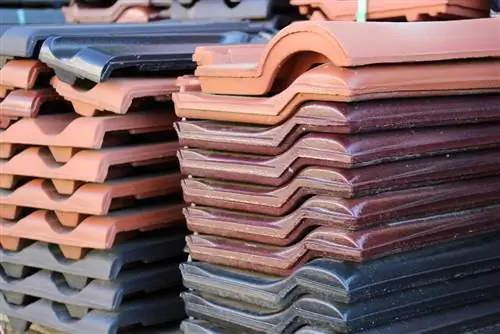
A verge is the side roof area on the vertical roof gable. If, for example, there is panel cladding instead of classic verge tiles, chimney panels of the same color and shape look very aesthetic.
Coating type
When it comes to the type of cladding, you have two options to choose from: you do the entire cladding yourself or you buy a ready-made cladding that you basically just have to put over the chimney. The latter has the advantage that if a chimney repair is necessary, the “cuff hood” can be easily removed without much effort.
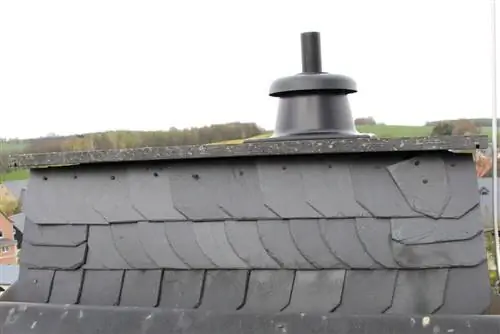
When cladding yourself, you make the border out of zinc plates, for example. These are available as rolls or sheets in various widths and can be cut to size. Alternatively, the cladding can be done by attaching slate or clinker panels. A cantilever plate is necessary for setting clinker bricks. This is a panel that protrudes from the facade and is usually used in construction. Retrofitting would only be possible by tearing open the facade.
Preparation
Material procurement
The material you need depends on the type of cladding. The following material list provides an overview:
- Roof battens, formwork boards or coarse chipboard with impregnation for the subsurface construction
- Fastening materials such as screws and dowels
- Roofing felt
- Slate panels, sheet metal or fiber cement panels or chimney clinker as cladding material
- For slate cladding, corner strips and slate pins are also required for fastening
- For fiber cement boards, special nails must be used for attachment
- Mortar when bricking bricks
- Copper, aluminum or zinc for the transition between roof covering and chimney cladding
Tools required
General:
- Inch rule
- Hammer
- pliers
- Screwdriver or cordless screwdriver
- Marker pen
- Etc.
Slate tiles
- Slate hammer
- Haubrücke
Eternit plates:
Cut scissors or a small cut-off grinder
Coating with sheet metal
- tin scissors
- Folding bench
- Sheets for metal sheets
- Soldering iron with soldering materials
- Drilling machine
Clinker
- Mortar trowel
- Fugeisen
Substructure for prefabricated fireplace parts
At least two screw clamps
Chimney inspection
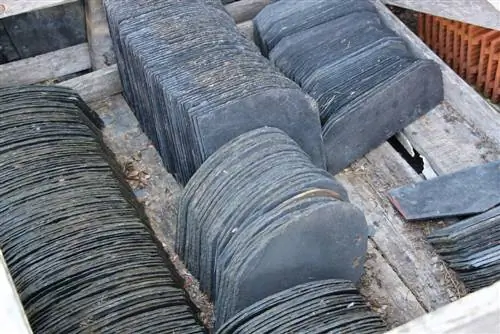
Before you can start working on a cladding, the chimney must be checked for stability. Older specimens in particular have loose rows in the upper area over the years. Since the chimney must be solid and load-bearing and loose masonry poses a fundamental risk, this area must be replaced. To do this, the bricks must be removed and rebuilt.
It is important that the previous height is strictly adhered to. An unauthorized change in height could negatively affect proper smoke extraction and lead to problems during the next chimney sweep inspection.
Construction instructions
Substructure
A substructure is necessary if the chimney cladding is to be made of slate, Eternit panels or sheet metal. In the case of clinkering or the use of a slip head, a substructure is not necessary.
For brick fireplaces, proceed as follows:
- Cut roof battens to the length of the chimney width
- Attach at least two slats per fireplace side
- Use a drill to drill dowel holes at the chimney corners through the battens for fastening the battens
- Insert the dowels, place the slats on them and screw them together
Tip:
The screw hole should always be made in the stone and not in the joints/mortar. This could come loose and fall into the interior of the chimney, resulting in less support.
Work steps for the substructure for fireplaces made of prefabricated parts look like this:
- Cut roof battens to appropriate length
- Stop in the designated places and fasten with a screw clamp
- Screwing of the individual slats at the corners
Plate setting
The panels are not set when cladding with slate or clinker bricks. Formwork boards or OSB panels are attached by screwing/nailing them onto the roof battens. A subsequent roofing felt attachment ensures weatherproofing.
Sheet metal cladding
For the sheet metal cladding, proceed as follows:
- Take up roof tiles around the chimney
- Cutting sheets
- Width at least five centimeters longer
- The length must be sufficient so that the sheets can extend over the roof surface (serves as water drainage)
- Align the metal sheets and solder the parts together at the corners (don't forget the foot pieces that run out)
Tip:
If you use copper for full cladding, the gutters and downpipes should also be made of the same material, as a chemical reaction occurs in conjunction with zinc. As a result, damage to the zinc parts is possible due to water flowing off.
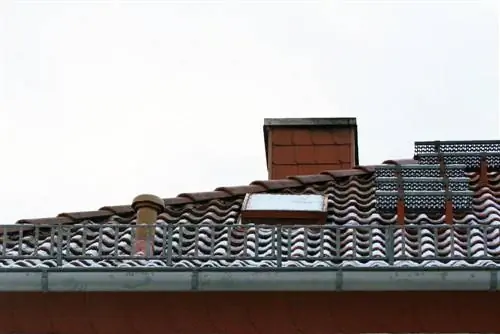
Slate and Eternit tiles
- Cut corner strips to the appropriate height
- Attach corner strips
- Place the first panel as the first bottom row on the corner strip (make sure it is inserted correctly into the strip)
- Connect to the corner strip by nailing
- Gradually fasten the panels with slate nails or special nails
- If necessary, cut the plate into the desired size using scissors or a cut-off grinder
- Once one side is covered, start with the next one
Clinker cladding
- Screw the metal sheets around the chimney to the chimney to drain the water
- Start on the cantilever plate with the first clinker on the edge of the chimney
- Continue clinking all around
- Once the mortar has dried well, it is grouted
Fireplace finish
A chimney cover is required to prevent rainwater from running between the main chimney and the chimney surround. Here you can attach metal sheets or make a concrete ring. For the sheet metal surround, shape the lower edges according to the chimney edge and edges. For the concrete wreath, you may need several hands and experience in preparing cement. This must not be too moist so that it does not fall into the interior of the fireplace.

