- Author admin caroline@plants-knowledge.com.
- Public 2023-12-17 03:39.
- Last modified 2025-01-24 12:45.
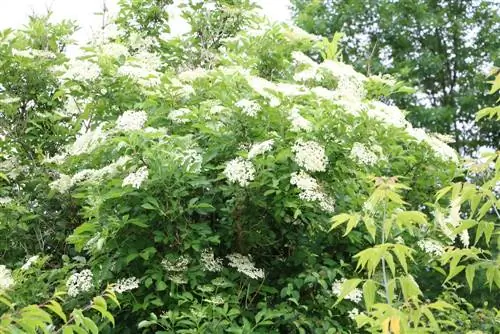
Black elderberry with the scientific name Sambucus nigra develops up to 10 m in height without any intervention. The situation is similar with its growth in width. However, most gardens lack space for such a large hedge. That's why reaching for scissors becomes essential.
When is the best time?
The ideal time to prune the elderberry is in autumn, but should be completed by mid-October. If done later, the plant no longer has enough time to recover from pruning before the onset of winter. If disturbing branches are removed during the year, the plant usually suffers no damage.
Only in permanent frost is there a risk of the wood splintering when cutting and bacteria and spores entering the injuries. If it is a comprehensive rejuvenation cut, it is not autumn that should be considered, but rather early spring, so that the elderberry can sprout vigorously soon afterwards.
Why cut the elderberry?
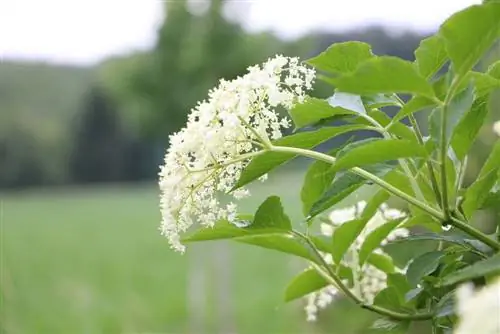
Whenever pruning occurs, the action primarily serves to curb growth. But there are other reasons that speak for regular cutting. Branches that are too close together give the umbels little freedom to develop. Thinned out elderberry bushes offer enough space for strong inflorescences that benefit from more intense sunlight. Leafy branches that are close together also take a long time to dry out again after rainy weather. This moist environment provides a perfect habitat for mold and spores. As a result, fungal diseases occur less frequently in thinned bushes. Reduced branches also enjoy a better supply of nutrients.
Types of pruning
Basically, a distinction is made between radical pruning after a long period of time and annual shortening of the shoots. In gardening circles, rejuvenation means the thorough cleaning out of heavily branched trees, shrubs and perennials. The term preservation, on the other hand, is common for cyclical pruning of branches. In addition, the cutting guide includes other initiatives.
Rejuvenation cut
Slightly older shrubs that have not been cut for several years need a thinning cut. Dead wood and bulky branches are the first to fall victim to the saw. The bush is then thinned out thoroughly and trimmed to shape. The plant responds to such a rejuvenation treatment with lush new growth. Putting it on the stick so that only a piece of tree stump remains is tolerated quite well by the elder. In this case, new shoots form from preventive buds, the so-called sleeping eyes.
Conservation cut
A maintenance cut carried out every autumn is used to eliminate rods that are no longer viable. Apart from that, mutual interference between the individual shoots is avoided. Specimens grown on standard stems cannot survive without continuous pruning, otherwise they will quickly become out of shape.
Fruit cutting
This variant is particularly suitable for elderberry varieties with high yield prospects in order to create ideal conditions for many fruit sets. In the case of cultivated varieties that are primarily used to beautify the garden, the focus is on an even silhouette. Even the most professional fruit pruning will not result in an excessive harvest in these species. After fruiting well-bearing varieties, the elderberry has ten to twelve strong shoots that produce an excellent harvest the following year.
Carecut in between times
You should remove weakly developed and cross-growing shoots as early as possible because they rob the shrub of unnecessary strength. The same applies to breakage caused by strong winds. Therefore, check it every now and then over the course of the season and carry out a light pruning if necessary. Elderberry grown on a standard tree needs more attention than the classic growth habit.
Pruning in case of pest and disease infestation
Elderberry bushes have a high level of resistance. But sometimes elderberry aphids settle down and feed on the plant sap. The excretory products of the sucking insects attract ants, which prevent access to ladybirds, lacewing larvae and other natural predators of the aphids.
Ideally, aphid infestations on elderberries are discovered promptly so that cutting off and removing affected branches is enough to drive away the pests. With regard to diseases, cone wilt and gray mold occasionally appear on elderberries. Because these are fungal infections, diseased shoots must be removed immediately and burned or otherwise destroyed.
Tip:
Do not dispose of disease-affected clippings in the compost, as the spores remain largely active there.
The right tool for cutting elderberries
You will need secateurs for pruning and loppers for thicker branches. You may need a saw. Dull blades do not produce smooth cuts. The branches are crushed and frayed when cut. As a result, the injuries to the shrub are significantly greater than with sharp blades, especially when the measure is carried out radically.
It takes significantly longer for the plant to recover from pruning. As long as the wounds are still open, bacteria, viruses and pests have an easy time of it. Optimally sharpened scissor blades glide easily through the wood and leave flat surfaces that close quickly. Quality pays off. High-quality garden and pruning shears cut precisely, fit comfortably in the hand and require relatively little effort during use.
How should the cut be done “step by step”?
- As a general rule, choose rain-free days when cutting bushes. Dry air contributes to open cut surfaces becoming overgrown within a short period of time. When the humidity is high, the likelihood of germs settling in the wounds increases.
- Have garden shears and pruning shears ready. If you are dealing with branches with a diameter of more than 5 cm, you will also need a saw.
- The blades of the tools must be clean, otherwise they turn out to be potential carriers of disease. It's best to wash the cutting edges with hot water, then germs have no chance of survival.
- Initially focus on the canes of your elderberry that have already been harvested. If possible, separate them completely. If the shrub lacks internal structure, half or a third of these branches may remain.
- Now select about ten strong shoots that grew last season and will now form the basis for the harvest in the coming late summer. Your approach should be close to the base. You can recognize these branches by their smooth and light gray bark. Elderberry always grows on the previous year's wood, which is why the fresh shoots are preserved.
- If there are more young shoots, experienced hobby gardeners remove the branches that are not absolutely necessary in favor of light growth.
- Inwardly growing and stunted shoots are only a nuisance, which is why they should be cut out.
- After you have completed your deed, take a few steps back to look at the plant from a short distance. Are you satisfied with the shape of your elderberry? If not, corrective pruning now follows, which gives the shrub an attractive appearance.
- Depending on your preference, all remaining shoots can be shortened. Let the middle shoots overhang a little so that the shrub takes on a bush-like shape.
- If you place little value on aesthetics and give priority to high harvest yields, you will only cut off enough of the one-year-old wood, if at all, so that the fruit can be easily reached during the next season.
- Sometimes instructions for cutting elderberry advise sealing larger cut surfaces with wound wax. The elderberry contains a lot of genuine originality, so you can trust in its natural regenerative ability, provided you make clean cuts that heal quickly.
- If the elderberry was cultivated on a standard tree, the instructions vary slightly. First, the trunk is freed from excess growth. All harvested branches must then be removed. The new main shoots receive moderate pruning and the side sprouts are pruned down to a few buds. With a little patience and sensitivity, a spherical crown is created.
Where do the clippings go?
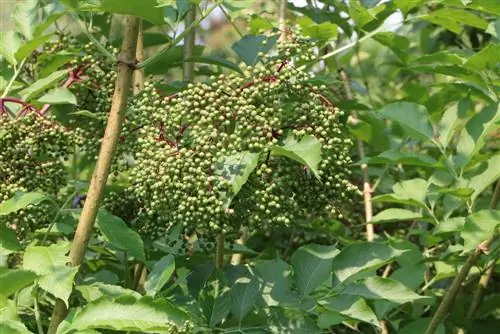
Small chopped branches and twigs serve as biomass, which breaks down into valuable humus in the compost. You can also spread the material as a mulch between ornamental or useful plants. Otherwise, green waste areas accept the elderberry clippings.
Note:
Without pruning in autumn, the elder tends to become bald, so that in its lower reaches there are only leafless branches, while the shoots take place at a lofty height. Shorten the shrub regularly to promote he althy growth.
What mistakes should you avoid?
Elderberry is in and of itself very compatible with pruning. No matter how the pruning ultimately turns out, whether it is harmoniously rounded or radically carried out, the plant generally does not suffer any existential damage. Even when the cutting takes place, whether in autumn or spring, does not affect the vitality of the plant. If the instructions are not transferred correctly, in the worst case scenario no flowers will form in the coming season and therefore no fruit.
There must always be a few viable shoots remaining in order to secure the harvest for the next year. It is also important that the branches are not broken off, but rather cut off with sharp scissors so that the resulting cuts are limited. Also make sure that the branches do not tear when cutting. If you follow the individual points in the instructions, you are guaranteed to be successful in pruning the elderberry.
Should you cut off spent flowers?
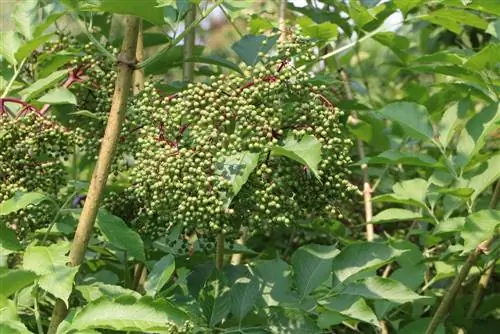
The elder produces fruit as soon as the flowering panicles are given the opportunity to mature. Wind and insects attracted by the scent of flowers take over the pollination. After fertilization, the white splendor disappears and makes way for fruit sets. Cutting off faded flowers that are no longer attractive only makes sense if there is no harvest anyway. Or the elderflowers, which contain essential oils, are dried into elderflower tea or processed fresh into elderflower syrup.
Tip:
Berries you don't pick ripen for hungry birds.

