- Author admin [email protected].
- Public 2023-12-17 03:39.
- Last modified 2025-01-24 12:45.
Bumblebees have become a rare sight in our gardens. These somewhat chubby-looking insects are extremely important in pollinating flowers. They start flying earlier than bees and are not deterred by rain. There are enough reasons to make your own garden as attractive as possible for bumblebees. A bumblebee castle as a nesting place helps enormously.
Background
Bumblebees, whose zoological name is Bombus, are, like bees, colony-forming insects. At the head of each bumblebee colony is an egg-laying queen. After hibernation, the queen begins to look for a nesting place for her eggs in early spring. For example, burrows, dead wood or house openings are suitable for this. But since our gardens are becoming tidier and tidier, a queen usually has a hard time finding a suitable place for her nest. A home-made bumblebee castle can help here. It has the advantage that it attracts useful animals to the garden. Bumblebees are always useful: a single animal travels for up to 18 hours a day and pollinates up to 1,000 flowers.
Variant one
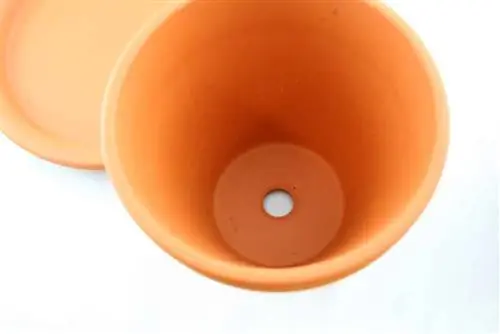
Bumblebee castles can basically be built in different ways. The simplest and probably most cost-effective variant essentially consists of an upturned plant pot. This is how you proceed with construction:
- Choose a clay plant pot with a diameter of at least 30 centimeters
- spread a layer of wood chips around two centimeters thick at the future location
- loosely fill the plant pot with moss, wood or nesting wool
- Place the pot upside down on the wood chips
- the drainage hole on the floor serves as an entry hole
In principle, this simple construction is enough to provide an attractive nesting place for bumblebees. It gets even better if there is a board over the entrance hole to protect it from the rain. To do this, you simply nail two three-centimeter thick strips parallel to an untreated wooden board. The distance should be such that the slats can rest on the pot. The board itself should protrude significantly beyond the pot on both sides. Finally, the board is weighed down with a stone so that it cannot be blown away by the wind.
Tip:
It's best to get the moss to fill the pot from your own garden or forest. A mossy area in the lawn that is simply cut out with a garden trowel is ideal.
Variant two
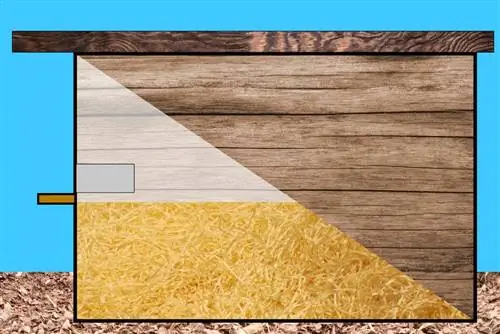
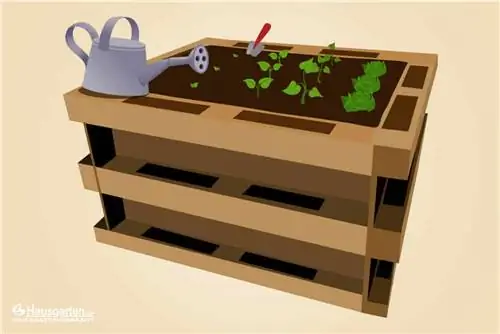
The second variant of a bumblebee castle is a little more complex and larger. It actually lives up to the name. The basis for this is either an old wooden box or you nail such a box together yourself. You don't have to buy new boards for this. There is usually usable material lying around in the shed or basement that can be reused. The size of the box is a matter of taste and depends on the space available. To make it as attractive and safe a nesting place as possible for bumblebees, proceed as follows:
- drill an opening with a diameter of at least two centimeters in the middle of one of the narrow sides of the box
- nail a small wooden block directly under this opening
- Fill the box loosely with moss, wood or nesting wool
- Place an empty cardboard roll (kitchen paper) into the opening from the inside
- guide the cardboard roll from the opening directly to the moss or wool
- Cover the box with boards and weigh the boards down with stones
The Bumblebee Castle, which was made from a box, usually offers space for a larger population. The entire construction is usually more stable. If you use an existing box, it should not have colorful printing if possible. The wood should also be free of chemicals. Of course, the latter also applies if the box itself is nailed together. By the way, the wooden block below the entrance opening is used so that the bumblebees can land comfortably. The cardboard roll inside guides you safely to your destination.
Location
Building a bumblebee castle yourself is really not a big challenge. The financial outlay for this is also kept within strict limits. In most cases, no new materials need to be purchased. In order for the castle to be accepted as a nesting place by the bumblebees, the location is crucial. Locations that are ideal are
- are protected from the wind,
- be illuminated only by the morning sun
- and be shaded by trees or bushes during the day.
Under no circumstances should the Hummelburg be left in the blazing midday sun. This would inevitably lead to overheating inside and thus the death of the brood. When choosing a location, it is also important that the newly installed bumblebee castle does not become an obstacle to gardening. Most importantly, it has been proven that once the location has been chosen, it can no longer be changed once bumblebees have settled there. Otherwise, the animals would simply no longer find their nesting place and would look for a new one.

