- Author admin [email protected].
- Public 2023-12-17 03:39.
- Last modified 2025-01-24 12:45.
Natural stone paving gives every garden path and every terrace naturalness and a very special atmosphere, which is why natural stone is becoming increasingly popular. In addition, areas that have been professionally paved with natural stone have a much longer lifespan.
You don't necessarily need a professional to lay your natural stone paving, but you should know how to lay it correctly and what is important. For example, it is advantageous to lay the natural stones on a gravel bed so that the stones interlock and cannot slip so easily. You can read more information about natural stone paving and how to lay it correctly in this article.
How can natural paving be distinguished?
If you want to lay natural stone paving, you can choose between two different variants:
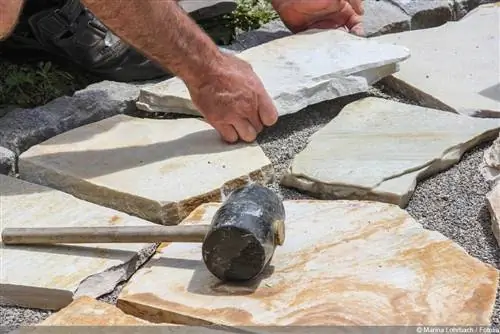
- on the one hand natural stone slabs
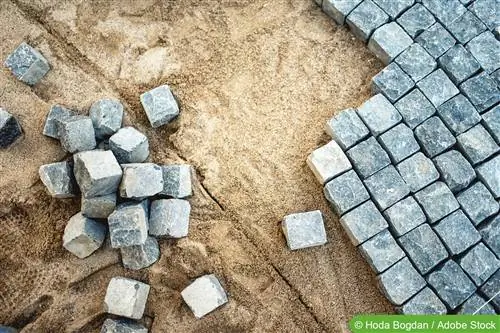
- on the other hand paving stones
The advantage of natural stone slabs, for example, is that they are particularly impressive in terms of their appearance, which is due to the naturally broken and irregular edges as well as the different sizes of the slabs. However, natural stone slabs are not a good choice if you are laying slabs for the first time because it requires experience and patience. Furthermore, natural stone slabs form a sealed surface so that rainwater cannot seep through, which is why drainage is necessary and additional wastewater fees are due. With natural stone paving, however, you can easily lay beautiful and curved patterns and combine different colors and shapes.
Advantages of natural stone paving
The special thing about natural stone is the fact that every stone laid looks unique and in this way conveys liveliness. Another advantage is that it is easy to design, which is also reflected in the way it is perceived and creates a pleasant atmosphere. With paving stones made of natural stone, you can not only visually enhance your sidewalks or patios, but they also don't slip so easily.
The stones are also suitable for creating a variety of patterns, figures or ornaments. Furthermore, this paving stone is cheaper compared to concrete paving or slabs and it does not break. You can use it over and over again without the patch losing its value. Quite the opposite, as it gains even more value over time. Another plus is the fact that minor splits that may occur during transport do not render the plaster unusable. Furthermore, natural stone is largely protected from frost damage due to its free mobility. As a rule, walking on natural stone pavement is found to be very pleasant and there is no risk of slipping when it is wet because the surface is very grippy.
What tools and aids are needed?
- Hoe and shovel or spade or mini excavator
- vibration plate
- Rubber or a so-called “paving hammer”
- Spirit level
- Inch ruler and tape measure
- Coarse gravel
- Weed fleece
- Rubber mat
- precious gravel
- Paving sand
- if applicable Deep shelves and concrete
How to lay natural stone paving correctly
So that you can be satisfied with your result, you should follow the following instructions and lay the paving stones made of natural stone step by step:
- First a substructure is needed. The depth of the substructure depends on the load on the area. If it is a footpath or terrace, the layer should be 30 cm thick. However, if it is an area that is regularly used by cars, then the substructure should be at least 40 cm thick.
- For the substructure, you must first excavate the selected area to an appropriate depth and then fill it with a five cm thick layer of coarse gravel. This layer of coarse gravel is now compacted with a vibrating plate.
- Now put a layer of weed fleece on top and add another 20 cm high layer of coarse gravel to the area, which is then compacted again with the vibrating machine.
- Since natural stones are not tip-proof, like composite paving, for example, it is recommended to work with edge edges. For this you can, for example, use low shelves that are set in cement and thus ensure sufficient stability.
- First apply approximately five cm of paving sand to the substructure.
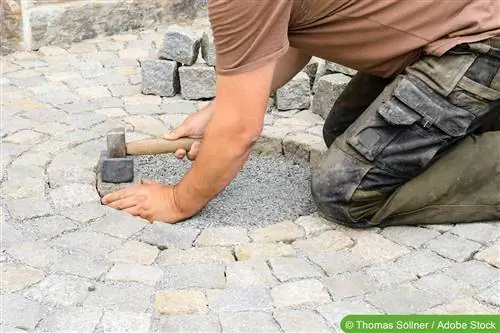
- Now you should take into account that paving stones made of natural stone always have different heights, so each stone must be adjusted individually in height. To do this, you need to fix the stones at a height of approx. three cm using a rubber hammer.
- If all the stones are in the correct position, the joints are now filled with precious gravel.
- Finally, place a rubber mat on the natural stone paving and use the vibrating machine to ram the stones into the ground until the appropriate height has been reached.
Possible sources of error when paving
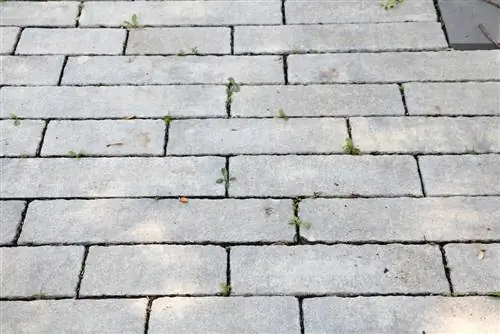
After laying, you will quickly notice from the walkability whether mistakes were made when laying the paving. The overall appearance also makes it easy to see whether flat surfaces are laid correctly, slopes are taken into account and joints are evenly filled and whether the head surfaces are actually on top. Furthermore, when using used natural stones, you should make sure that you do not use the already worn side as the top. You also have to be careful that a uniform surface is created when laying.
What you should know about laying natural stone paving in brief
Natural stone paving is becoming increasingly popular because it does not destroy the naturalness in your garden, but rather emphasizes it and in this way creates a pleasant atmosphere. Natural stone can be laid easily on your own if you work carefully and take enough time. Try it out for yourself and enjoy your new terrace or your beautiful garden path made of natural stone!
Which style is desired?
The selection of suitable natural stone paving stones is quite large, so that when laying natural paving stones you are spoiled for choice: should it be granite stone? Or is slate or even sandstone preferred instead? Maybe bas alt stone ultimately suits the existing visual conditions best?
Is natural stone paving expensive?
Be that as it may: the purchase of natural stone is generally associated with quite high financial expenditure, so in any case you first have to check which look you want later: modern, elegant, rustic or simply functional. Once the visual issue has been clarified, it is then important to attach importance to a firm and stable foundation with a view to a long-lasting, safe and even paving.
How do I lay natural stone paving?
This can, for example, be a previously determined section of path or the laying can be done in a more unconventional way: in attractive natural gardens, for example, it is a wonderful eye-catcher to pave certain sections of lawns with natural stone paving (e.g. near ponds, etc.) by previously excavating the relevant areas within the green area: so deep that the surface of the stones will later be exactly flush with the surface of the earth. This appears very natural and does not in itself require a lot of work, so this procedure is becoming increasingly popular with hobby gardeners.
- When laying natural paving stones in the classic way, however, it is necessary to first prepare an approximately 2 cm thick layer of gravel stones.
- The next work step follows immediately: this surface is filled evenly with sand chippings and then tapped evenly and firmly.
- Now it's time to apply the paving stones: They are carefully laid with constant joint spacing and then tapped very firmly with a wide rubber mallet.
- The joints should be between one and two centimeters wide; A wider joint is not advisable, otherwise walking on the freshly paved section could result in many tripping hazards.
- The joints themselves must be filled with sand or grit after a further check. The entire amount of work involved in paving can sometimes be quite lengthy, but this variant gives the garden or yard or similar a completely new, modern look.


