- Author admin [email protected].
- Public 2023-12-17 03:39.
- Last modified 2025-01-24 12:45.
What could be nicer for a gardener than to bring home-grown vegetables fresh and crunchy to the table. Radishes are good for this because they grow quickly and take up little space - and of course because they taste delicious! With the right information and tips, from sowing to harvesting, you too will be able to grow easily.
Varieties
The name radish comes from radix, the Latin word for root. The botanical name is “Raphanus sativus subsp. Sativus was.” In normal usage, however, the radish is sometimes also called radish or monthly radish. More than 100 different varieties are now available for domestic cultivation.
There are special varieties for every season. The individual varieties also differ considerably in terms of shape and color. In addition to the classic round shape, there are also oval and cylindrical examples. The tuber is most often red, but it also comes in yellow, pink, purple or even black. The intensity of the spiciness caused by the mustard oils it contains also varies from variety to variety. Detailed information about the respective variety is provided on the packaging.
Early varieties grow quickly and form delicious tubers even at low temperatures. However, since they develop weaker roots, good watering is important.
Popular spring varieties are:
- Cyros
- Icicles
- Vitus
- French Breakfast
- Lucia
- Knacker
- Saxa
- Vienna
- Neckerperle
- giant butter
The following varieties are suitable for cultivation in summer and autumn:
- Rudi
- Raxe
- Parat
- Sora
Tip:
For gardeners who like to experiment, there are seed packs with mixed contents available in stores. It's worth trying, because varieties that have not been bred for transport and storage surprise with a more intense taste.
Location requirements
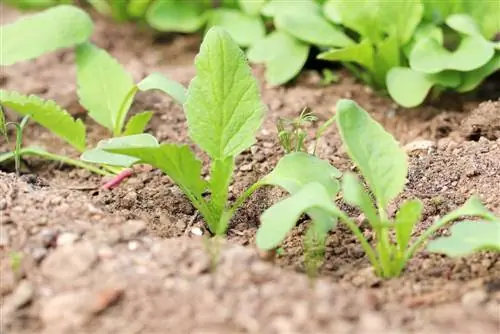
Radishes need a lot of light, so bright and partially shaded places are ideal for growing them. Humus-rich and water-permeable soil offers the best growing conditions. Before sowing, the soil can be improved and loosened with compost and a little sand. Fresh stable manure, on the other hand, would turn the small tubers black and would also attract pests.
The soil should be loosened and well ventilated before sowing. If the soil is finely crumbly and falls apart in your hand, it is perfect for sowing radishes. The enriched oxygen promotes germination. For the bed, choose a suitable place in the garden where radishes, cabbage and radishes have been grown again in the last four years.
Sowing
Radish sprouts in frost-free soil at temperatures as low as 5 °C, which is why they can be sown in cold frames and greenhouses from February onwards. Outdoor cultivation is possible from March to September, initially under foil. Radishes need space to develop their tuber. If they are too close together, the leaves will grow splendidly, but the tubers will remain small.
Radish seeds are brown, egg-shaped and about 3 cm long. They can be taken in the hand and easily dosed. The seeds are placed a short distance apart in 1 cm deep seed grooves and then lightly covered with soil. Sowing too deep produces misshapen and elongated tubers. The ideal distance between two rows is 15-20 cm. Young plants should be thinned to a distance of 3-5 cm. With ready-made seed tapes, the correct distance is automatically maintained.
Tip:
Place a long plant stick about 1 cm in diameter on the ground where radishes are to be sown. Press it deeper into the soil with your foot. After you pick up the stick again, a perfect groove is left for sowing.
If you want to make the effort, you can first sow radishes in purchased seed soil. This has hardly any nutrients and therefore forces the seedlings to form stronger roots. The small plants are then planted out in normal garden soil.
Are radishes actually hardy?
Radishes are not hardy. The last month for sowing in our temperate climate is September. If you have a greenhouse, you can still sow radishes in October.
Tip:
Do you always want fresh radishes? It is then recommended to sow smaller quantities regularly every two to three weeks. If a few radishes that are ready to harvest are left on the bed, they will soon form seed pods. Once they turn light brown, you can harvest and dry the seeds. Stored in a paper bag, they will last until the next sowing in spring.
Plant combinations
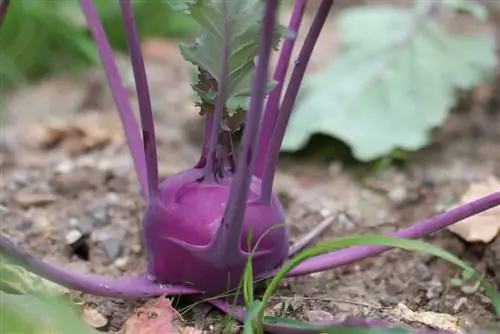
Radish plants are ideal for mixed cultivation. If suitable plant neighbors are chosen, there is no competition for nutrients and all plants thrive. They get along extremely well with beans, peas, cabbage, beets, parsley, tomatoes, kohlrabi and spinach. Green lettuce is also suitable for mixed cultivation because its large leaves protect the soil from moisture loss.
Basil and onions do not form a good neighborhood with radishes. Neither do cucumbers and melons, as they would remove a lot of water from the radishes.
Radishes are suitable as marker seeds for other plants that germinate more slowly, for example carrots and parsnips. Due to their short cultivation period, radishes are also suitable as a pre-, intermediate or post-culture of other plants, wherever there is space in the bed. Tomatoes, for example, are not planted until May, until then radishes can be harvested from the bed.
Pouring
Radishes are quite thirsty plants. During the growth phase, they love consistent soil moisture, but it should not be too wet. Significant differences in moisture make radishes furry and even cause them to burst. Therefore, it is important to pay attention to regular watering, especially when growing in summer. How much actually needs to be watered depends directly on the current weather conditions.
Fertilize
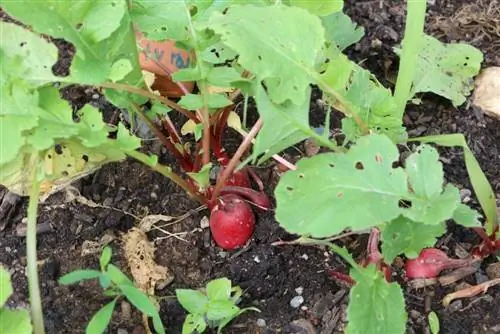
Radishes are among the so-called weak eaters in the home garden. Adding compost before sowing is sufficient to cover all nutrient requirements. This should only be incorporated superficially, as radishes are so-called shallow-rooted plants. They get the nutrients they need from the upper layer of soil. They do not tolerate fresh organic fertilizer. Also avoid mineral fertilizers, as radishes tend to accumulate nitrate.
Nitrogen-containing fertilizer only stimulates the growth of the leaves, but the tubers remain small.
Pests and diseases
Due to their rapid growth, radishes are usually spared from many pests and diseases. Even before pathogens can develop, they are harvested and consumed. If diseases and pests still occur, it is usually due to incorrect care and an unsuitable location.
Flea beetles
An infestation of flea beetles usually occurs in warm and dry weather. Holed and withered leaves cause the plants to wither.
Tip:
Moist soil and frequent hoeing prevent spread. Garlic planted nearby will repel the pests with its scent.
Cabbage flies and cabbage white butterflies
From mid-May there is a risk of crop loss due to these pests, whose maggots puncture the tubers. Attach a net over the seed for protection.
Tip:
Sow early in March or late in September, then you have a good chance of avoiding this pest.
Aphids
They spread very quickly and cause feeding damage to leaves and tubers. Discolored and curling leaves are typical of aphid infestation. Agents made from potash soaps or rapeseed oil are used to combat it. Natural predators such as ladybirds are more environmentally friendly.
Clubroot hernia
This disease only occurs in cruciferous vegetables, which includes radishes. The fungus can survive in the soil for up to 20 years. The radish tubers have goiter-like thickenings, older leaves wither and yellow. Since there is no suitable means of combating the disease, infected plants should be removed from the bed and disposed of as quickly as possible. This way the disease can at least be contained.
Tip:
Observing crop rotation has a preventative effect. Therefore, only sow radishes in the same place every four years. Regular additions of lime and humus improve the soil and thus also help prevent clubroot.
Radish blackness
This fungal disease penetrates through the roots. The gray to black colored tubers must be removed immediately.
Downy mildew
Black spots and white fungal coating on tubers as well as yellow and brownish spots on leaves are the unmistakable signs of this disease. Since the radish tubers are intended for consumption, usual treatment with fungicides is not recommended. Instead, you should quickly dispose of the affected plants with household waste. Under no circumstances should sick plants be put in the compost.
Tip:
Avoid sowing too densely and high leaf moisture, as these promote the disease.
Harvesting and storage
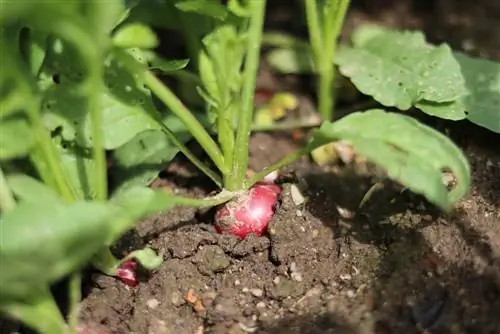
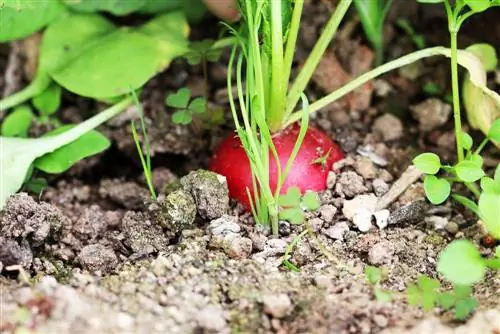
The ripening time is around 30 days, depending on the variety. After about four weeks you can try a radish and test its ripeness. If they are crispy and sharp, then they are ripe. This applies to all other tubers that are the same size. Whether small or large radishes taste tastier is simply a matter of taste. However, one thing is clear: young radishes taste best. They must be removed from the ground in good time before flowering, otherwise their taste will suffer and they will become hollow and woody. When the tubers have reached 2-3 cm in diameter, it is time to harvest. As needed, they are gradually removed from the ground, the largest tubers first, the smaller ones are allowed to continue to grow.
The harvest season extends into October. If you have sown early, you can start your first harvest in April. Radishes taste best when freshly harvested and should therefore be harvested as shortly before consumption as possible. They are simply pulled by their leaves and taken out of the ground. Remove the leaves immediately, as they remove water from the tuber and cause it to age faster.
Wrapped in a damp cloth, the tubers stay fresh in the vegetable drawer of the refrigerator for several days without losing much of their vitamins.
Tip:
Harvest radishes in the late afternoon, then they have the highest vitamin value and the lowest nitrate content.
Balcony extension
Who says you always need a garden to grow your own vegetables? Because they require little space and have a short ripening time, radishes are ideal for the balcony box and thrive there. Cultivation does not require much effort and the varieties can vary as desired. Normal potting soil, which is available everywhere in supermarkets and garden centers, is sufficient for cultivation. A typical balcony box offers enough space for around 40 radishes, which are sown in two rows. Ideally, the balcony box should be placed in a sunny location. The first leaves can be seen after just a week. Now it's time to keep the soil moist and be patient until the radishes are ready to eat in about 4 weeks.

