- Author admin caroline@plants-knowledge.com.
- Public 2023-12-17 03:39.
- Last modified 2025-06-01 06:48.
Tempting, creamy-yellow sweet corn cobs are reserved for the home gardener's menu. Only freshly picked, the vitamin-rich corn kernels promise a crunchy, sweet treat that other varieties cannot offer. There are further advantages to growing sweet corn in a private kitchen garden. Even beginners in hobby gardening can master their frugal demands. Not to forget the practical function of the majestic sweet grass plant as a windbreak or natural climbing aid for climbing vegetable plants. These instructions explain in practical and detailed terms how to properly cultivate sweet corn from sowing to harvest.
Sowing behind glass - this is how it works
For gardens outside hardiness zones Z7 and Z8, the growing season is too short for a 100-day cultivation period for sweet corn. If your garden is not located on the mild winter Lower Rhine or in a wine-growing region, we recommend growing on the windowsill. Pre-grown young plants enter the bed with a real head start in growth, so that the short summer is sufficient for the growth of ripe sweet corn cobs. Furthermore, you avoid the pronounced competitive sensitivity to weeds that exists in the two to six leaf stage after direct sowing. The process for sowing seeds does not pose any gardening stumbling blocks. How to do it correctly:
- Best time: mid-February to early March
- Fill seed soil or vegetable soil emaciated with sand into cultivation pots
- Insert a kernel of corn about 3 cm deep in each pot
- Press the substrate and spray with soft water
Germination takes between 12 and 14 days in a partially shaded window seat at an average of 15 degrees Celsius. It's quicker at 20 degrees Celsius within 7 days and at a pleasant 25 degrees Celsius after 3 to 4 days. Cover each growing container with glass or cling film so that a warm, humid microclimate is created underneath, as the seeds are used to in their home regions in South and Central America.
Location
A sunny, warm location with sandy-loamy, deep and nutrient-rich soil is ideal for growing sweet corn. The soil should be fresh to moist, because tropical grain plants cannot tolerate drought stress. To ensure that the monumental stalks with their large leaves do not shade other garden plants, we recommend a location on the northern edge of the kitchen garden. In rural areas, please keep a distance of at least 500 meters from fields with fodder corn. Otherwise, unwanted cross-pollination cannot be ruled out.
Tip:
Associated with runner beans, sweet corn acts as a natural climbing aid. To ensure that young corn is not strangled by the fast-growing bean plants, it should be grown on the windowsill and not sown directly in the bed at the same time as beans.
Soil preparation
As a heavy feeder, sweet corn relies on a high nutrient content in the soil. In organically cultivated garden soil, you can ensure that this important prerequisite for profitable cultivation is met by preparing the soil in autumn. Organic fertilizers such as compost, horse manure, guano or bark humus must first be processed by soil organisms before they are available to corn plants. Since this process takes a long time, the months of September to November are reserved in the work plan to make the following arrangements for the cultivation of corn:
- Remove crop residues, weeds, stones and roots from the bed
- Dig and rake the soil with the spade
- Sprinkle 3 to 5 liters of mature compost and 70 to 100 grams of horn shavings per square meter
- Work the organic fertilizers lightly into the surface and irrigate
As a supplement or alternative, we recommend green manure with legumes. Clover, vetch, peas and lupins additionally enrich the soil with valuable nitrogen for sweet corn. In addition, green manure suppresses annoying weeds and prevents erosion and siltation after rainfall. Since the plants are mowed in spring and worked into the ground, you add valuable biomass to your garden soil.
The best planting time
For early sweet corn plants, mild spring weather should have arrived in the garden on the day of planting. Under normal weather conditions, this is the case between mid and late May, when delayed ground frosts are no longer to be expected. If you take appropriate protective measures against the cold with fleece and foil, the time window for planting opens at the end of April to the beginning of May.
Tip:
Young sweet corn from the greenhouse or windowsill is susceptible to sunburn. By acclimatizing early sweet corn for 8 to 10 days before planting, you can effectively prevent leaf damage. For this purpose, the plants can get used to the outdoors and the sunshine on the balcony in a partially shaded location during the day.
Planting instructions - how to do it right
A mild, dry day after the Ice Saints is noted in the schedule for planting ready-made corn plants that have been purchased or that have been grown in advance. Before you weed and rake the bed soil, place the potted root balls in water until no more air bubbles appear. This is how you plant sweet corn in an exemplary manner:
- Dig planting pits at a distance of 30 to 40 cm that are twice the size of the root ball
- When planting in rows, maintain a distance of 80 cm
- Enrich the excavation with horn shavings, guano granules, composted horse manure or mature compost
- Unpot water-soaked root balls and plant in the middle
Please align the root disc so that it ends up just below the soil surface. Press the soil firmly with your hands and water. A mulch layer of nettle leaves keeps the soil moist longer and also releases natural nitrogen.
Tip:
Experts advocate growing sweet corn in the shape of a square. Instead of planting them in one or more long rows, plant the plants in the soil in short rows. In this way you optimize pollination, as all types of corn thrive as wind-flowered plants.
Direct sowing - this is how it works in mild regions

If there is a lack of space and time for sowing behind glass, home gardeners in mild winter areas have the option of direct sowing as an alternative. The instructions for soil preparation from the previous year also apply in this case. How to do it right:
- Suitable sowing date: end of May to mid-June at the latest
- Weed the bed and rake repeatedly to create a fine topsoil
- Draw seed grooves 4 to 5 cm deep with a row spacing of 80 cm
- Place seeds in the furrows 30 to 40 cm apart
- Close the seed grooves, press the substrate and water
To protect against pecking birds and voracious pests, please cover the seedbed with a protective net or transparent fleece. Since there is a probability of failure of 30 to 50 percent, you can place the seeds in the soil at a distance of 10 cm. After emergence, the weakest seedlings are thinned out so that the correct planting distance of 30 to 40 cm for adult sweet corn plants is maintained.
Tip:
For direct sowing in the Central European climate, only early to mid-early varieties, such as Sweet Nugget or Golden Super Sweet, are suitable. Even the longer season in hardiness zones Z8 and Z7 is usually not enough for later-ripening sweet corn.
Watering and fertilizing - you should pay attention to this
Constant soil moisture without waterlogging is beneficial for vigorous growth, lush flowers and a rich harvest. The more a sweet corn plant increases in volume, the less rainwater penetrates to the ground. Therefore, check the current water requirement daily in midsummer. Press your thumb into the ground. If you only encounter moisture after about 3 cm, pour immediately onto the root disc.
The recommended soil preparation provides the necessary nutrients for the starting phase after planting. To ensure a complete supply of nitrogen, potassium, phosphorus and trace elements, please fertilize with compost every 2 to 3 weeks. Ideally, you should also fertilize with nettle manure, which you dilute with water in a ratio of 1:10.
To fertilize sweet corn organically, home-made compost is not the only option. If there is no possibility of creating a compost heap in the garden, use ready-made compost from the market. Alternatively, promote the growth and productivity of sweet corn with horn shavings, bark humus or an organic vegetable fertilizer with sheep's wool.
Accumulating optimizes productivity
If adult plants reach up to 3 meters towards the sky, we can no longer see that sweet corn is weak in competition with weeds in the early stages. In fact, young plants in the 2 to 6 leaf stage are constantly at risk of losing out to weeds in the fight for light and nutrients. Regular piling strengthens growth and productivity.
How to do it:
- From a height of 30 cm, pile up sweet corn every 1 to 2 weeks
- Use your hands or a hand tiller plow to pull the soil up to the main stem
Continuous piling effectively suppresses weeds. By continuing to mulch with leaves, compost or grass clippings, the amount of work required for annoying weeding is reduced to a minimum.
Nets keep uninvited guests away
For the birds in your garden, corn kernels are at the top of the menu. In summer and late summer, the feathered friends attack the cobs and pull off the bracts to get to the longed-for prey. The uninvited guests are prevented from robbing the mouth by putting tangerine nets or thin cotton bags over the cobs. The nature lovers among the home gardeners leave a few cobs standing so that the winged beneficial insects can enjoy the corn and make their further stay in the garden tempting.
Harvesting sweet corn correctly - tips for harvest time
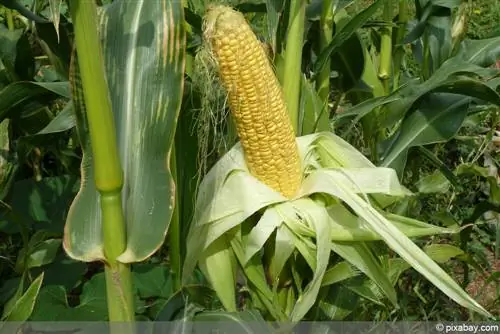
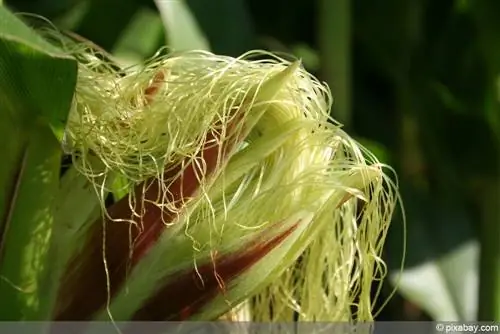
The secret to success for harvesting sweet corn at the ideal time is milk ripeness. Gardeners use this term to describe fully grown, golden-yellow corn kernels that are beautifully soft and milky-white inside. As a visual indication, the piston threads have turned dark. Scrape a few grains off the cob to check for milk ripeness. If necessary, wait a few more days if the test result is not satisfactory. Picked, unripe corn cobs do not ripen.
Experience shows that the harvest season begins in August/September. Once you have determined that the harvest is ready, turn or cut the cobs from the stalk by hand. The disturbing stigma threads and bracts can then be removed. To enjoy premium quality sweet corn, please do not allow more than 8 hours to pass between harvest and consumption.
If the harvest is delayed until October due to bad weather, please remove the accumulated soil from the root disk.
The stems and leaves make excellent mulching material. Cut the harvested plants close to the ground and shred them in the garden shredder. Alternatively, let the leftovers dry in the bed and then compost them.
Conclusion
These instructions leave no doubt that growing sweet corn in the vegetable patch is worthwhile in many ways. In order to enjoy freshly picked, golden-yellow sweet corn cobs, cultivation begins in autumn with organic soil preparation. Sowing on the windowsill from February produces strong young plants, which continue their rapid growth in the bed from mid-May. A sunny, nutrient-rich location on the northern edge of the garden sets the stage for a premium quality harvest. The care requirements are limited to watering when it is dry and fertilizing with compost. Hilling up every two weeks suppresses annoying weeds and promotes productivity. If the summer weather sticks to the rules, the longed-for harvest season of milk-ripe, seductive sweet corn cobs will begin in August/September.

