- Author admin caroline@plants-knowledge.com.
- Public 2023-12-17 03:39.
- Last modified 2025-01-24 12:45.
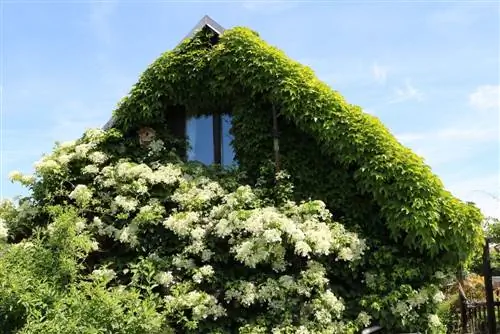
The climbing hydrangea covers dreary facades, sober downpipes, trellises and fences with a magnificent foliage and delicate, white abundance of flowers. The skilled climbing artist also carries out her decorative work where there is no topsoil available as a base for planting because the area is paved or asph alted. Clever hobby gardeners simply pot up the Hydrangea petiolaris and place the container at the desired starting point of the floral pull-ups. These instructions explain in detail how to skillfully care for a climbing hydrangea in a bucket and pot.
The right pot
Cultivating climbing plants in pots for greening facades, fences and trellises is a practical alternative to classic soil planting. Although this variant is mostly used to plant annual climbing plants, there is nothing to be said against caring for a perennial climbing hydrangea in a planter. They provide a young Hydrangea petiolaris with the best starting conditions for vital growth if the pot is like this:
- A minimum volume of 10 to 30 liters
- One or more openings in the base for water drainage
- Stable, tip-proof material, such as ceramic, concrete or terracotta
Please do not place the pot in a saucer, as in this case there is a risk of waterlogging after every downpour. It is better if the bucket has feet or you can slide some blocks under it. Also choose a light color that reflects the sun's rays if necessary so that the root ball does not heat up.
Tip:
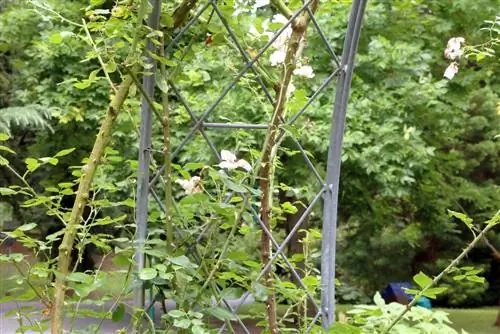
As a self-climber, the climbing hydrangea tends to develop irrational lines at first. By using a pot with an integrated climbing aid, you can direct the climbing plant in the desired growth direction from the start.
Substrate
Native to the forests of Korea and Japan, the climbing hydrangea favors loose, humus-rich and nutritious soil. Furthermore, a slightly acidic pH value of 5.5 to 6.5 is an advantage, as the plant is designed to be less lime-tolerant. First-class water storage capacity is just as essential as reliable permeability so that waterlogging does not develop as a result of compaction. The requirements are not met satisfactorily with standardized growing media, such as standard soil. You can either upgrade commercially available plant soil with additives or mix the substrate for your climbing hydrangea yourself. The following recipes have proven themselves in practice:
- Rhododendron or ericaceous soil, enriched with 20 percent expanded clay, fine grit or quartz sand
- A mix of 2 parts leaf compost, white peat and garden soil, 1 part lava granulate and 1 handful of horn shavings
- Alternatively a mixture of clay, leaf mold, coconut fiber substrate, bark humus as well as perlite and horn shavings
Since the pH value of self-made substrate mixtures is difficult to estimate, please carry out a test at the end. Every hardware and garden store has inexpensive test strips available. If the result is below 5.5, increase the value using algae or garden lime. A pH value greater than 6.5 is reduced using peat or alum (potassium aluminum sulfate).
Stew
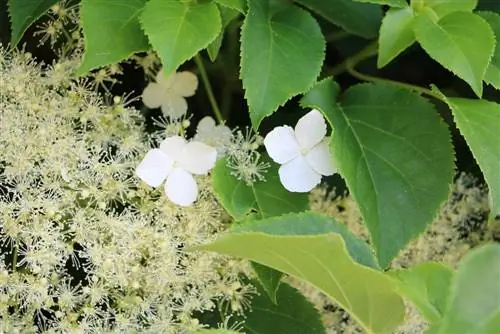
Place the root ball, still potted in the container, in a bucket of stale tap water or rainwater while you prepare the bucket for planting. If it is terracotta, the pot should stand in water for the previous 24 hours so that the porous material does not drain all the moisture from a young, freshly planted climbing hydrangea. Place a layer of pottery shards, grit or expanded clay balls on the bottom of the pot as drainage. To prevent the substrate from sticking between the inorganic material later, place a breathable fleece over the water-conducting layer. After this preparation, pot the hydrangea like this:
- Fill the bucket a third full with substrate via drainage and fleece
- Unpot the water-soaked root ball and position it in the middle of the soil
- Pour the substrate all around in portions and press lightly in between
- Fill in plant soil up to a maximum of the bottom pair of leaves
- Keep a pouring edge free of 3 to 5 cm
Finally, water the potted climbing hydrangea with lime-free water until a trickle runs out of the bottom opening. If you have chosen a pot with an integrated climbing aid, tie the lower tendrils to the struts without the binding material cutting into the fabric.
Location
Place the pot with the potted hydrangea in a partially shaded to shady location. On the north wall of the house, in the street with little light or on the shady balcony, the climbing hydrangea meets all expectations. A location protected from the wind is an advantage so that a strong gust does not tear the tendrils away from the facade or climbing aid.
A sunny spot with a west or east orientation can also be considered, provided there is enough water available during the warm season. The brighter the location, the more colorful the autumn colors of the leaves will be.
Pouring
All hydrangeas require a high level of water. In this regard, the climbing hydrangea is no exception. At the same time, their low limescale tolerance requires special water quality. How to water the climbing leaf and flower ornamental plant properly:
- Water promptly if the substrate surface is dry
- Preferably use rainwater or decalcified tap water
- Let the irrigation water slowly run onto the root disk
- If possible, do not water the plant overhead
The watering process is finished when the water flows out through the bottom opening. The sunnier the location, the shorter the intervals between waterings. If the climbing hydrangea is in its dense foliage and flower dress in summer, the high degree of evaporation sometimes requires daily watering. A quick finger test provides information about the actual need. As long as you can still feel moisture within or in the upper 1 to 2 cm, you should not water to avoid waterlogging.
Fertilize
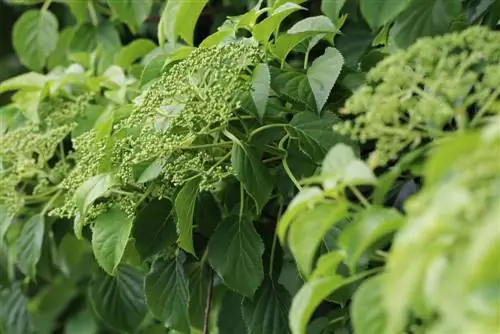
The climbing hydrangea thrives as a heart-rooted plant with vertical main roots, from which a dense network of fine roots branches out to the sides just below the surface of the earth. Solid fertilizers are therefore not recommended as they have to be raked into the soil, with the risk of damaging the fine roots. Liquid fertilizers, on the other hand, are added to the irrigation water and can be administered without any problems. In order to meet the special nutrient requirements of Asian forest plants, specialist retailers offer hydrangea liquid fertilizer. In addition to nitrogen, phosphorus and potassium, these contain other trace nutrients such as iron, manganese and copper in water-soluble form. The administration is very easy:
- Fertilize every 4 weeks from March to September
- Add the hydrangea liquid fertilizer to the irrigation water according to the manufacturer's instructions
- Water before and after with clear water
To support the winter hardiness of a climbing hydrangea, switch to a potassium-focused fertilizer in liquid form in September. One of the numerous benefits of the main nutrient is that potassium increases the cell sap pressure in the tissue. As a result, the plant is better prepared for the constant change between thaw and frost in winter. At the same time, potassium lowers the freezing point in the cell water, which also optimizes frost hardiness. Comfrey manure, which is rich in natural potassium, is ideal. Alternatively, liquid potassium fertilizers are available commercially.
Cutting
A climbing hydrangea takes between 5 and 8 years to bloom for the first time. Until then, encourage bushy growth by cutting the vines back by a third to the next leaf node in late winter. Older specimens lay the buds for the next flowering period the previous year, so the timing and pruning procedure differs from young plants. This is how you prune properly:
- Cut adult climbing hydrangeas into shape immediately after flowering
- Short tendrils that are too long until just above a sleeping eye
- Clean out wilted flowers to prevent the vigorous growth of seed heads
A climbing hydrangea is only thinned out in the leafless winter period. If there are no leaves blocking the view of the tendrils in January/February, you can cut and thin out more specifically. Cut off dead and weak shoots at the base. Otherwise, the branches remain untouched so as not to reduce the summer blooms in advance.
Sensible fall protection
In the construction phase, the self-climbing hydrangea does not require any climbing aid as it has stable roots. In order to guide the climbing hydrangea in the desired direction right from the start on a facade, not only a climbing aid integrated into the pot makes sense. Alternatively, as a starting aid, create several fixation points on the surface, for example using beeswax clay. From here, the plant climbs even smooth surfaces in exactly the orientation in which greenery is desired.
Furthermore, fall protection is recommended, as the adhesive elements are only placed on the young shoots. As a result of the growth in thickness over the years, these adhesive organs tear off. This means that the majestic climbing hydrangea only clings to a facade with its young tendrils. This behavior increases the risk that strong winds and storms will detach the plant from the substrate in entire mats. By installing a simple rope system in good time, you can avoid this risk.
Wintering
Deeply rooted in the ground, a hydrangea is reliably hardy in the right location, so no special precautions need to be taken. This does not apply to a climbing hydrangea in a pot. Due to the exposed location of the root ball, there is a risk of damage from strong winds and bitter frost. Please move a plant in a pot with a mobile climbing aid to a frost-free winter quarters. Since the leaves are shed, it can also be dark here. If, on the other hand, a pot serves as a starting point for greening a facade, pergola or arbor, the following measures guarantee he althy wintering:
- Before the first frost, cover the pot with insulating materials
- Bubble wrap, jute ribbons or garden fleece are well suited
- Alternatively, surround it with a chain link fence and fill it with leaves, straw or soil
- Water occasionally during the winter to prevent the potting soil from drying out
In the first 3 to 5 years, put a breathable hood over the young tendrils so that they do not freeze back in severe frost. Reed mats that you place in front of the climbing hydrangea are also helpful to protect against cold wind and intense winter sun.
Propagate
The Hydrangea petiolaris owes its status as a high-quality climbing plant not least to a simple propagation strategy. The lowering method works without extensive effort and produces young plants that have the same beneficial benefits of their mother plant. Here's how to do it professionally:
- In spring, fill a 10 liter pot with potting soil, coconut fiber substrate or peat sand
- Place this growing pot next to the pot with the mother plant
- Pull a half-woody, he althy, non-flowering shoot down onto the substrate
- Dig the area in contact with the soil 8 to 10 cm deep and weigh it down with a stone
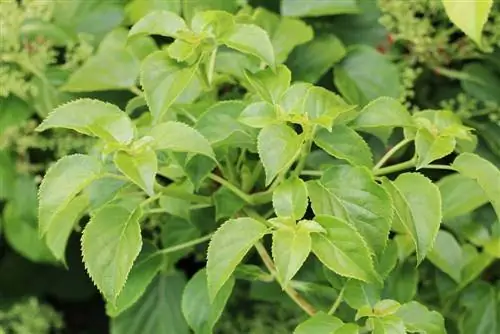
For the shoot end, stick a wooden stick into the ground and tie the tip to it. Water the sinker moderately with soft water. In the coming weeks and months, the offshoot remains connected to the mother plant so that its supply of nutrients is ensured. Water the soil whenever the surface has dried out. A fresh shoot signals that a root system of its own has formed on the buried branch. If you feel significant resistance when you pull lightly, the lowering tool can be cut off from the mother plant. Repotted into nutrient-rich, acidic substrate, the care program according to these instructions now applies.
Diseases: Leaf chlorosis
A climbing hydrangea cared for according to these instructions develops robust resistance to typical plant diseases. However, there may sometimes be cause for complaint because the rich green decorative leaves turn yellow. What at first glance seems like an illness is actually the result of iron deficiency. This trace element is sufficiently present in every good plant soil. However, deficiency symptoms can occur because iron is no longer absorbed by the roots and transported into the interior of the plant.
If a lime-sensitive climbing hydrangea is watered exclusively with hard tap water, the lime content in the soil accumulates. As a result, iron, magnesium and other microelements are stored and are no longer available to the plant. This blockage leads to leaf chlorosis. Visible indications are yellow leaves with green veins. The climbing plant is particularly vulnerable in the limited substrate volume of the pot. How to solve the problem:
- At the first sign, switch the water supply to rainwater or decalcified tap water
- Check the pH value in the substrate
- If the result is below 5, repot the climbing hydrangea using an acidic substrate recommended here
In the advanced stages of leaf chlorosis, there is an urgent need for action as it takes a long time for the roots to absorb iron again. By foliar fertilizing the climbing hydrangea with liquid iron fertilizer, you compensate for the deficiency where it has an acute impact. As a chelated fertilizer, iron is water-soluble and can be applied directly to the leaves using a spray bottle. Please note the special safety regulations as this fertilizer contains toxic iron II sulfate.
Conclusion
Planted in a pot, the climbing hydrangea adds greenery to facades, fences, downpipes and arbors, even where soil planting is not possible. In semi-shady to shady locations, the climbing artist fulfills the task set without requiring a time-consuming care program. A sufficiently large pot with a volume of 10 to 30 liters and a nutrient-rich, slightly acidic substrate guarantee good success. An adequate supply of soft water and fertilizers every 4 weeks during the summer are the central points in care. If the Hydrangea petiolaris does grow over your head, you won't mind having to cut it back in the summer after the flowering period. The gardening year comes to an end by protecting the pot from frostbite before the first frost with a winter coat.

