- Author admin caroline@plants-knowledge.com.
- Public 2023-12-17 03:39.
- Last modified 2025-01-24 12:45.
Ginger is useful as a culinary spice in nature-loving cuisine. Thanks to its natural healing powers, stomach problems and colds disappear in no time. Its exotic origins are no obstacle to growing the magical ginger plant with its powerful rhizomes yourself. These instructions explain in detail how you can easily grow the herbal and medicinal plant yourself in the bed and on the balcony. From professional planting to species-appropriate care to a bountiful harvest, this guide will guide you step by step through successful cultivation.
Advancing creates a growth advantage
The ginger plant is native to the subtropical and tropical regions of the world, so it is not hardy in the Central European climate. Since the average culture time from planting to harvest is 250 days, growing on the windowsill is recommended. In this way you give your ginger a head start in growth, which will be rewarded with a bountiful harvest in autumn. This recommendation applies equally to cultivation in beds and pots.
Criteria for the best planting material
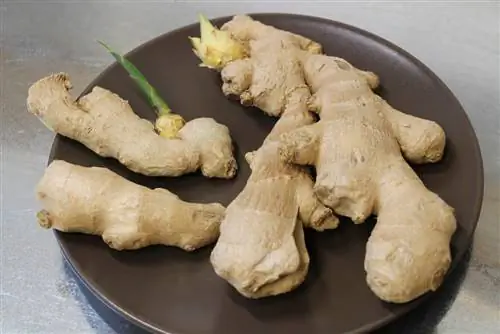
High-quality planting material sets the stage for successful cultivation of ginger. Look for a fresh, juicy, organically grown rhizome at the farmer's market or supermarket. If you pick up a tuber with a smooth, firm shell, it should feel plump without any soft spots. Since you can cut this tuber up later for cultivation, just one specimen is enough to grow a variety of tasty gingers. Since longer storage reduces germination, we recommend purchasing shortly before beginning cultivation.
Growing Guide
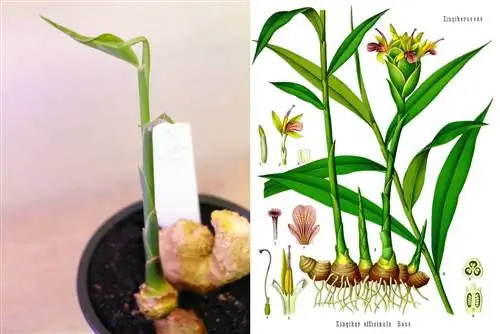
When the lighting conditions on the windowsill improve from mid-February, the window of opportunity for growing ginger opens. The fresh rhizome has numerous vegetation points, visible as slight bumps under the peel. A fresh shoot can sprout from each of these eyes, allowing you to divide the tuber into several segments. A suitable rhizome piece should have 2 to 3 vegetation points. Of course, the ginger rhizome can also be used whole according to the following guidelines. How to do it correctly:
- Soak the planting material for 2 days in lime-free water at room temperature
- First then cut a ginger bulb into pieces with 2 to 3 eyes
- Fill a growing pot with a mix of vegetable soil and sand or commercially available growing soil
- Place one piece of rhizome flat on the substrate, with the eyes facing upwards
- Sift thinly with potting soil, press down and moisten with a fine spray of lime-free water
- Place in a bright, not full-sunny window seat with at least 20 degrees Celsius
- Water little and do not fertilize over the next 8 to 10 weeks
A combination of warm temperatures and high humidity has a beneficial effect on rooting. Therefore, put a plastic bag or a glass hood over each growing pot and ventilate it briefly every day to prevent mold from forming. If green shoots have developed, the cover can be removed. Warm temperatures of more than 20 degrees, a slight soil moisture and tropical humidity represent the supporting pillars for the vital growth of the fresh shoots during cultivation. While the shoots grow upwards from the vegetation points, they simultaneously form an independent system of fine roots hidden from the earth. Therefore, please water very cautiously. The young ginger plants cope with short-term drought much better than waterlogging.
Tip:
Rhizome parts of ginger root just as quickly in water. For this purpose, a transparent plastic bowl is filled finger-high with rainwater, the tuber pieces are placed in it with the eyes facing up and closed with a lid. In a bright, warm location, the formation of roots and shoots progresses quickly within 6 to 8 weeks.
Planting time outdoors
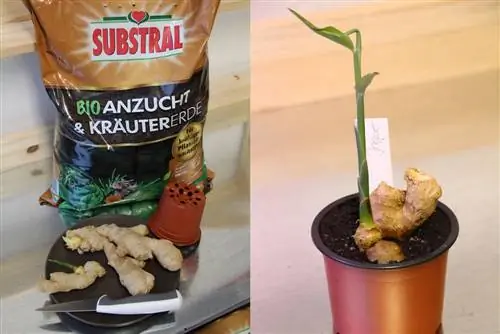
If the young plants on the windowsill have developed their own shoots with several leaves, they can be planted in the bed from mid to late May in mild wine-growing regions. The ideal planting time, however, should not be based solely on the calendar. In order for the tropical plants to continue growing vigorously in the open air, the temperature level should fluctuate around 20 degrees Celsius during the day and no longer fall below 10 degrees Celsius at night. In northern latitudes, the ideal planting time shifts to June.
Location
The better the location suits the sunny disposition of ginger plants, the more lush the growth will be. Therefore, assign the young plants a place in the garden with the following conditions:
- Sunny, warm and protected
- Ideally with at least 4 to 6 hours of sunshine daily
- Nutritious, humus-rich and loose garden soil
- Fresh to moderately dry
- Preferably with a slightly acidic pH value of 5.5 to 6.5
If the soil condition does not meet ideal conditions, solve the problem with additives. Loosen clay-based soil that tends to compact with sand, leaf mold or compost. You can optimize very sandy soil with bark humus, leaf compost or vegetable soil.
Planting out in the bed
Please rake the soil thoroughly at your chosen location. Weeds, stones and old roots are removed. A fine, crumbly soil offers the tender roots the best conditions for growth. This is how you plant early ginger plants correctly:
- Dig a shallow planting pit 1.5 times the diameter of the rhizome
- Enrich the excavation with leaf compost, guano granules or horn shavings
- Unpot the ginger plant and place it in the middle of the pit
- Cover with the enriched excavation to a maximum height of 2 cm and press down
Pour the young ginger with lime-free water. A close-meshed protective net keeps voracious snails away from the delicate shoots and leaves.
Tip:
In the garden bed where there is a risk of voles, the early ginger plants are planted in the protection of a close-meshed wire basket. This vole basket is placed in the excavated planting pit and filled with substrate in order to insert the sprouting tubers 2 cm deep.
Planting out in pots and balcony boxes
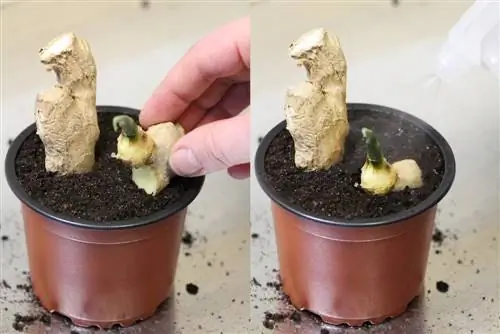
In order to successfully grow ginger, a lean potting soil makes sense. In a nutrient-poor substrate, the delicate root strands make a lot more effort to grow lengthwise in search of nutrients. Young ginger, on the other hand, is planted in pots and balcony boxes in nutritious soil so that the desired, fleshy rhizomes form over the course of the summer. Vegetable soil from specialist retailers is well suited for this purpose. Alternatively, mix 1 part of good garden soil with leaf compost and add coconut fiber and perlite. How to plant ginger properly on the balcony:
- Create drainage on the ground in the planter made of expanded clay or pottery shards
- Pour a layer of substrate on top
- Unpot the young plant and plant it about 2 cm deep
- For a good soil seal, press the soil down and water with soft water
Please do not suddenly place the pot or planter in full sun. To prevent the leaves from getting sunburned, the ginger plant should first acclimatize in a partially shaded, warm location for 8 to 10 days before moving to its summer location in the sunshine.
Care
Ginger not only impresses with its uncomplicated cultivation and planting. In addition, the spicy, hot herbal and medicinal plant scores with a low-maintenance care program. To ensure that the multifunctional plant achieves its optimum, the following measures should be observed.
Pouring
Ginger is only watered when the soil in the bed and pot is noticeably dry. Short-term drought does not cause any problems for Zingiber officinale, whereas waterlogging causes the roots and tubers to rot within a short time. How to properly water a ginger root:
- Check the substrate for dryness using a finger test
- If the top 1 to 2 cm are dry, watering is required
- Preferably use lime-free water for watering
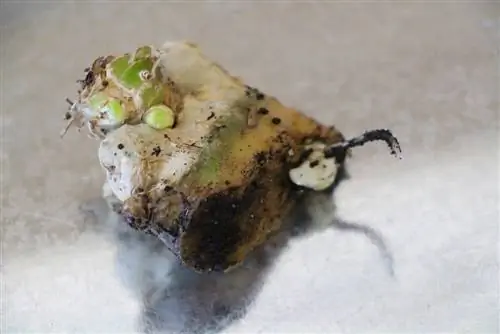
So that the tubers lying just below the soil surface are not washed out, the water should be administered as a fine shower. No puddles should form in the bed. If the saucer in the pot and balcony box fills with water, the current needs are met. After 10 to 15 minutes, please pour out the coaster to prevent harmful waterlogging.
Fertilize
Your spiced ginger is modest when it comes to nutrient intake. No fertilizer is given during cultivation. After planting, the nutrient reserves in the soil are sufficient for the first 6 to 8 weeks. From July onwards, add a liquid vegetable or herb fertilizer to the water every 4 weeks. Organic solid fertilizers, such as leaf compost, are not recommended for ginger. These must be worked into the soil, which could damage the rhizomes due to the shallow planting depth.
Cut leaves only in moderation
The diverse application scenarios for a ginger plant include using the leaves as a fresh ingredient in salads. However, this option should only be used to a limited extent, as the leaves play a significant role in supplying the ginger bulbs. To give your summer salad a spicy note, there's nothing wrong with cutting off one or two delicate green leaves.
Harvest time is in autumn
It takes 8 to 9 months until the harvest is ready. Under normal weather conditions, you can harvest your home-grown ginger in October and November. The yellowing shoots and leaves are a visible signal that the harvest season has begun. Only when ginger has absorbed its above-ground plant parts is it ready to eat. Harvesting is so easy:
- Pick off the root ball all around the bed with a spade
- Push the spade under the rhizomes and lift it out of the ground
- Simply grab the potted ginger by the shoots and pull it out
- Shake off the soil and cut off all shoots
Numerous new tubers have developed on the plant rhizome over the course of the summer. These offer you a spicy, fresh taste. Use a sharp knife to separate these regrown parts to use them fresh in the kitchen. You can dry and store any excess harvest. The original ginger root, or rather the cut section, is either consumed or used for propagation.
Propagate and overwinter
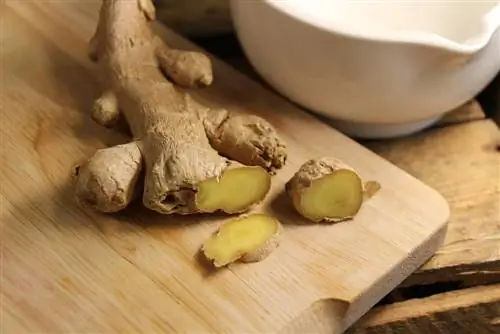
So that the spicy taste sensation repeats itself next year, not all ginger roots should be eaten. Save 2 to 3 or more he althy, plump rhizome pieces with 1 to 2 eyes to overwinter and grow into ginger plants again.
This is how the plan works:
- Clean tubers intended for propagation thoroughly after harvesting
- Cut off the green shoots and leaves
- Also remove the long root strands
- Store on an airy shelf in a dark, cool basement
- Turn every 3 to 4 weeks
Since ginger goes dormant throughout the winter, it can overwinter dry. It is important to note that it is dark in the winter quarters and the temperatures fluctuate between a minimum of 3 and a maximum of 10 degrees Celsius. In February, the overwintered rhizomes leave the cellar to be awakened from hibernation in potting soil on the bright, warm windowsill.
Diseases
When growing ginger, you will rarely have to complain about plant diseases. The pungent ingredients, such as gingerol, act as an effective defense against fungal spores and other pathogens. Symptoms such as rot and softened tubers are usually due to excessive watering. Experience has shown that the natural rainfall already covers the water requirements in the bed, so that watering is only carried out when there is a long period of drought. Please only add water to the substrate in the pot when it has dried to a depth of 1 to 2 cm.
Pests
These instructions already pointed out the danger of voles and snails. You can keep the voracious pests away from your ginger plants using vole baskets and protective nets. It becomes problematic when tiny fungus gnats target your exotic spiced ginger in the pot and balcony box. A clear indication of an infestation are clouds of tiny insects that emerge from the pot at the slightest touch. The 2 to 4 mm small insects prefer to lay their eggs in plant soil so that the larvae develop splendidly in the protected environment of the planters and feed on the roots. If this activity is not stopped, this year's ginger harvest will, in the worst case, fail completely. Since the use of chemical insecticides is not an option when caring for crops, combat the pest with the following environmentally and he alth-friendly products:
- Stick several matches upside down into the ground
- Sprinkle the substrate 2 to 3 mm thick with bird sand or quartz sand
- Crush the neem press cake and carefully work it into the upper substrate layer
- Set up Neudorff fungus gnat traps to prevent adult insects from laying eggs
Since fungus gnats avoid substrate that has dried on the surface, water the plagued ginger plant from below immediately. To do this, place the pot or planter in soft water for a few minutes so that it rises to the roots thanks to capillary force.
Conclusion
In order to enjoy freshly harvested ginger, you do not have to rely on extensive experience as a home gardener. You can find suitable planting material in any well-stocked supermarket in the form of a plump, he althy ginger root with lots of sleeping eyes. Growing on the windowsill gets growth going from February onwards so that you can reap a rich harvest of juicy ginger roots in autumn. Watering sparingly with lime-free water and a little liquid vegetable fertilizer every 4 weeks completely cover the care needs. By overwintering one or two pieces of rhizome in a dry, cool and dark place, the hot and spicy taste sensation will continue seamlessly next year.

