- Author admin [email protected].
- Public 2023-12-17 03:39.
- Last modified 2025-01-24 12:45.
Plants and colorful flowers in pots or boxes on the terrace or balcony are always nice to look at. But plants grown in pots in particular require more irrigation water than those planted outdoors. In order not to have to constantly water, and not just in the hot summer, the tubs and balcony boxes can be equipped with a self-made irrigation system, which can also help the terrace and balcony owners go on vacation. With the right tips, any hobby gardener can easily build one themselves.
Irrigation forms
Plant watering for balconies and potted plants always makes sense if the homeowners travel often or the balcony is on a south side. Such an irrigation system can also be easily built yourself. However, this requires some materials that can be purchased in advance from a garden store or hardware store. The tools for construction can be found in almost every well-equipped household. There are two sensible methods for long-term plant watering for balconies and potted plants. The first method is particularly suitable for elongated balcony boxes. This requires two boxes that are placed one inside the other. The second method should be used for large pots, which usually only contain one plant. Because only one bucket is needed. However, both methods are equally easy to build yourself:
Tools required
In order to be able to make the irrigation boxes for the balcony yourself, you will also need one or two tools, but these should actually be found in every household:
- Scissors
- Hammer and thick nail
- alternatively small drill
First procedure
Materials
- a large box or bucket without bottom drainage holes
- a smaller box or bucket that fits well into the large one and does not end up on the floor
- the small balcony box needs drainage holes
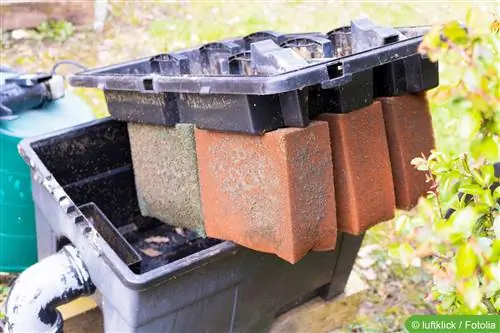
- if necessary two to three bricks on which the small box can rest
- Alternatively, plastic cups, such as old yogurt cups, can also be used
- wide fabric ribbons, for example made of cotton
- Water level measuring device from hydroponics
- Wire
Tip:
Ideally, only plastic boxes are used because holes have to be drilled all around the outer box for drainage. If clay pots are used here, it can happen that they tear during drilling and can no longer be used.
Getting started
Once all the required materials have been purchased from retailers, you can get started. First, the outer box is prepared. To do this, use a hammer and nail to knock in small drainage holes all around. If you have a drill available, you can use it. Two small holes are made a little higher, where the wire for attaching the water level indicator will later be pulled through. It continues as follows:
- Place two to three bricks on the ground, depending on how big the bucket or box is
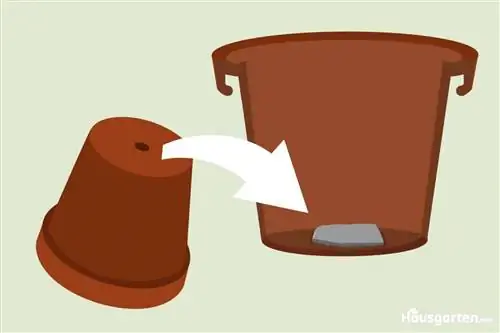
- alternatively, place the plastic cups upside down on the floor
- Attach the water level indicator to the inside wall so that it protrudes far enough out of the box to be easily read
- It must later be able to reach down into the storage water
- Drill or punch holes in the bottom of the smaller box that is used
- make sure that holes are needed for water drainage
- on the other hand, holes are needed for the cotton strips
- cut enough long and wide strips of fabric
- these can be made from an old cotton cloth
- Put cotton threads through the bottom holes
- leave enough play up and down
- the upper part must later disappear into the earth, the lower part must be able to hang in the water
Completion
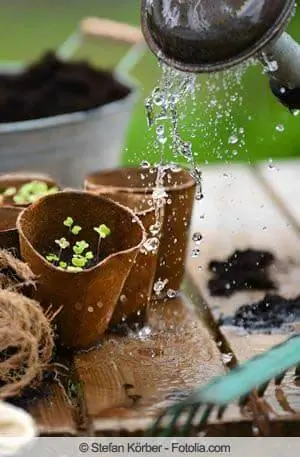
Once these preparations have been completed, the irrigation system can be completed. For this purpose, the inner balcony box or pot is planted as usual. Ideally, a drainage system should be created on the floor so that no waterlogging can occur here either. Care must be taken to ensure that the cotton strips are pulled up to the ground so that they can reach the roots. Clay shards or gravel are suitable for drainage. Plant fleece is placed over this so that no soil clogs the holes. The cotton threads are pulled through small holes in this fleece. Then plant as normal:
- fill in the appropriate soil for the plants
- Leave cotton strips in the ground
- Place plants on the ends of the cotton strips so that the roots are in contact
- place the inner bucket on the bricks of the outer bucket
- Fill water at the bottom between the boxes
- water new plants from above too
Tip:
Now you can always see how much water is still in the lower tank using the water level gauge. Before a longer absence, this should be filled well so that excess water can escape from the side holes.
Second procedure
Materials
- a box or bucket without drainage holes
- ideally use plastic ones
- Clay stones for hydroponics
- Water level measuring device from hydroponics
- Plant fleece
- a piece of hose
Getting started
Only one planter is required for the second irrigation system. This is more suitable for larger pots, for example, but balcony boxes can also be created this way. First, drain holes are drilled all around the sides or punched in with a nail and hammer. When it comes to height, make sure that the holes are where the earth will later lie. There should be no drainage holes in the floor, otherwise the stored water that is needed for irrigation will escape here. The hydroponic beads are now placed on the ground to an appropriate height, depending on how much water is to be stored. At the same time, the water level gauge is inserted into one corner. A previously cut, sufficiently long piece of hose is inserted into another corner. This will be used to fill the water storage tank later. Permeable plant fleece is placed over this first level. This prevents soil from getting between the clay balls.
Tip:
The plant fleece not only prevents soil from getting down between the balls, but also prevents the roots of the plants from constantly hanging in the water and thus could rot.
Completion
If the pot has been prepared this far, it is ready for planting:
- fill in soil suitable for the plant
- Insert the plant and add soil around it
- fill the clay balls with water through the hose, making sure that the soil does not get any water
- If the plant has been replanted, it should also be watered briefly from above
Tip:
Fill in the soil carefully so that the hose does not get clogged. This must be so long that it protrudes quite a bit at the top and no soil can run in even when the plants are watered normally.
Other alternatives
To these two large irrigation systems, there are also smaller alternatives that can be set up quickly if a short trip or vacation is on the agenda and there are no neighbors or friends who can come to water in between. If the balcony is not yet equipped with plant watering, the plants can also be supplied with water when you are away:
- with plastic bottles
- these are filled with water and placed upside down in the ground without the lid
- with a bucket filled with water
- this is placed higher than the flower box
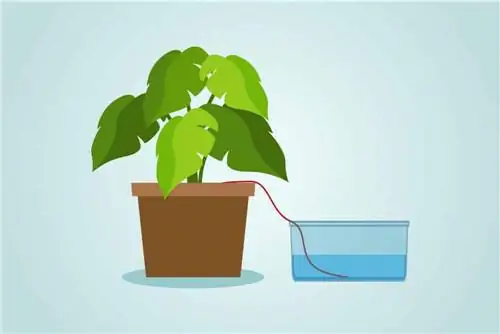
- The plants draw the water they need through the wool threads suspended in the water and stuck into the soil at the roots
Tip:
However, these alternatives are really only suitable for vacation absences and should not be used constantly. The wool threads in the water bucket are also just an alternative for small boxes and buckets.
Tropf-Blumat plant waterer for pots and boxes
- The Blumat plant watering system is ideal for the plants. There are many different parts, depending on what you need and whether you want to connect an irrigation vessel or work directly from a water connection.
- You can purchase all parts individually or in sets and expand and supplement the system at any time.
- Depending on how big the plant and the planter are, one or more of the cones must be inserted into the ground.
- There is a supply line and you need a water vessel or a hose to which all supply lines are connected and which is connected to a water connection.
- The houseplants are supplied with the valuable water via the suction hose.
- In one system, water is released via porous clay cones.
- The water supply in the separate container must be placed below the Blumat cone(s) (approx. 10 to 20 cm)!
- About 80 to 100 ml of water is released per cone per day.
- If more water is needed, use several cones. They can be connected to each other using a hose. The size of the water reservoir must be taken into account!
- Raising or lowering the water tank increases or decreases the water output.
- The Blumat plant watering system is not only suitable for houseplants, but also for balcony boxes or plant pots that are kept outside and also for the garden. However, you have to remember that a lot of water evaporates on hot days. The water containers must be correspondingly large if you want to water for several days. It is therefore ideal if the hose is connected directly to a water connection, at least outdoors.
Ground spike for irrigation ball
- A simple and inexpensive way to water plants.
- The ground spike is inserted into the potting soil, as deep as possible.
- You can attach the corresponding irrigation ball to the top, but also a standard beverage bottle. The balls have significantly less capacity (250 ml) than the bottles (up to 2 liters).
- When the earth dries out, water runs in. The plant or the plant substrate cannot dry out. With large bottles you can go a few weeks without watering. For large planters it is better to use two skewers and two bottles.
Plant waterer to hang on the pot
- Also a very inexpensive method and less noticeable than the large bottles, although also with a smaller capacity.
- The water storage container is hung directly on the flower pot.
- The corresponding wick is inserted into the ground and the other end into the storage container.
- This has a capacity of 450 ml and is 15 x 12 x 4 cm.
- The wick supplies the plant with water.
- The system doesn't really work well for large plants, but it's sufficient for smaller ones.
Conclusion
With a little know-how, it is very easy to build your own plant watering system for balcony and potted plants. Only a little more material is required than with simple balcony planting and yet such an irrigation system achieves a lot more. Especially if you're often not at home and don't want to let your neighbors or friends do the watering while you're away, you can still create a beautiful, flowering balcony. And even those balconies that are on the south side of a house do not require any more work with the irrigation system. Here too, thanks to the irrigation system, watering doesn't have to be done as often despite longer exposure to sunlight.

