- Author admin [email protected].
- Public 2023-12-17 03:39.
- Last modified 2025-01-24 12:45.
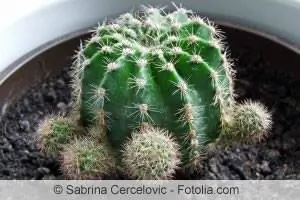
To maintain vitality, cacti move to fresh substrate every few years. For the prickly succulents in the bed, moving to a new location is sometimes an option. Proportional to the length of the thorns, hobby gardeners' respect for this measure increases. The following guide shows in practical terms how to properly repot and transplant cacti. Benefit from advice on useful tools, the ideal substrate, the perfect planter and more. Here are the 10 best tips for you.
Step-by-step instructions for proper repotting
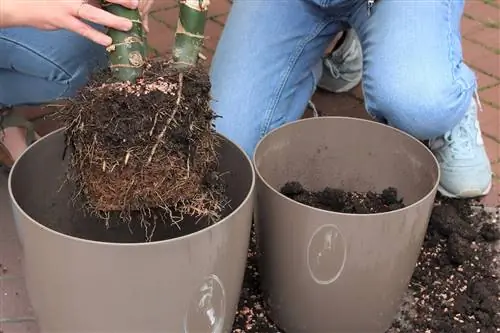
Once all the preparations have been completed, the actual repotting process goes quickly. You can do it in these steps:
- Fill in the substrate up to half the height of the pot
- Make a hollow in it with your fist or a piece of planting wood
- Place the potted cactus in the middle
- Surround with the remaining soil as high as the succulent stood so far
Press the potting soil from the side with a stick or your fingers so that no cavities are created that would hinder root growth. A thin layer of quartz gravel or expanded clay proves to be beneficial to prevent moss and algae.
Correct transplanting works like this
Ideally, you should first prepare the soil at the new location so that it takes on the recommended structure. The digging fork then loosens the surrounding soil around the cactus. Using a spade, separate the roots all around at a diameter corresponding to the growth height of the succulent. To lift the largely dry plant out of the ground, push the spade under the root ball. The prickly fellow is transported to its new place with the help of the wheelbarrow. Follow these steps here:
- Shake off the old soil or remove it from the ball with a root claw
- Dig a planting pit with twice the volume of the root ball
- Place the cactus in the middle and bury it just as deep as at the previous location
A mulching layer of decorative gravel or chippings keeps the soil warmer for longer and suppresses emerging weeds.
Tip:
Do not water cacti for a few days after repotting and transplanting
So that the battered succulent recovers, it should not be watered for the first time until after a week at the earliest. Cacti in pots should spend this time in a partially shaded place. The specimens in the bed are shaded with an umbrella in sunny weather.
Tip:
Break discarded clay pots and use them as drainage material
Protection against waterlogging in the form of drainage above the water outlet is not only useful for cacti. Before you dispose of an old clay pot in the trash, put it to good use in this way. Even if the vessel is destroyed, there could still be cunning fungal spores, tiny insect eggs or lurking viruses hiding in the pores or soil crumbs. Careful hobby gardeners therefore carefully clean the pot again before breaking it.
Tip:
The best time for repotting and transplanting is the months from March to May
Every move to a new planter or to a different location puts a strain on cacti. Immediately after hibernation, the stress level is at its lowest level. For the hardy succulents in the bed, a date when the ground has completely thawed is of course an option.
Tip:
It is easier to pot a cactus if the substrate is completely dry
The largely dry substrate also speaks in favor of a date in spring. Roots that have been established for years detach themselves from both the planter and the bed soil.
Tip:
Root claw, pricking rod or chopstick remove stuck potting soil
A cactus grows faster in fresh substrate the less the roots are hindered by old potting soil. A root claw from the toolbox for bonsai cultivation, a pricking stick or simply a Japanese chopstick serve as an aid. Experienced hobby gardeners take a close look at the exposed root ball in order to cut out any obviously diseased or rotten root strands with sharp, disinfected scissors.
Tip:
The ideal substrate consists of an organic-mineral mixture
A high-quality cactus soil offers the plant support, is easy to root through and is airy. If watering occurs after a long period of winter rest, the substrate should hold water for some time without causing waterlogging. As a result, succulents rely on a mixture that contains both organic and mineral components. The following combinations have proven to be very effective in practice:
- 60% commercial cactus soil + 20% lava granules + 20% pumice beads
- 30% peat growing medium + 30% mature compost + 20% pumice + 20% lava granules
The existing soil in the bed determines the extent to which additives are beneficial. In the starting position, the soil should already be clayey-sandy and not too moist. Compacted soil is optimized with quartz sand, perlite, pumice and peat. Explicitly sandy soil can be enriched with 3 to 4 year old compost, leaf mold, granulated cattle manure or clay. Potting soil from the supermarket is unsuitable for succulents because its high humus content causes masty growth with a risk of rot.
Tip:
Sterilize pot substrate in the oven or microwave before use
The manufacturer's promises, no matter how full-bodied they are, promise the sterile nature of a substrate. As long as there are organic components in it, disinfecting it yourself is still recommended. This is how it works:
- Pour the substrate into a fireproof bowl
- Put the lid on loosely
- Preheat the oven to 150 degrees Celsius
- Disinfect in it for 30 minutes and let it cool down
Alternatively, place the container in the microwave at 800 watts for 10 minutes. Now you can be sure that there are no more pathogens in the substrate.
Tip:
The pot diameter corresponds to a third of the plant height
Simply choosing the new planter a few centimeters larger by eye does not really meet the requirements of successful cactus care. You are on the safe side if you choose a pot whose diameter corresponds to a third of the plant height. If the succulent grows higher than 100 centimeters, the value drops to a quarter, but not less than a sixth. In addition, the shape of the pot takes root growth into account. Shallow-rooted plants feel more comfortable in wide bowls, while taprooted plants are happy with a deep pot.
Tip:
Drainage above the floor opening prevents waterlogging
While rain and irrigation water seeps away after a while in properly cultivated garden soil, cacti in planters are threatened by waterlogging. If the excess moisture cannot drain away, the water collects in the root ball. The root strands literally drown and the succulent can no longer be saved. You can effectively prevent this shortcoming with the help of drainage. Spread coarse-grained, inorganic material, such as crushed pottery shards, pebbles or grit, over the bottom opening in the pot. To prevent the soil crumbs from getting stuck in between, add an air- and water-permeable fleece between the drainage and the substrate.
Tip:
Thick work gloves, several layers of newspaper or polystyrene sheets protect against the thorns
The longer the thorns of a cactus, the greater the discomfort for the gardener. If you are even confronted with the glochidia on Opuntia, protective measures are essential. These thorns have barbs that are very painful to remove from the skin.
Conclusion
Cacti are among the most grateful ornamental plants in the home and garden. Without requiring extensive care, the succulents delight with the most amazing silhouettes and breathtaking flowers. In order for the prickly beauties to achieve this masterpiece for many years, regular replacement of the substrate gives them the necessary vitality. Thanks to this guide, you are now familiar with how to properly repot and transplant cacti. Browse through the 10 best tips to enable your thorny companions to move to a new planter or new location without stress.

