- Author admin [email protected].
- Public 2023-12-17 03:39.
- Last modified 2025-01-24 12:45.
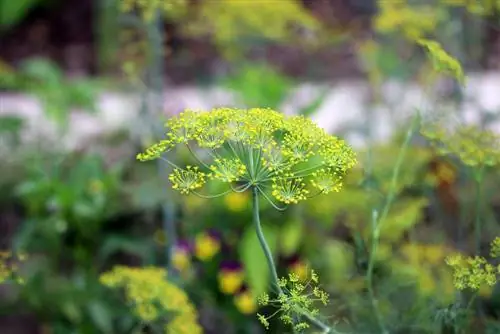
Many people only know dill from delicious dishes. The cucumber herb, as dill is also called, can do a lot more than just taste good. It deters a variety of pests, keeps the soil deeply loose and also looks decorative. What is not used in the kitchen after the harvest can definitely become part of a bouquet. The numerous advantages of growing dill in the garden do not come with a lot of maintenance effort. On the contrary.
Suitable varieties
As a popular herb, dill is now available in numerous varieties. However, not all of them are suitable for outdoor cultivation. However, the following are recommended:
- Dill Tetra
- Dill Bouquet
- Dill Dukat
- Dill Vierling
- Dill Hercules
However, it must be noted that these dill varieties are only suitable for annual cultivation.
Location
If dill is to be planted successfully, the most important thing is the right location. Above all, this must be sunny and warm for the cucumber herb. It also doesn't harm the yield if the planting site is protected from wind. Full sun, i.e. the south side, is particularly beneficial. East and west can also be suitable if they are not additionally shaded and have at least three hours of sunlight.
In addition, the space required should of course be taken into account when choosing the location. Although most dill varieties will only reach 20 to 30 centimeters in diameter, they can grow to 75 centimeters or higher. This can be problematic, especially in small beds with dense cultivation and significantly shorter but also sun-loving plants. The dimensions must therefore be taken into account when planning. Alternatively, it is advisable to choose a more compact and low variety of dill, such as potted dill Delikat. Although these are usually a little more sensitive, they can also be planted in the garden.
Substrate
When choosing the substrate, dill is quick and easy to satisfy. Fresh garden soil, balcony soil or herb soil can be used. In any case, it is important that the soil is loose and slightly calcareous. Substrate with an acidic pH value is therefore unfavorable.
Tip:
Whether the bed is suitable for growing dill or not can be determined by a simple test. Corresponding indicator strips can be found in stores.
Preparing for cultivation
If dill is grown directly in a bed outdoors, a little preparation is necessary. This is usually limited to loosening the earth by digging it up if necessary and, if necessary, adding some sand to it to improve water drainage. A small amount of well-rotted compost to enrich it with nutrients is also recommended. When it comes to preparing the seeds, the effort is even lower. These are simply rinsed well with cool water before sowing. However, pre-germinating outside the bed does not make sense. The reason for this is the sensitivity of the dill plant. In many cases, the cucumber herb does not tolerate pricking out, i.e. removing the weakest germs in order to promote the growth of the stronger ones, or only tolerates it poorly.
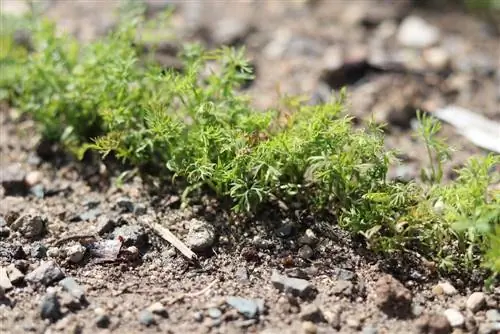
The subsequent planting or transplanting of this crop is also usually accompanied by some losses. It is therefore better to sow seeds directly in the bed and avoid pre-germination.
Planting
Growing dill is easy in itself. Nevertheless, when designing the bed and sowing, attention should be paid to the correct procedure and some crucial factors. The following instructions will help:
- The right time to sow dill outdoors is when frost is no longer expected and temperatures are consistently at least 15 °C. As a rule, you don't have to start before May or June.
- The bed is loosened up as described above and the soil is possibly mixed with sand and compost to create the ideal substrate.
- The seeds are soaked in cool water for a few minutes or rinsed thoroughly.
- The seeds are sown with two to three seeds per spot. A distance of 20 to 30 centimeters must be maintained within the row. There should be 50 centimeters of space between the rows for easy cultivation and harvesting.
- The seeds are planted about two centimeters deep or covered with an appropriate layer of soil.
- The soil is watered thoroughly so that the seeds can swell in the soil. Waterlogging should still be avoided.
It usually takes two to four weeks for germination, but the outside temperature must be at least 15 and a maximum of 30 °C and the soil must be kept continuously moist. Emerging weeds must also be removed promptly, as they can initially become threatening competition to the dill.
Tip:
Once the dill plants have reached a height of around ten centimeters, a layer of mulch should be spread on the bed. This prevents weeds from reappearing and keeps the soil moist for longer. The maintenance effort is reduced in two ways.
Plant neighbors and defense against pests
Dill gets along with almost every other plant. The exceptions are:
- Caraway
- Fenche
- cress
- Basil
- Potatoes
- sweetcorn
- Lilies
Dill can not only be planted next to a large number of other plants, it should be. The sweet yet spicy aroma of the cucumber herb keeps numerous pests away. Below:
- cabbage white butterfly
- Carrot fly
- Onion fly
- Snails
A neighborhood with plants that are particularly at risk from these parasites brings double benefits. The best way to do this is to plant dill between other species.
Tip:
The dill itself is quite susceptible to aphids, from which it suffers quickly and severely and which can make large parts of the crop unusable. If lavender is planted here and there among the dill, such a threat can be avoided.
Cultivation sequence
Dill is not only a bad neighbor to caraway and co., but also incompatible with itself. When growing dill, it is important to note that the location must be changed every year. A break of two years per bed is usually enough.
Pouring
The dill needs a lot of water and always slightly moist soil. However, it does not tolerate wet roots. Waterlogging should therefore never occur, but neither should a dried-out substrate. As already mentioned, a layer of mulch significantly reduces the amount of watering required. In addition, the dill is uncomplicated here as both hard and soft water can be used for watering.
Tip:
Water every now and then with pond water - as long as it is free of chemical additives. This measure is also light fertilization.
Fertilize
It is not necessary to fertilize the dill, although small amounts of well-rotted compost can be added. An additional supply of nutrients is recommended, especially if there are several sowings per season.
Harvest
The dill is ready to harvest when it measures at least twenty centimeters. The young, fresh tips are cut off and used.
Propagate
If the dill blooms and umbels form, you just have to wait for them to turn brown. At this point the umbels can be cut off and the seeds removed from them. If stored in a dark, dry and cool place, they will survive the winter without any problems. In complete contrast to dill plants, as they are annual and not frost hardy.
Dill used as an aroma miracle
- Your dill contains the most flavor when it is already flowering and you harvest it after a few days of sunshine.
- If you want to add dill to cooked dishes, add it at the very end so that its distinctive but delicate aroma does not suffer from long cooking.
- An excess of fresh dill can also be preserved very well in oil, or you can mix it into a strong dill butter, which you can enjoy in the next few days as a “herbal cure on your sandwich”.
- You can use too much dill to pickle a salmon (or a salmon trout or tuna or other firm-fleshed fish), in the classic “graved salmon” recipe, dill is one of the main ingredients.
Conclusion
Planting dill in the garden is very easy and has several advantages. Defense against pests, appearance and culinary enrichment can be achieved quickly and easily with dill plants - making the spicy herb ideal for all newcomers to plant cultivation.

