- Author admin [email protected].
- Public 2023-12-17 03:39.
- Last modified 2025-01-24 12:45.
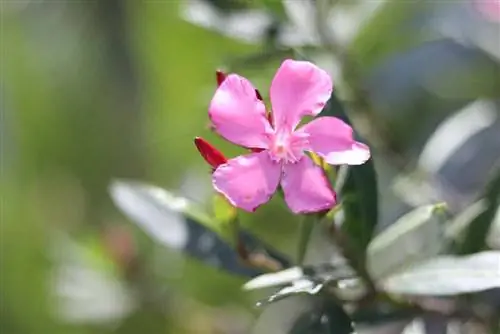
Oleander is also very popular in these latitudes. However, due to its limited winter hardiness, it is advisable to cultivate the flowering shrub in a container. So it can spend the summer on the terrace, balcony or in the garden with little care, and over the winter the plant can be placed in a container in a protected place.
Care
The oleander is quite easy to care for if it is given the right conditions and is a grateful plant that rewards this with abundant flowering throughout the summer months.
Location
Due to its origins in the Mediterranean region, the oleander is used to the blazing sun and therefore wants a location in full sun on the terrace, balcony or in the garden. But the plant also copes well with a bright location in partial shade. It is ideal if the oleander is protected from the rain under a eaves. The following locations are ideal for the decorative plant:
- in the front garden next to the front door
- on a sunny, covered terrace
- on a south-facing balcony, which also has a roof
- in the garden in a sunny corner
- bright, frost-free place in winter
- Hallway or winter garden are suitable
- slowly get used to the sun after winter quarters
- Part shade is ideal for the first few weeks
Tip:
Due to the ice saints, the move from the winter quarters should not take place until mid-May, when night frosts are no longer expected.
Substrate & Soil
The oleander has a high nutrient requirement and therefore the commercially available potting soil is well suited for potted plants. Garden soil mixed with compost is also ideal for the decorative plant to thrive. The soil should also be quite calcareous.
Fertilize
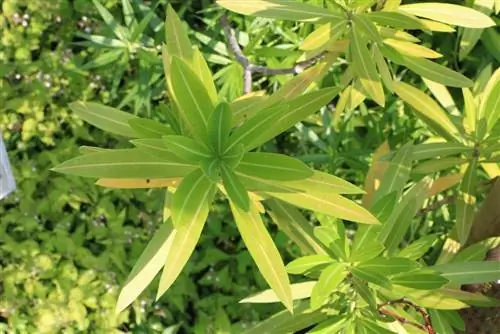
Oleander needs a lot of fertilizer to show its beautiful flowers in all their glory in summer. It therefore makes sense to start fertilizing in early spring, when it is still in winter quarters. The following fertilizers are well suited for the plant:
- Liquid fertilizer for flowering plants
- fertilize every two to three weeks
- give with the irrigation water
- is particularly suitable for plants grown in pots
- Long-term fertilizer for flowering plants
- use sticks that are simply stuck into the ground
- these release fertilizer regularly
- pay attention to the manufacturer's instructions for replacement
- add lime regularly
- from autumn before moving to winter quarters, stop fertilizing
Of course, compost is also suitable for fertilizing oleander, but if it has been cultivated in a bucket, then adding compost as fertilizer is not that easy. But when repotting regularly, compost can also be mixed in with the fresh soil.
Tip:
The oleander likes it calcareous. Lime should therefore be mixed into the soil regularly. It is also helpful to water with hard water. Therefore, with this plant you should avoid collecting rainwater, which usually contains little to no lime.
Pouring
During its main growing season in summer, the oleander needs a lot of water. Plants that have been grown in pots and are left in the blazing sun dry out more quickly than potted plants in the shade or plants in the garden bed. It is therefore important that the plant receives plenty of water, especially in the hot months. To do this, you should proceed as follows:
- during high heat, water in the morning and evening
- Water can also remain in the collecting plate
- water every two to three days in spring and autumn
- always from below directly to the roots
Tip:
If potted plants have a place under a roof, but also without protection from above, they do not receive enough water when it rains. Because the rainwater often doesn't reach the soil in the bucket. Therefore, the oleander plants in the pot must also be checked for sufficient water and moist soil during a rainy period and, if necessary, watered.
Plants
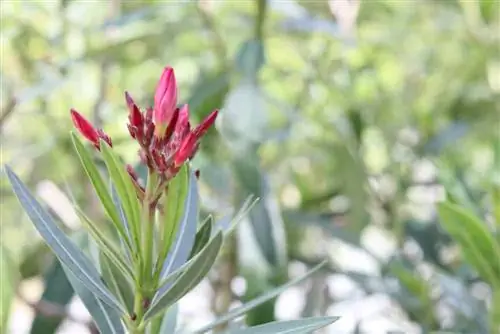
Ideally, the oleander is cultivated in a bucket due to its limited winter hardiness. The size of the container is chosen depending on the size of the plant. Then proceed as follows:
- Create drainage
- to do this, place pebbles or expanded clay on the drain hole
- Put up plant fleece
- Fill half of the potting soil or garden soil with compost
- Insert oleander
- fill in the remaining soil and press down well
- water enough
- Put the bucket in the desired location
Tip:
An oleander cultivated in a pot can be planted at any time. However, spring is still the best time for this.
Cutting
The oleander should only be cut a little and very carefully. Because the new flowers for next year are formed before overwintering. If all the shoots are removed, the plant will sprout again next year, but it will not produce any flowers. Therefore, you should pay attention to the following when cutting so that the plant is in full bloom again every year:
- Carefully pick off the faded flowers
- this promotes the formation of new flowers
- only cut if the oleander is out of shape
- make a cut immediately after the first flowering
- cut a few shoots directly above the ground base every year
- this is how the oleander grows nice and dense
- never make a radical cut in autumn
- use sharp pruning shears or saw
- Always disinfect tools
When cutting the oleander, but also when picking off the withered flowers, it is advisable to protect your hands with gloves and to wear long clothing. Because the plant is poisonous in all parts and sap can escape when pruned, which should be avoided from touching the skin.
Tip:
The tools used should always be sharp and disinfected. To do this, clean the scissors or saw well and disinfect them with pure alcohol from the pharmacy. If the cutting tool is unclean or unclear, bacteria or viruses can more easily penetrate the plant and damage it overall.
Propagate
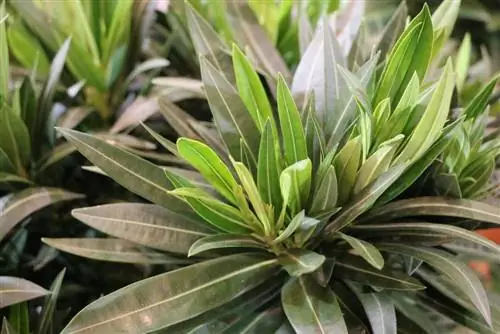
Oleander can easily be propagated from cuttings. The shoots cut after flowering can be used for this purpose. When using cuttings, you should proceed as follows:
- remove lower leaves
- place in a glass with water
- place in a warm and bright place
- Avoid full sun exposure
- after a while roots form
- then plant in pots
- from autumn onwards in a bright, cool, frost-free room
- do not place in the blazing sun in spring
- fertilize and water regularly from spring onwards
If you grow an oleander from cuttings, you can expect the fast-growing plant to bloom densely after two to three years.
Tip:
With a young oleander plant from a cutting, care should be taken in the first year that it is not exposed to the first night frosts in autumn.
Wintering
The oleander is only partially hardy, which means that the plant can tolerate light frost, but should be better protected in the local latitudes. The shoots are particularly at risk when it gets cold. If these die due to frost, the plant will sprout again the next year, but there will be no flowering because the buds form on the shoots before winter. Therefore, the oleander should be overwintered as follows:
- the evergreen plant needs a bright location
- this one shouldn't be too warm in winter
- A corner in the heated living room is therefore not suitable
- a bright hallway or staircase is ideal
- also suitable for an unheated winter garden
- Oleander is also decorative in winter because of its leaves
- change before the first frost in autumn
- check for pests before moving in
- remove old flowers
- water only moderately in winter quarters
In winter, cool temperatures of up to 15° Celsius are ideal for the plant. The darker the room, the cooler the temperatures can be. However, ideal overwintering temperatures are between 2° and 10° Celsius, otherwise there is a risk that the plant will be attacked by scale insects.
Tip:
If you can't find a suitable place for winter quarters, you can also place the pot on Styrofoam, wrap the entire plant and pot in plant fleece and place it in a protected corner on the terrace or balcony. The oleander can also survive light frosts down to -5° Celsius unprotected.
Repotting
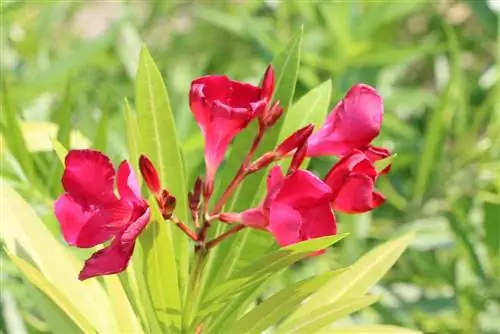
The oleander should be repotted regularly, at least every two to three years. This is not only due to its growth in size, but in this way the plant in the pot also receives fresh substrate. The ideal time to repot is when the plant moves back outside from its winter quarters. When repotting, the following should be noted:
- choose a new, slightly larger planter
- Carefully remove the oleander from the old bucket
- prepare new pot with drainage
- fill half of fresh soil
- Freeing roots from old soil
- Dip the root ball briefly into water
- then put it in a new bucket
- fill in the remaining soil and press down
- water adequately
Tip:
Depending on how big the plant is, it is helpful to have two people do the work. This means one person can hold the pot while the other carefully removes the plant. Gloves and long clothing should also be worn during this work due to the toxicity of the plant.
Care errors, diseases or pests
Unfortunately there are also some mistakes in care that could harm the oleander. It can suffer from a lack of lime, which is indicated by pale leaves. But these also arise when too little fertilizer is given and the plant lacks nutrients. However, if the leaves turn yellow and fall off in summer, then there is no reason to worry, as this is the natural shedding of leaves when the leaves change. Brown edges on the edge of the leaf appear when the oleander is in the blazing sun in the spring immediately after overwintering. But here too, new leaves grow back quickly. The following pests are known:
- is often attacked by scale insects
- especially in winter quarters
- check regularly for insects
- wash off if infested
- possibly change location
- Use insecticides

