- Author admin caroline@plants-knowledge.com.
- Public 2023-12-17 03:39.
- Last modified 2025-01-24 12:45.
Cucumis - the cucumber - is, along with zucchini, one of the most popular representatives of the pumpkin family. The elongated fruits have many uses and impress with their taste and ingredients. They thrive particularly well when they are optimally supplied with light, air and water. The first two factors can be easily accomplished with the help of a trellis. With our instructions you can build it in no time.
Many ways to find a suitable cucumber trellis
From general considerations to practical implementation: There is certainly no one, universal trellis. Instead, a few variants have emerged that come into question depending on the space available and the number of plants. But first let’s take a look at the materials required. These should be able to safely last a season and meet the requirements in terms of surface and load-bearing capacity:
- Well suited: rough-sawn wooden slats, round sticks with bark, peeled, unplaned sticks, bamboo
- Less suitable: Metal pipes, plastic (due to aging in UV light)
- Well-suited lanyards: Garden raffia, hand string, stainless wire, stainless screws etc.
- Less suitable: non-stainless wire / nails (due to loss of integrity when rusting), plastic cord (due to dissolution under UV radiation from the sun)
Now we move on to the possible construction methods to enable the cucumber tendrils to rise safely:
tension ropes
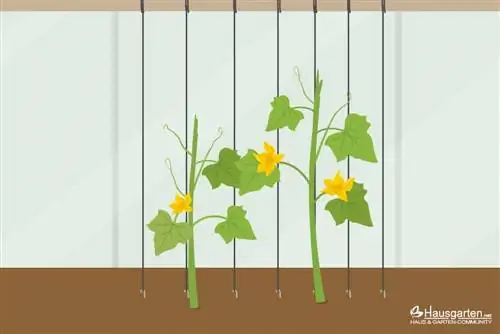
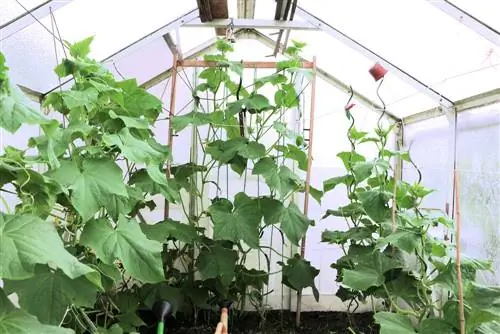
Certainly one of the easiest variants for a cucumber trellis is to set up simple tension ropes. However, these can only be built without further effort if a greenhouse offers the necessary support structure. It is important that the greenhouse is built so robustly that it can support not only its own weight but also the load of the plant and its fruits.
Material
- Garden raffia or tear-resistant garden twine
- Herring
- ALTERNATIVE: stones or other weights
Work steps
- Attach string over cucumber plants to greenhouse roof, e.g. to supports
- Run the cord vertically to the ground
- Fix the lower end of the line to the ground with a peg
- ALTERNATIVE: Secure the position of the tension cord with weight on the floor
Tip:
If, for example, you still have an old tent pole, you can implement this variant with tension ropes as structural support even without your own greenhouse.
Place the tent poles over the outdoor plants and stretch the cords between the ground and the roof poles as described. It is important that the pole has a sufficient height of at least 1, 80 to 2, 00 meters.
Free-standing trellis
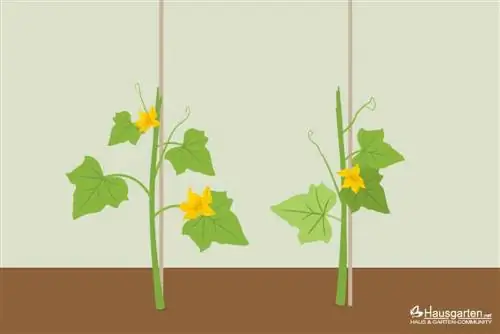
The simplest free-standing form of a climbing aid is the free-standing version. Simple and quick to implement, it compensates for the fact that each cucumber trellis is only suitable for one cucumber tendril by being easy to implement in large quantities.
Material
Round rod, square bar or similar, diameter at least 2 to 3 centimeters, length approximately 2.00 meters
Work steps
- Position the rod approx. 15 centimeters to the side of the plant
- Align vertically
- Drive at least 20 to 30 centimeters deep into the ground
The Rank “Tipi”
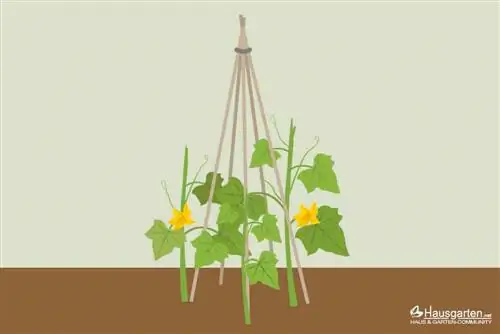
As a three-dimensional alternative to the classic cucumber trellis, the trellis “teepee” offers the opportunity to ideally cover large plantings. Because of its round shape that converges at the top, this variant is also known as a conical trellis. One of its advantages is that the slope inside the trellis allows the cucumbers to hang freely while the tendrils climb upwards.
Material
- Garden twine or wire
- Four to six wooden poles, at least 2 centimeters thick, each about 2 meters long
Work steps
- Place the rods in a circle in the ground and tilt the upper ends towards the middle
- Diameter depending on rod length 0.60 to 1.00 meters
- Cross the poles and tie them together tightly with wire or string
- Place plants in a circle around the poles
Tip:
As an additional climbing aid, especially if the trellis is large, horizontal cross connections can be easily created using garden cord. There the tendrils find additional support and can grow over the entire surface of the teepee.
Free-standing tension grids
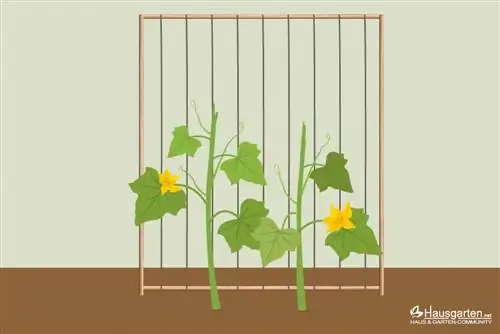
The free-standing tension trellis comes very close to the “ideal image” of a classic trellis. A solid frame provides the support structure for tension cords and defines the width and height of the vegetation.
Material
- 4 wooden slats, at least 3×3 centimeters, length 1.50 to 2.00 meters
- 4 wood screws
- OPTIONAL: cordless screwdriver with wood drill
- Garden twine
Work steps
- Screw the slats into a rectangular frame
- OPTIONAL: Pre-drill screw holes to prevent the wood from tearing out when screwing
- Let vertical slats protrude 50 centimeters on one side
- Stretch the garden cord vertically between horizontal slats at a distance of around 30 centimeters
- Drive the frame with protruding slat ends into the ground at a distance of approx. 15 centimeters from the planting row
Rank-Bock
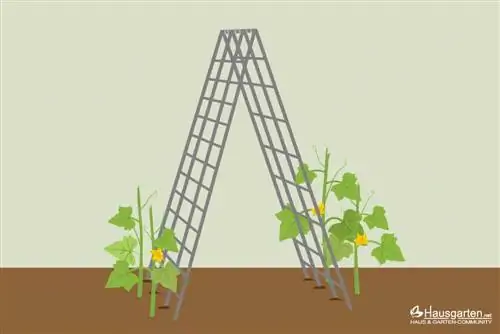
The trellis trestle represents a linear form of the conical trellis. Two inclined trellises complement each other to form a kind of roof shape that can be covered with vegetation on both sides. The fruits, on the other hand, can hang vertically downwards and can ripen inside the trellis with good ventilation and thus protected from mold.
- made of structural steel mesh or other wire mesh
- Distance approx. 1.5 x height, lean against each other and connect at the top
Material
- 2 structural steel meshes, each approx. 2, 00 x 2, 00 meters
- ALTERNATIVE: other stable wire mesh, mesh size at least 3 x 3 centimeters
- Wire
Work steps
- Press the lower edge of the grid mats into the ground, lean the upper edges against each other
- Distance at base 0.7 to 1.0 x height
- Connect grid with wire
- Place cucumber plants outside the trellis, about 15 centimeters apart
Tip:
Instead of finished steel mats, the mesh trellises already described can of course be used and leaned against each other. However, tension cords tend to sag with this arrangement, so a steep angle of attack for the frame should be chosen.
Net trellis
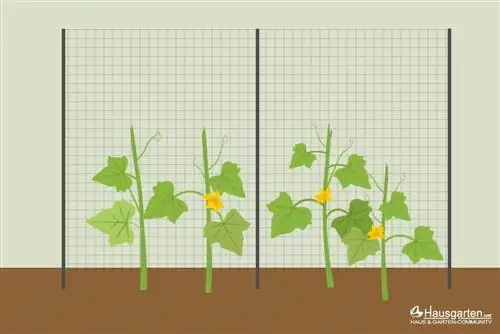
A good method of combining seasonally required trellises with a permanent basic structure is the net trellis. Support posts that can be used over several years are combined with a net that is removed along with the plants at the end of the cucumber harvest.
Material
- 2 or more poles made of wood or metal, length approx. 2.00 meters, thickness depending on the material 4 to 5 centimeters
- Net made of rope or cord, mesh size at least 3 centimeters, maximum 30 centimeters
- Cord or wire for fastening
- OPTIONAL: Lean concrete, e.g. dry concrete as ready-made bagged goods
Work steps
- Drive poles into the ground at least 30 to 50 centimeters deep at a maximum distance of 2 meters
- OPTIONAL: Concrete the bars with lean concrete (if used for several years), ideally choose metal bars
- Add additional pole fields depending on the trellis length
- Stretch the net between poles and secure with string or wire
- Planting cucumber plants next to net hem
Classic trellis
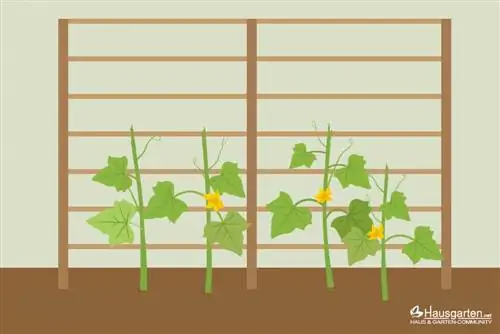
This is a more solid version of the net trellis already described. However, an identical basic construction does not support a net, but rather rods or slats as a stable and durable alternative.
Material
- 2 or more metal or wooden rods, length 2.00 meters, thickness around 4 to 5 centimeters
- Wooden slats, approx. 2 x 3 centimeters, 1.50 to 2.00 meters long
- Screws, wire or cord for fastening
- OPTIONAL: lean concrete
Work steps
- Drive in the post like variant 6 or set in concrete
- Attach crossbars at a maximum distance of 0.30 meters
- Select the lowest distance approx. 0.50 meters from the ground
- Placing plants under a row of trellises
ATTENTION:
The greater the distance between the crossbars, the sooner the individual cucumber tendrils of the appropriate length have to be fixed manually to the next higher wood, e.g. using garden string.
Miniature trellis for plant pots
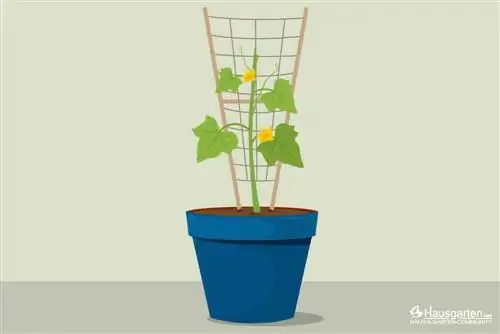
The miniature V-shaped trellis is particularly suitable for cucumbers in planters. It takes up little space and has enough support here too.
Material
- 2 wooden sticks, approx. 1, 50 meters long, at least 2 to 3 centimeters thick
- Garden twine
- OPTIONAL: slats or round bars, at least 1 to 2 centimeters thick
Work steps
- Press the rods diagonally into the ground on the side of the cucumber plant, at least 20 centimeters deep
- Stretch the cord horizontally between the rods, spacing approx. 20 centimeters
- OPTIONAL: tie or screw a wooden stick directly above the ground and at the top end crosswise
- Then tie vertical tension ropes between wooden sticks, sideways. Distances approx. 20 centimeters

