- Author admin [email protected].
- Public 2023-12-17 03:39.
- Last modified 2025-01-24 12:45.
Strictly speaking, seven different subspecies are referred to as plum trees, but they all have to be pruned in the same way in order to produce a rich yield. The plum tree only bears fruit on wood that is two to five years old. Accordingly, the cutting must be done promptly and regularly. Interested hobby gardeners will find out below how to proceed and what needs to be taken into account.
Planting
The first important step for a rich yield and a he althy plum tree is the right time to plant. Regardless of the subspecies, plum trees can be planted outdoors in autumn or spring. In any case, it is important to choose a frost-free day. Depending on the region and climate, planting can take place from March to May or in October.
The tree disc should be protected so that the negative effects of subzero temperatures can be kept to a minimum. Brushwood, straw and garden fleece are suitable for this. The selected materials can be placed directly on the tree disc and should cover the lowest part of the tree trunk. In areas with a rather harsh climate, it is also recommended to wrap at least the tree trunk with fleece to avoid frost damage.
First blend
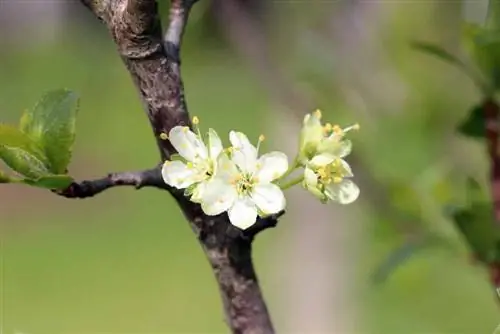
Regardless of whether the plum tree was planted in spring or autumn, the first cutting should not be done until the following spring. This first shortening is also known as a training cut and is used to make the crown as he althy and airy as possible. On the one hand, this measure makes it possible to achieve a high yield. On the other hand, illnesses and unnecessary energy losses should be avoided. In order to achieve these goals, the following steps must be taken into account:
- Select a strong central shoot that runs vertically and mark it if necessary.
- Choose four to five strong side shoots that are as horizontal or diagonal as possible and are at an approximately even distance from the central shoot and each other. If necessary, these shoots should also be marked. Ribbons or colored chalk, for example, are recommended for this.
- Other central shoots and side shoots are cut off as close as possible to the trunk.
- The marked shoots are each shortened by a third of their length. For the side shoots, it is ideal if they are shortened to one eye pointing outwards. The so-called training pruning does not take place directly after planting, but prepares the plum tree optimally for yield. He makes the crown airy and light. However, the first harvest can only be expected from the second year onwards.
Educational Cut
The four side shoots and the one central shoot that are left standing during the first cutting are the so-called leading shoots. From these, further shoots develop, which are initially green and become woody over the first one to two years. To ensure that the crown does not become too dense due to this development, it must be pruned annually. This involves thinning the crown, which has several advantages:
- Sunlight can reach the fruit directly and ensure rapid ripening
- Preventing plum tree diseases
- Fruits ripen in larger quantities than fall off unripe
- Damage to the plum tree caused by too much weight or too narrow growth can be prevented
- baldness is avoided
- the yield is continuously maintained
In addition, the tree becomes less susceptible to weather-related damage because there is less surface to attack, for example snow. In order for these advantages to arise, appropriate steps must be followed during maintenance pruning. The following instructions show what steps are involved:
Identify competitive instincts
Green shoots that run towards the central shoot are shortened. They should each be cut to about ten centimeters long. Otherwise the crown will be too dense.
Remove competing shoots on the side shoots
The number and length of newly growing shoots should also be reduced on the side shoots. About eight additional fruit-bearing shoots per side shoot are ideal. The shoots should point outwards and not grow inwards.
Other shoots
All other shoots are shortened as close as possible to the trunk or the leading shoots. They should each be no more than ten centimeters long.
Conservation cut
If regular pruning was carried out during the first few years, the plum trees will already have the correct shape and the crown will be optimally designed. As a result, it is only necessary to carry out a so-called maintenance cut. Only the shoots that are removed are:
- growing inward or crossing with other twigs and branches
- hanging or damaged
- grow steeply upwards
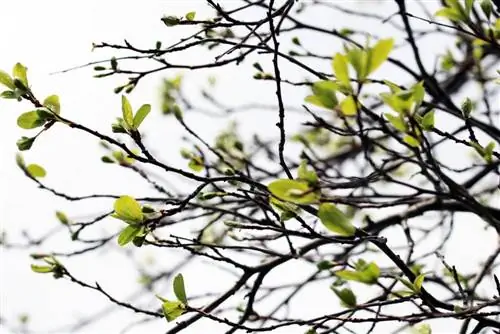
In addition, the leading shoots are shortened by a quarter or third. This means the plum tree retains its shape and the yield remains high.
Rejuvenation cut
Rejuvenation pruning is not necessary if the plum trees are pruned regularly and an initial trimming has been made as a basis. However, when taking over a property or garden or if pruning has been neglected, such radical cutting back may well become necessary. Our instructions show how to do it:
- All shoots that grow steeply upwards are removed.
- All shoots that cross each other and grow inwards are shortened to ten centimeters in length.
- A central leading shoot and four to five side shoots are selected and only shortened by a third each.
- Young shoots on the leading shoots are cut off except for the eight strongest ones.
- When pruning, care should be taken to ensure that young, fruit-bearing shoots are retained. Aged branches should therefore only be shortened to such an extent that the young side shoots are retained and a lush but still light crown can be created again.
- One to two years after the first rejuvenation cut, all protruding remains of the branches can also be removed. Due to the original shortening, the residue dries up and removal is more gentle.
Tip:
In order not to overload the plum, the rejuvenation cut should be divided into several uses. This creates fewer interfaces and reduces the risk of disease, parasite infestation and damage. In addition, the tree can be fertilized to increase growth and yield.
Times at a glance
So that pruning results in a he althy and strong tree, the appropriate times for the respective pruning measures should be taken into account. Because even when the pruning takes place has a decisive influence on the plum.
SpringIn the first spring after planting the plum tree, the first cutting is also carried out. It is important that frost is no longer expected. The interfaces or wounds of the tree react very sensitively to frost. In addition, the risk of fungal diseases in plums increases.
May to SeptemberCutting young, green and not yet woody shoots can be done from late spring to the end of summer. The advantage of these ongoing corrections is that the cut surfaces on the tree are very small and therefore dry and close more quickly. This means that the risk of invading germs and parasites can be kept to a minimum. -After the harvest: Immediately after the plums have been harvested, the time is right for rejuvenation pruning. Old and senescent shoots are removed, as are steep-growing shoots and branches that grow inwards or cross each other. To ensure that the tree is not weakened too much, the rejuvenation cut should be carried out over several weeks.
Annually in spring or autumnThe initial training cut is best done in the spring of the first year of growth. Once the desired crown shape has been achieved, all that is needed is the so-called maintenance cut. This can be done both in spring and autumn. It is again important that a frost-free period is chosen. If the cutting is missed in the fall, it is better to do it in the spring when sub-zero temperatures are no longer expected.
Basic rules of blending
In order to prune the plum without causing any damage, a few basic rules must be observed. These include, among others:
Use clean toolsIn order not to transmit diseases or parasites, the cutting tool should be thoroughly cleaned before and after use and, if possible, disinfected.
Use sharp cutting toolsSo that the interfaces on the trees dry quickly and do not represent entry points for pathogens or parasites, the sharpest possible cutting tools must be used. This applies to both scissors and saws.
Use markingsMarkings can be used to ensure that the correct shoots are shortened. Colored signs can be made using ribbons or chalk, which can also help with the selection of leading shoots. Setting markings is particularly useful if the plum trees have not been pruned for several years.
Pruning in good weatherDue to the susceptibility of the cut surfaces to frost, cutting may only be done on frost-free days. In addition, dry and warm days should be chosen and the cutting is best done in the morning. This allows the cut surfaces to dry and close faster and better. This can reduce the risk of illness and damage.

