- Author admin caroline@plants-knowledge.com.
- Public 2023-12-17 03:39.
- Last modified 2025-01-24 12:45.
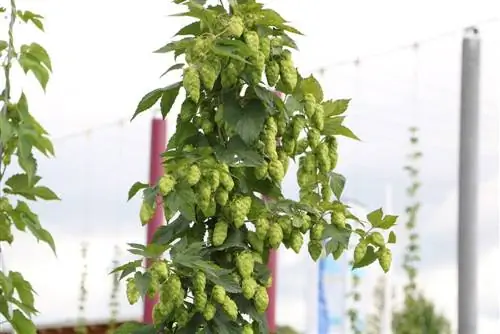
In the wild, hops are usually found in damp forests or near river banks and streams. However, the popular perennial can also be easily cultivated in the home garden and even on the balcony. A green thumb is not necessarily required for this, as the plant is considered relatively easy to care for. However, if you want to get the most out of your hop harvest, you should consider these 11 tips!
Choose the right variety
The large selection of different hop varieties makes it possible to always choose the right variety. On the one hand, the taste and the processing purpose of the hops obviously play an important role. Because hops can taste both fruity-sweet and herbal-earthy. But the available space should also be taken into account when choosing the variety. Because hops are extremely fast-growing and grow accordingly. So-called “dwarf varieties”, such as the “Gimmli” variety, are recommended for cultivation on the balcony.
Finding the optimal location
Hops can be cultivated both in the bed and in the pot on the balcony. Regardless of this, it should always be taken into account that the perennial grows very easily - in all directions. Both the shoots and the roots require an enormous amount of space, so they tend to overgrow other plants. However, in order for the hops to grow and thrive extensively, the location must meet the following requirements:
- Sunny location possible
- lots of sun is important for fruit production
- However, partial shade is also tolerated
- neither too dry nor too wet
Tip:
Thanks to its sprawling growth, hops are ideal as a shade provider or privacy screen on the terrace. However, only until winter, because then it retreats into the ground to hibernate.
Provide the perfect surface
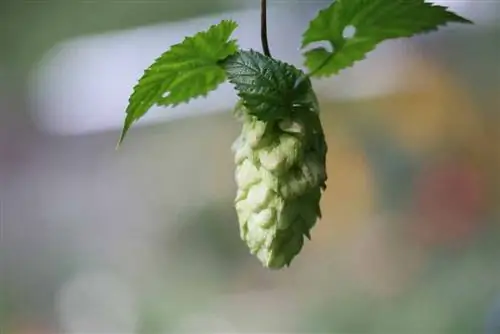
Hops are considered easy to care for, but have special requirements for the soil. If the perennial is cultivated in a pot, high-quality potting soil is recommended. This is comparatively a little more expensive, but the purchase price is worth it. Because the substrate meets the optimal requirements for growing hops. In general, the perennial feels most comfortable when the soil has the following characteristics:
- nutritious and fluffy
- profound
- nitrogen-rich
- pH value: 6.5-7.5
- sandy loam or loamy sand
Plant at the best possible time
There is generally no specific date for planting hops. Because the perennial can be planted in both spring and autumn. The best time to plant hops usually depends on their age:
- older specimens: from the end of March
- unwooden young plants: from May
- Autumn: end of September to November
Use the trellis directly when planting
Hops are extremely fast-growing, which is why the shoots often reach a length of several meters. It is therefore advisable to support the shoots and provide the perennial with a climbing aid. Ideally, the trellis is used when planting, as this could damage the roots later. You should also pay attention to the following:
- Trail made of wire or rope
- but also wood or iron possible
- Trellis or scaffolding
- thread strong shoots around climbing aid from May
- always clockwise
- repeat regularly until harvest
Note:
Hops are so-called “right-winders,” which means that their shoots wind clockwise. In order not to confuse the perennial, the direction should always be maintained.
Always supply hops with water and nutrients
The rapid growth of hops means that the perennial is extremely hungry. On the one hand, it wants to be watered as regularly as possible so that the soil is always moist. However, waterlogging must be avoided at all costs. On the other hand, the plant needs sufficient nutrients to grow. That's why the hops are not only watered regularly, but also fertilized:
- incorporate compost or animal manure in spring
- fertilize once a week from early summer
- until flowering occurs
- the longer the shoots, the more frequently fertilize and water
Promote height growth with pruning
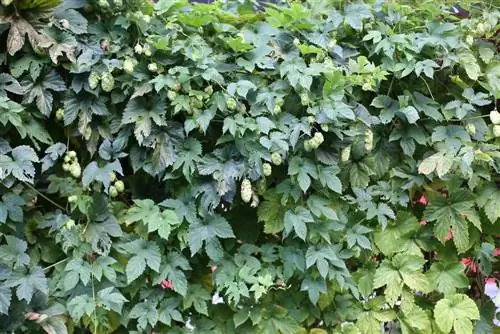
If the perennial is not cut, it will literally grow in all directions. However, this can be prevented with targeted pruning and at the same time promote height growth. The best way to cut the hops is as follows:
- tie up 3-4 strong shoots during growth
- let these grow and climb
- cut remaining tendrils close to the ground
Tip:
It is better not to cut the tendrils close to the ground before winter, but rather to just shorten them to a length of 50-80 cm. This allows the remaining nutrients from the shoots to migrate into the rhizomes.
Protect hops from pests and diseases
Hops are relatively susceptible to powdery mildew, which is also known as the “fair weather fungus”. Powdery mildew can be recognized by a white, flour-like coating on the leaves. There is no chemical remedy for this, but a mixture of milk and water has proven to be effective against it. This home remedy is also suitable for fighting aphids. Alternatively, the pests can also be combated with the following home remedies:
- Use natural enemies, for example ladybugs
- Mixture of 5L water and 90 ml rapeseed oil
- mix some dishwashing liquid into the water
Identifying and harvesting ripe hop cones
The harvest time for hops is from the end of August to mid-September. However, it is not possible to tell at first glance whether the hop cones are ripe. In order to determine the degree of ripeness of the cones, they must be opened. In ripe specimens there is a kind of yellowish powder inside, called “lupullin”. Once the first hop cones are ripe, harvesting can begin. The hop cones are usually picked by hand, paying attention to the following:
- harvest on a dry day
- harvest green cones
- It's best if they are still tightly closed
- Carefully cut off the umbels
- don't hurt them in the process
Tip:
Ideally, it hasn't rained in the days before the harvest date, so the hop cones are as dry as possible. The drier the fruits are, the quicker they can be processed.
Drying hop cones
The hop cones last longest when dried. It is therefore advisable to dry them after harvesting. There are two different methods for this: Firstly, the hop cones can be dried in the oven. The cones will lie on a rack and stay in the oven at 80 degrees for about an hour or two. An alternative to this is air drying, in which both individual hop cones and entire branches can be dried.
- place individual cones on a sieve
- Removing leaves from branches
- hang upside down
- in a dark, warm and dry place
Note:
Darkness is important to maintain the green color of the hop cones. If these are dried in sunlight, they turn red-brown.
Make tea from hop cones
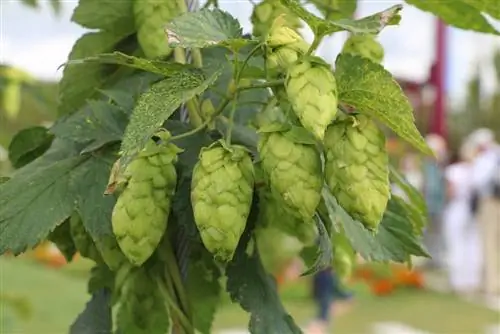
Most people are probably familiar with hops in connection with beer. However, hop cones are also used in the medical field. The ingredient lupulin has a calming effect and is therefore often found in medical products. But a tea made from hop cones can also provide relaxation and even alleviate sleep disorders. The tea is also quick and easy to make:
- about 1-2 teaspoons of hop cones
- pour around 150 milliliters of hot water over them
- Cover container
- let it steep for about 10-15 minutes
- Drain the tea and sweeten if necessary
Note:
It's best to always drink tea fresh!

