- Author admin caroline@plants-knowledge.com.
- Public 2023-12-17 03:39.
- Last modified 2025-06-01 06:48.
If you've never tried it, you think cleaning paving stones and concrete paving is the easiest thing in the world. After all, if it's stone, what could happen to it - but concrete is a complex composite material that can suffer from harsh cleaning agents. If you spend a little time with the material, you can remove (almost) any stain without leaving any marks on the concrete pavement:
Concrete
- only almost as insensitive as stone -
Concrete is hard as stone, but is still a man-made composite material made up of a surprising number of different components:
The binding agent is cement - it ensures that the concrete components "stick" together when mixed (similar to egg and the "flour glue" gluten cake dough), and it ensures that this mixture becomes rock hard. Cement basically consists of limestone and clay, which is usually accompanied by quartz sand and iron rock; During grinding after sintering, depending on the type of cement, ash, gypsum, sand and limestone are added. To turn cement into concrete, aggregate, water and various additives are added to give the concrete certain properties.
That's why concrete paving is not easy to clean; Therefore, if in doubt, you should always clean with water first before using harsh cleaning agents.
Tip:
For sealing paving stones, products called stone coating, stone impregnation, stone sealant, etc. are offered, which can contain all sorts of chemical compounds. The situation is similar with concrete paving stones, which are advertised as having special properties; Here the chemical compounds are added to the concrete when it is mixed. Such paving stones can usually also be cleaned using the gentle and environmentally friendly methods presented below; but no one can guarantee you that the sealant or a special concrete additive will not react with cleaning products that also contain chemical compounds in some concentration. Therefore, you should always follow the manufacturer's cleaning instructions carefully or only use the products specified there if the stains cannot be easily removed with water.
Remove stains on clean paving stones
White spots
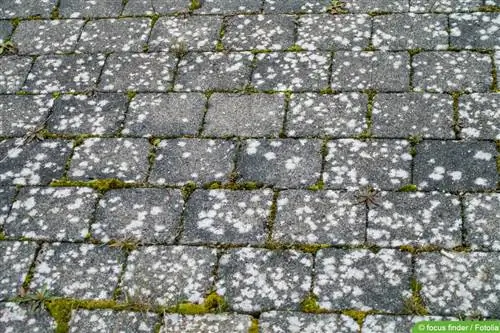
If the white spots disappear when scrubbing or carving, minerals crystallize out of the concrete mass; This is neither unusual nor a defect with freshly produced concrete blocks. When moisture rises from inside the concrete mass, it takes individual mineral molecules with it to the surface of the rock that the cement binding agent “did not catch”. At some point all of the “loners” have reached the surface, and the efflorescence disappears over time due to the effects of the weather. What is normal doesn't actually need to be cleaned up; Only if the efflorescence persists for months would an expert have to clarify whether the concrete mix was incorrect.
If you don't want to wait for the concrete to develop its final structure, you can address the efflorescence with water and cement film remover, emphasis on water. Don't be tempted to follow the common recommendations for using an acidic cleaner.
If the white spots appear on the garage floor, road s alt may have been dragged into the garage in the winter. This disappears by wiping with plenty of water and cleaning with a low-acid stone basic cleaner.
Bright spots
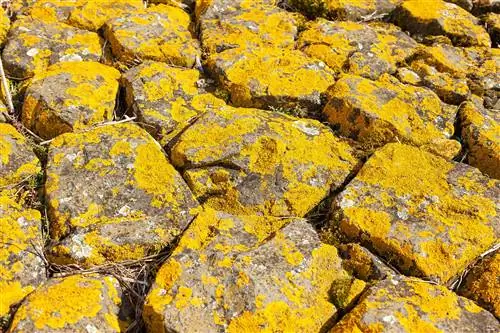
Light spots are usually caused by lichens that colonize the paving stones. Actually a reason to be happy because the lichens are an indicator of clean air. If you can't live with this natural phenomenon, you have a little program ahead of you, as these are permanent algae-fungal communities that stubbornly penetrate the porous concrete block and are difficult to remove.
You can scrub the organisms from the surface of the paving stones or use a high-pressure cleaner, but this only removes the visible parts of the lichen; the spores remain in the stone and provide offspring. The rough treatment often makes the surface a little rougher, so that the lichen and dirt can adhere better. If you attack the lichens with fungicides, you would have to saturate the entire stone with the poison; In this case, the paving stones should not be in places that are frequently walked by people or other living beings. To remove lichen with acid, what was said under 1 applies. If you want to get rid of lichen, you would also have to empty the joints, treat them and later fill them with an impermeable material, which could turn the pavement into a sealed area from a sewage perspective and incur sewage charges.
Only (Mellerud) s altpeter remover should have a good effect against lichen if you subject the area to “enormous mechanical rework” (quote from Mellerud guide): Wet the plaster surface thoroughly with water, use s altpeter remover (1 part cleaner, 5 Apply some water), let it take effect for 5-10 minutes, work the area vigorously with the scrubber and rinse with plenty of water. Large areas should be worked on by several people or in sections; the concrete paving area should first be checked for product compatibility in an inconspicuous area.
Grease stains
Grease stains “happen” much more often on concrete floors in the house or in ancillary rooms (garage with screed floor) than on the paving stones in the garden area; They are therefore discussed in more detail in the article “Stone cleaner for walls, walls and stairs - cleaning concrete correctly”.
Reddish spots
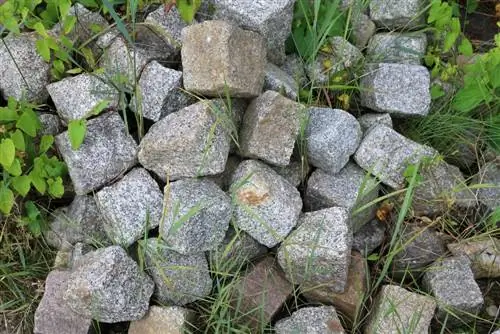
Orange to reddish spots come from rusty garden equipment or iron fertilizer. Both should be easy to remove with rust remover, which is then cleaned with water. But be careful, most rust removers contain acid and should only be used briefly and on small areas (if necessary, check in an inconspicuous area first).
The alternative for larger areas would be bleaching sodium hydrogen sulfite, which is sold in the drugstore. However, it is an irritating substance that should only be used in a 20% solution, tested in an invisible area beforehand and immediately scrubbed with water.
Dark Spots
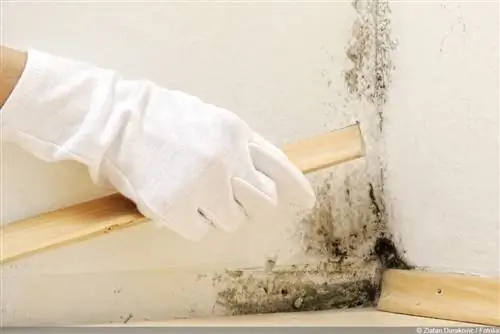
can be caused by mold, which can disappear with mold killer plus mechanical rework. Test again first on a stone that is not in your field of vision, then spray the surface with mold killer, let it take effect for an hour, then rework vigorously with a scrubber and lots of water.
Mold stains on paving stones in the middle of the garden could also be tackled with fungicidal plant broths; ivy, for example. B. have a powerful effect against mold.
Other colorful spots
It looks problematic with all stains that have strong and dark colors, from elderberry to spilled red wine. Before you tackle the ones on the concrete pavement, you should check how such stains should be treated on sensitive clothing; appropriate cleaning will not harm the pavement either.
Old stains on paving stones
- Complete cleaning plus stain removal -
If it is paving stones that are in the entrance area or can be seen from the sidewalk in the garden, this concrete paving is usually cleaned at regular intervals anyway. If possible, you should remove old, possibly difficult stains as part of this regular cleaning; This greatly improves the chances that the pavers will shine like new after cleaning.
The following procedure is recommended:
Roughly remove old stains
If these are old stains that have a certain amount of mass, you should first remove the main part of this mass. Often this is best done by cutting horizontally with a sharp knife, sometimes a wire brush helps, sometimes a soft brush and dustpan are sufficient.
If you can now only see a light, not particularly colored film of dirt, continue with 2. If very light, very dark or otherwise strongly colored areas appear, the area is treated specifically to the stain as just described.
Rough Cleanup
First you should collect everything from the pavement that is on it but is not intended to be there permanently. It sounds exaggerated, but it's really worth it - if you clean the surface of the pavement, an area that wasn't cleaned would look different to the rest of the pavement for months when it "comes back to light".
Then the stones are freed from coarse sand etc. Wait for dry weather and first sweep the paving stones thoroughly. If possible, first with a coarse street broom and then again with a finer broom.
If moss, grass tufts and weeds need to be removed from the cracks, this should be done next: Go along the cracks with a joint scraper; If the useful tool is not yet available in the household, a strong brush can serve as a substitute, but only for growth with finer roots. If stronger plants "claw" into the joints, a hand rake, a strong screwdriver, an old knife (that is really no longer needed in the kitchen) may help, but it is worth getting a joint scraper from the hardware store beforehand, it costs money not the world and the little checkmark at the top makes the work noticeably easier. Evenly distributed, loosely rooted moss can sometimes be easily “blown away” with a high-pressure cleaner, which then cleans half the stone at the same time.
There are chemical weed killers that can do this work for you, but their use is usually not permitted in home and allotment gardens and is also not really recommended: What kills stubborn weeds may also kill the plants in the bed next to them and is usually anything but he althy for the human user.
Clean the surface of the paving stones
If you have tackled the growth with the high-pressure cleaner, you now only need to use it in the middle of the plaster. For even cleaning, it is crucial that you work through it in one go. If you work on one part first and then a week on the rest, this can often be seen later. Even if it's quicker: Don't get very close because you'll roughen up the paving stones, which usually leads to a "beautiful algae coating". So: high-pressure cleaner, yes, but with so much feeling that it loosens everything sitting on the stones and the stones themselves at rest orcompletely leaves. This isn't nearly as impossible as it sounds, you just have to concentrate a bit at the beginning until you feel the strength of the water jet.
You can also remove the weather dirt by hand, using a soda solution to help. Dissolve around 10 tablespoons of soda (washing soda, available in the green 500 g bag from Holste, for example) per 10 liter bucket with lukewarm water and distribute on the surface of the paving stones. It is not worth preparing the soda solution with boiling water. In any case, this would only make sense for stones that are heated by the sun, but would then not be recommended because the solution is significantly more aggressive when hot. If you boil the milder cooking soda (known as Kaiser-Natron) in a pot with a burnt crust and then let it stand for a few hours, you will then know what is meant. If you have baking soda in the house, you can use it as a substitute for washing soda; As I said, milder, but sufficient for moderately dirty areas.
Depending on the size of the area, spreading works better with a laundry sprayer or a watering can. Don't let too much of the washing soda get into the adjacent beds; it significantly reduces the pH value. If you use baking soda, you can “spray around” as much as you like; your plants can drink it just as much as you can. Once the liquid has been distributed, it is allowed to act until it is just starting to dry out. Then, if necessary, add a light spray from the garden hose over it; Once the soda mixture has sat for a few hours, you can begin scrubbing. Just a normal, old-fashioned scrubber, you can walk casually over the surface without much force.
Remove remaining stains
Now it's time to tackle the stains, which will have faded quite a bit during the basic cleaning. After uncovering the surroundings, you can now “admire in all its glory” what’s left. You can now usually see much better what it actually is.
Typical garden residues such as remains of bird droppings and dried apples etc. can now be removed with hot water, soaking and a brush; all other stains are treated as described at the beginning of the article. The longer a stain is allowed to dry, the more likely you are to have to patiently remove layer by layer.
Stains on paving stones in the natural garden
are basically eliminated as described above, but a natural garden is usually not supposed to look so neat; Shining paving stones that have been cleaned down to the cracks would almost seem like foreign bodies. Here you can approach cleaning a lot more relaxed - first go over the area with the broom (with firm bristles), it won't do any harm even in a more natural garden, and you can see whether "your stain still has a few buddies". Whether this is the case or not, the next step is to identify the stain and tackle it in a targeted manner, then, as always, clean it thoroughly and extensively with water so that the surface remains uniform.
Tip:
Paving stones can become ancient and still look good, but this only works if they have never been cleaned too thoroughly. If you have bought an old house, the chances are not good that the concrete was only ever gently cleaned: new chemical cleaning products that came onto the market from the middle of the last century were often tried out. If you're dealing with pavers that have become porous due to a variety of chemicals, don't be under the illusion that you can clean them back to a completely uniform appearance. If you find it difficult to live with the traces of the years, you should put more thought into which easy-care surface you can replace the old paving with (sandstone cobblestones, for example, are eco-friendly, laid by hand and not difficult to maintain). than trying every cleaning product in the world.
Preventing stains on concrete paving
The best prevention against stains on concrete paving is not necessarily sealing. Firstly, you would have to find out very carefully how the respective sealant is cleaned (and whether it can be cleaned well at all, ideally with proof of an area that has already been sealed and used). Secondly, sealing actually only makes sense if the joints are permanently filled, because otherwise stain-causing liquids can penetrate the stone from the side. Thirdly, this area is often noticeable on your wastewater bill because you have to pay fees for sealed areas.
The best way to prevent stains is (actually) much simpler: Always brush away stains immediately before they can penetrate the stone. Certainly easier said than done, but if you know that it's not a good idea to let colored liquids seep into concrete, you can do it: If you have a supply of old towels in an easily accessible place, then you can do it While still with the offspring in your arms, grabbing one or two towels and dropping them on the spot with the deep red tea that has just fallen down when the baby is sleeping can be wiped with warm water and no permanent stain will be left behind.

