- Author admin caroline@plants-knowledge.com.
- Public 2023-12-17 03:39.
- Last modified 2025-01-24 12:45.
Worms in potting soil are repulsive. The mostly colorless or white small animals trigger feelings of disgust and are viewed as pests. They are not that per se, but they are not always good for the houseplant either. So it's completely understandable if you want to get rid of the worms. However, chemicals are not necessary, the worms can simply move out.
Relatives of earthworms
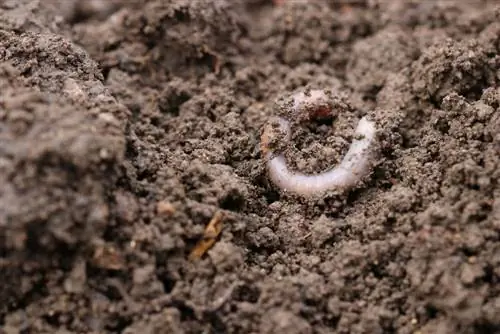
If worms are noticed in the potting soil, the initial feeling of disgust is usually great. The small creatures are between four and thirty millimeters long, often transparent, but sometimes also milky white or brown-gray. Most of them belong to the same family as earthworms and feed in the same way: They drag dead plant parts underground, eat them and fertilize the soil with their excretions. However, the supply of dead plant parts in a well-kept flower pot or pot indoors is very limited, in contrast to outdoors. It can therefore happen that at some point the small worms eat the roots of the plants due to a lack of food. And that harms the plant.
The worms mostly belong to the Enchytraea family. When fully grown, these worms are usually between five and thirty millimeters in size and white or yellowish-brown. However, there are also completely transparent specimens. Here it is worth overcoming your disgust and taking a closer look at the animals: the internal organs can be seen through the transparent body and the worms' digestive tract can be seen. This is a fascinating insight into nature that is otherwise only possible for biologists.
In nature, worms eat the dead parts of plants and also digest the bacteria they contain before they can infect the surrounding plants. Their excretions fertilize the soil. As they move through the ground, the earth is loosened and aerated, water can penetrate and seep away easily, and the earth is evenly permeated with humus. This means that the animals are really welcome outdoors and in pots and are a great help for every gardener. Just like earthworms, which sometimes get into the flower pot with the outdoor soil.
Harmful or not?
In the balcony box or in the bucket outside, where there are often dead leaves and occasionally an unwanted herb grows and is plucked out, worms initially do no harm. Things look different in a closed room: no plant parts end up on the ground that would have to be removed by the clean-up service (because that's exactly what worms are). So they would quickly nibble on the houseplants due to a lack of food. He althy, strong plants can cope well with the loss of some hair roots, but when the worms multiply, it quickly becomes a real problem. Because then it doesn't just remain with just a few hair roots, but rather many roots are eaten. However, the plant needs the roots to absorb the nutrients from the potting soil together with the irrigation water. If the roots are eaten away, the plant will starve and die of thirst. Accordingly, the worms in the flower pot are not pests per se, but they are definitely a threat to the plants in closed rooms.
It works without chemicals
There are special sprays, tinctures and other chemicals that are sometimes mixed into the soil to combat many different organisms that potentially harm plants. This is not necessary if there are worms. It is sufficient if the plant is carefully removed from the old potting soil and placed in new soil and a new, cleaned pot. By the way, this is also recommended if there are worms crawling around in the potting soil on the balcony or in the pots in front of the front door. Not because they would harm the plants too much, but because worms cause extreme disgust in most people.
Germ and worm free soil?
Anyone who is disgusted by worms in the potting soil will want to make sure that after repotting there are guaranteed to be no more living creatures in the potting soil. There is more or less sterile soil to buy. Other soil can always contain small living beings because they view the soil as their natural habitat and naturally find it in gardening and trading. It is quite easy to get normal potting or garden soil reasonably free of animals and other unwanted creatures:
- Preheat oven to 220° C.
- Line a sufficiently deep baking tray with baking paper.
- Spread soil on top in the desired amount.
- Put the baking tray in the oven and heat for about 15 to 20 minutes. Best to be supervised in case something in the ground catches fire.
With this method, most fungal spores do not survive, many bacteria are destroyed, and worms cannot tolerate this heat either. The slightly earthy smell spreading through the apartment is normal, as long as nothing is burning, everything is fine. Alternatively, the soil can be sterilized in the microwave.
- Place slightly moist (not wet) soil loosely in a cotton bag.
- Tie the bag and place it in the middle of the microwave.
- Cook for about four to five minutes on a 900 watt device. Under supervision in case the bag catches fire.
- Let it cool down and carefully remove it from the bag.
Sterilizing in the microwave requires less electricity than the oven method and is not as time-consuming. However, in this case too, the kitchen will smell a bit like hot earth, which cannot be avoided.
Repotting step by step
In preparation, everything needed for repotting should be ready. Required:
- Houseplant in old pot
- new pot
- sufficient new soil
- some gravel or seramis
- a trash can for the old earth
- Gloves and a small shovel
- lots of newspaper
First, the work surface is covered with newspaper. This makes cleaning easier after the work is done. Then the gloves are put on and the necessary utensils are provided on the newspaper. The new pot is filled with some gravel or seramis and then some potting soil is added. A depression is made in the middle so that the plant and its root ball can find space here. The remaining potting soil is placed on top of the newspaper. The houseplant is now carefully grabbed by the trunk, as close to the soil as possible (worms can't bite through gloves, so don't worry).
Now carefully pull up and hold the pot with your other hand. The plant often comes loose from the soil and can be removed. If this is not the case, the soil can be loosened a little with the shovel on the edge of the flower pot. The plant is now carefully held over the trash can so that the soil can be shaken off as completely as possible from the root ball. Shake gently so as not to damage the plant. If necessary, you may have to use your second hand to help: As much soil as possible should be removed from the roots, but without damaging the roots.
Now the plant can be carefully placed with the root ball in the new pot. Once the plant is somewhat aligned, add more potting soil from the outside and press it lightly. But only very carefully, the soil should only hold the plant in position, not cement it in. If the plant is stable, the flower pot can be filled to the desired height. A little water will help the plant extend its roots into the new soil. The remaining soil from the old flower pot can be disposed of in the trash can along with the worms.
The soil can also simply be tipped into the garden: Here the worms do useful work and do no harm. The old flower pot now needs to be cleaned so that no worms or their eggs or larvae stick to the pot. Warm water and a sponge do a good job. Lastly, the workplace is cleaned up, the newspapers are collected and the dirt on them is shaken off. The newspapers themselves can be disposed of in waste paper, the soil belongs in the residual waste or, if necessary, in the organic waste bin (the individual German municipalities have different regulations).
Collecting is also possible
If you don't feel disgusted by the worms, you can simply collect them. To do this, place the houseplant and its pot in a large container with water. The worms cannot breathe in the water, they come to the surface and can now be easily collected. Exposed in the garden, they can find a new habitat and do a good job for the plants.
Often you don't catch all the worms when you collect them. Sometimes eggs, larvae or particularly young specimens remain undetected, so that after a while worms can be observed again in the potting soil. Then the collection must be repeated. For the benefit of the houseplant, the water should be able to completely drain out of the flower pot after this action. You don't need to water at first, the plant has enough water.
Some plants can tolerate short-term extreme drought - but the worms cannot. Therefore, it can also work to simply not water the plant for a while and dry out the worms. However, this requires a bit of sensitivity, because it is not visible from the outside how dry the soil in the middle of the pot is. And if you wait too long to water, you risk a withered houseplant. By the way, both enchytraea and earthworms are hermaphrodites. The worms are male and female at the same time, so they can basically reproduce as long as there are only two worms present.

