- Author admin [email protected].
- Public 2023-12-17 03:39.
- Last modified 2025-01-24 12:45.
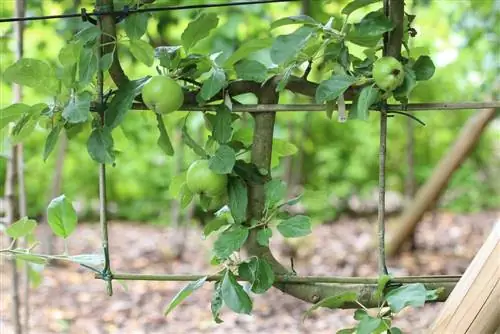
Even if some people can't imagine it, espaliered fruit can also be very productive, provided it is cared for appropriately and cut correctly. Before you can even trim the trees, a suitable trellis or framework, for example made of wood or metal, must be built to which the shoots can be attached and the tree can be trained into an attractive trellis. The pruning of espalier fruit includes a planting pruning, several training prunes to build leading branches and fruit shoots as well as the maintenance pruning to build up the crown.
Pruning in spring
The so-called planting cut, with which training to form a trellis begins, is usually carried out in the spring after planting. Even if the tree is planted in autumn, pruning should not be carried out until the following spring. To do this, select the two strongest of the lowest side branches and cut them back by about a third or to an eye facing downwards. Then attach them to the lowest horizontal tension wires. These two side branches form the so-called leading branches and thus the first level of the trellis. All other side branches that grow diagonally or vertically are cut back to small stubs or three leaves. The vertical main shoot, also known as the leading or middle shoot, is shortened slightly just above an outward-pointing bud.
Tip:
Only elastic materials should be used to attach the guide branches, such as:B. Binding willow or tubular tape made of PVC. You should avoid rigid materials such as wire or similar, as they would grow in over time and cause considerable damage to the plant.
Education in summer
The planting cut is followed by the next training cut in July, which serves to build up both the leading branches and the fruit shoots and forms the second branch level. As with the planting cut, you now select two strong side shoots and fix them on the trellis at an angle of about 45 degrees. Over the course of the summer, these new leading shoots are gradually lowered until they are finally in a horizontal position. Small shoots growing steeply upwards as well as young shoots that have formed on the main shoot are removed. Furthermore, smaller side branches are shortened to 5-6 leaves and the lower leading branches are trimmed.
Education in the second spring
The tree now has two well-developed branches. As with pruning in summer, all shoots growing vertically upwards are removed. Then the tips of the leading branches of the second branch level are cut off again. This is intended to promote branching and sprouting of the espalier. Now all the shoots that have formed between these two floors, as well as the fruit wood of the leading branches, are shortened to around four fruit buds. The fourth floor can be formed using the side shoots from the second level of branches.
Tip:
The shoots that later form and bear flowers and fruits are called fruit wood. Fruit buds can be recognized by the fact that they are usually thicker than leaf buds.
Maintenance cut in summer
- The planting and training pruning is followed by the maintenance pruning.
- The training cut should create a balanced relationship between fruiting and leading branches.
- The aim is to achieve an even crown structure and improve the fertility of the fruit tree.
- Cutting takes place between June and August.
- Cut all young shoots on the main shoot back to approx. 20 cm.
- This also applies to the new shoots on the leading branches.
- This cut is intended to prevent the vertically growing branches from becoming too strong.
- New shoots that grow steeply upwards directly on the main shoot should be removed completely.
- During this time, any competitive shoots should be continuously removed.
Conservation in the third spring
In the third spring, a so-called cone cut is carried out, in which old and heavily branched fruit whorls are cut back along the individual branch levels, down to 3-4 buds. However, this means that significantly fewer fruit buds are formed and the yield is therefore lower. But don't worry, the fruits are larger and the quality of the fruits is generally much better.
Basic framework for espaliered fruit
To form the trellises, an appropriate framework made of wood, metal or tension wires must be built before planting. Ideally, the distances between the individual wires and rods should be approx. 40 cm. The ideal place for a trellis is in front of a west or south facing house wall. This location offers good wind protection and both direct (sun) and indirect heat radiation. There should always be a sufficient distance of at least 10 cm between the trellis and the house wall to ensure sufficient ventilation and good development of the plant.
The lowest branches should be at a height of around 40-50 cm. Once the framework is finished, it can be planted and the planting cut can be made. When bending the shoots, care must be taken at the right time, because the more immature the shoots are, the more flexible they are. This is best done between May and July. They are easiest to bend about 10-20 cm behind the tip. By the way, espalier trees can be trained in different shapes. In addition to the horizontal, the most common shape, there is the U or V trellis as well as the fan trellis and a special shape, the so-called palmette.
Tip:
It's best to buy espaliered fruit at the tree nursery and make sure that the tree has a trunk that is as short as possible so that the lowest row of branches or branch levels are not too high.
Advantages and disadvantages of espalier fruit
In addition to young plants that you can train into espaliers yourself, perennial, already grown espaliers are also available in stores. These have the advantage that they can be harvested earlier. But espaliered fruit also has some other advantages. Compared to half and tall stems, they require significantly less space. With trellises you can…a. House walls are greened, which also has an aesthetic effect. Free-standing trellises can be used very well as property boundaries, provided they are cut or trained correctly so that there is a certain degree of stability. Depending on the cut and the duration of treatment, espalier training can cause a significant reduction in growth in vigorous fruit trees. The design of the crown remains clear and the better exposure and ventilation of the entire plant promotes the formation of flower buds for the next year. Otherwise, the correct cut will positively influence the quality of the fruit in terms of ingredients and color and ensure a lower susceptibility to disease. The only disadvantage of espaliered fruit is actually the cutting, as it is a bit time-consuming.
Suitable types of fruit
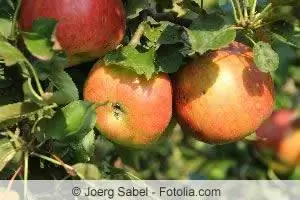
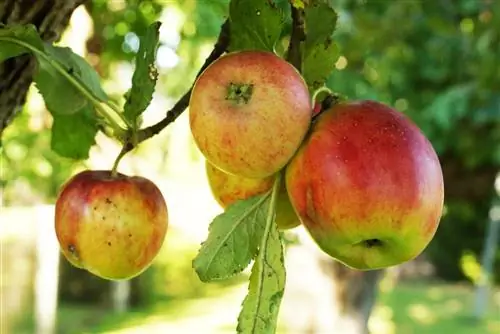
Basically all apple, pear and cherry varieties are suitable for being trained as espalier trees; they are the classics, so to speak. But apricots, plums and peaches are also suitable for this form of training and even berry bushes such as gooseberries, raspberries, currants or blackberries. However, apples and pears are still the most commonly grown espalier fruit varieties. Among the apples, for example, the Elstar, the Red Boskoop and the Canada Renette are particularly popular, and among the pears, the Clapps Favoriten, the Delicious from Charneau, the Williams Christ and the Conference are particularly popular. If you want to grow your dream trellis yourself, you should definitely make sure when purchasing that the finishing was done on a weakly growing base.
Tip:
The base M9 or M27 is recommended for apples and quince A for pears.
Conclusion
Espalier fruit is an interesting and, above all, space-saving alternative to conventional fruit trees. The easiest way is to get a pre-stretched trellis from the nursery. However, if you are not afraid of the effort, you can build your own trellis. Above all, you should pay attention to a suitable finishing base and a trunk that is as short as possible. You should also know that in order to build an appropriate espalier, several cuts are required per year, which are used to build up the framework with leading and fruiting branches and to build the crown. Otherwise, care should be taken to ensure sufficient distances from house walls to ensure good rear ventilation. Under these conditions, nothing should stand in the way of a quick harvest of delicious fruit.

