- Author admin [email protected].
- Public 2023-12-17 03:39.
- Last modified 2025-06-01 06:48.
Peas as a side dish to a wide variety of dishes or simply eaten raw, picked directly from the plant. What could be more delicious? But peas don't necessarily have to come from the frozen shelf. Growing it yourself is so uncomplicated and easy and can even be carried out successfully in a balcony box. With the right know-how, nothing will stand in the way of harvesting your own garden peas next summer.
Basic information about cultivation and site conditions
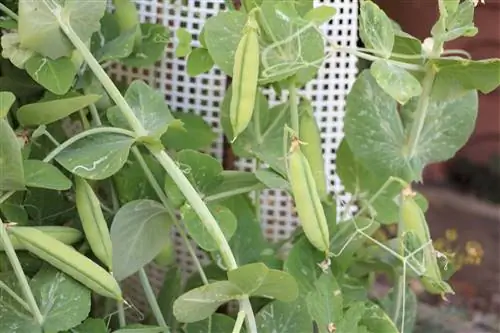
The pea is cultivated between mid-March and mid-April using direct sowing. It is not necessary to prefer the plant. Deep soil enriched with humus is the ideal prerequisite for a productive harvest. If you only have one balcony available, you can even grow the peas in the balcony box. However, since the ground is not that deep here, the harvest yield will be somewhat small. However, for a snacking balcony, the pea provides some tasty pods even in the smallest of spaces. However, the soil must not be too wet, neither in the balcony box nor in the bed. Pea plants are among the uncomplicated and extremely robust vegetable plants. They cope well with all weather conditions, and direct sunlight does not harm them. The seeds are sown directly into the bed, with the optimal distance between the seeds being around 5 centimeters. If several rows are sown, a distance of 40 centimeters should be maintained between them. After sowing, a little soil is sprinkled over it and pressed down lightly.
Care instructions until harvest: trellis, compost and irrigation
A few days after sowing, the seeds begin to germinate and small green plants become visible on the surface of the soil. These are a popular food for passing birds. To protect the seedlings, it is best to place a fleece or a coarse-mesh net over them. When the plants have reached a height of around 10 centimeters, the fleece can be removed and a climbing aid can be inserted into the soil instead. The best options for this are brushwood or thin wooden sticks, which can be collected in the nearest forest. Peas don't like metal because their tentacles slip off more easily and they become too cold when it's cold and too hot when it's hot. Wood is also free and fits in beautifully with the natural surroundings. Once the trellis has been set up, the stability of the plants can be supported by piling up some soil. The pea does not need to be fertilized, just a little compost every now and then provides the plants with enough food for their growth. The weeds around the plants should be removed regularly. Pulling out the weeds also loosens the soil a little, which is good for the peas. Watering should be done sparingly. The spring downpour is usually enough. In any case, you should never water too much, as the pea plant cannot tolerate excessive moisture and would die as a result.
Diseases and pests
Mildew is a common disease of the pea plant. However, if the row spacing is well maintained when sowing, this disease rarely occurs. A mixed culture, for example with lettuce, chard or kohlrabi nearby, supports the pea plant and protects it from powdery mildew. Pests are also particularly fond of the pea plant. These include the pea aphid, the pea beetle and the pea moth. Unfortunately, these pests are a real nuisance. If the pea plant is infested with larvae, it should be completely removed so that it cannot touch the neighboring plants.
Harvesting and propagation of the garden pea
Peas are annual plants. This means that they have to be re-sown every year. After flowering in May and June, it only takes a maximum of four weeks until harvest. If you want to eat young and tender peas fresh, you shouldn't wait too long to harvest them. Because only the young fruits taste sweet and juicy. Peas have the advantage that the frequency of harvesting stimulates fruit production. So the more you harvest, the more it grows back. Fruits that are harvested slightly riper are very suitable for cooking and, depending on the variety, can also be preserved frozen or dried. The overripe fruits are allowed to dry for sowing the following year. This means you can immediately have your own seeds for the coming gardening season. After the harvest, the plants are cut short and the roots are left in the ground. These ensure a good supply of nitrogen to the soil and prepare it optimally for the next year. However, after two or three years of harvest, the location should be changed and the old pea bed should no longer be planted with garden peas for the following six to eight years.
What you need to know about the types of peas
Basically there are three types of peas:
- Scarf or Pale pea
- Brand pea
- Sugar Pea
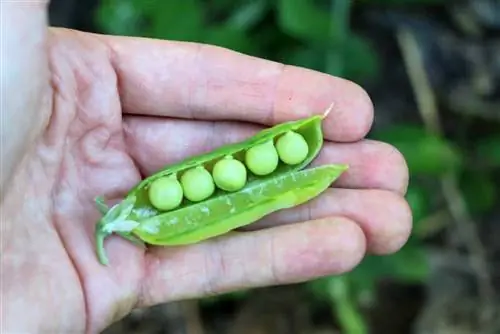
The seeds of the pea or pale pea are smooth. These are often used as dried peas in the kitchen. This type of pea can be sown a little earlier as it is known as the frost-resistant type of pea. Accordingly, it ripens earlier than other varieties. If harvested too late, the fruits taste mealy. Branded peas have a sweet taste, but when dried they can no longer be used in the kitchen. The ripe grain can be recognized by its slightly shrunken state. They are the favorite variety for frozen or canned goods from the supermarket. The sweet taste of sugar peas makes this type of garden pea particularly popular. It is considered extremely tender and juicy and can be eaten with the pod included.
Conclusion
Peas are very easy and simple to grow yourself. In general, the more space the plant has to grow, the safer and more successful the yield will be. Illnesses can also be avoided this way. Since fresh garden peas have now become a rarity on the market, this grateful vegetable plant belongs in every garden. Anyone who has already had experience with peas in their own bed will no longer want to be without them.
Care tips
- Sowing time is from mid-March to mid-April.
- Branded peas are the most popular, while pal or shell peas are less commonly grown.
- It is definitely advisable to sow sugar peas, as you won't find them as often in vegetable shops.
Peas are best grown on a wire mesh or on dry twigs that are stuck into the rows of beds. The distance between rows should be 60 - 70 cm. Bush peas, on the other hand, grow comparatively low and do not necessarily need support. A row spacing of 30 - 40 cm is sufficient here. It saves space by growing in double rows, each 20 cm apart. The seeds are placed 8 - 10 cm apart. The sowing depth of 5 cm is unusual.
After sowing, you should cover the bed with foil because birds like to snack on the pea seeds. As soon as the young plants are 10 cm high, they are piled up to increase their stability. If the beds are provided with a lot of compost, additional fertilization is unnecessary. Plant protection measures are also superfluous.
Mildew infestation can be prevented by sufficient row spacing and preference for locations that are not overly protected. Mixed culture with lettuce, kohlrabi, carrots, radishes and chard, which are also sown in April, is recommended.
Early varieties are ready to harvest after just under three months, late varieties after a maximum of four months. You should pick peas as young as possible because then they have the best taste. After harvesting, the bushes are cut just above the ground, the roots remain in the soil and contribute to the enrichment with nitrogen fertilizer.

