- Author admin caroline@plants-knowledge.com.
- Public 2023-12-17 03:39.
- Last modified 2025-06-01 06:48.
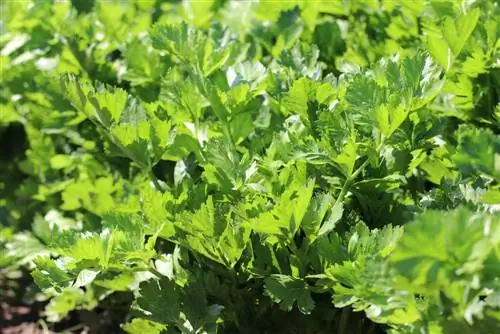
Leaf celery is a spicy, aromatic and, above all, vital ingredient rich in many savory dishes and does not require a garden bed for a rich yield. In addition, growing leafy celery is very easy and therefore easy for beginners to care for plants. However, it is important to have the appropriate basic knowledge of the requirements of celery. As easy as cut celery is to care for, there are still special features when it comes to culture - and these start with the selection of the substrate and the pre-cultivation of the celery seedlings.
Species
Celery is differentiated into:
- Celeriac
- Celery or stalks
- Leaf celery
To use the leaves, we recommend the appropriately named leaf celery, which only forms thin stems and is also ideal for cultivation in pots or buckets. Alternatively, celery or celery can also be used. Although this tends to be better kept in a bed, it can also be grown in a bucket. In addition, both the leaves and the stalks can then be harvested, although for a shorter time than with leaf celery in the pot.
If you have enough space and don't want to harvest celery leaves all year round, you're well advised to go with celery. For year-round cultivation and harvesting of greens, leaf celery is the better choice.
Pre-breeding and sowing
Leaf celery, like celery and celeriac, is quite sensitive to cold and frost. Therefore, sowing outdoors can only take place after the Ice Saints. However, you then have to wait a comparatively long time for the harvest. It is therefore recommended to either prefer celery or buy young plants directly.
When sowing - regardless of whether it is for growing purposes, directly outdoors or for cultivation in a bucket - the following points must be taken into account:
- Use herb, vegetable or growing soil. Cover the seeds thinly and preferably with sifted soil.
- Keep substrate and seeds permanently moist for the first few days. To do this, either cover the planter with transparent film, spray it daily or water it moderately.
- When pre-growing, separate the seedlings and prick out when they have reached a height of around five centimeters. In the bed it is sufficient to sow the leaf celery at a distance of 20 to 30 centimeters in the row and about 40 centimeters between the rows. The plants can be a little closer in the pot.
Tip:
If the leaves are harvested early and often and the plants are thinned out regularly, a distance of five to ten centimeters between the plants can be completely sufficient when sowing in pots. Otherwise it will quickly become too narrow here.
Location
The location should be as sunny as possible. Outdoors, maximum partial shade is recommended for celery. When growing indoors, the location should at least be very bright if direct sunlight is not possible.
Substrate
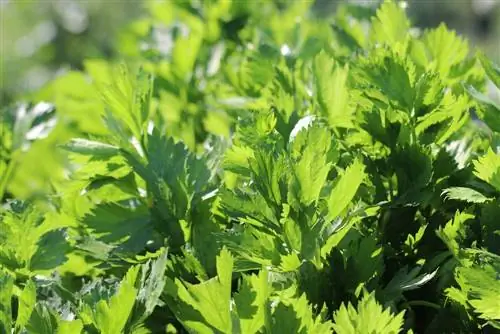
Nutrient-rich, loamy, humus - this is what the optimal substrate for celery leaves looks like. Normal garden soil may be slightly compacted with clay and should definitely be enriched with compost or manure, then it is sufficient for growing celery. If the seeds were grown in a substrate with fewer nutrients, fertilizer can be added to this. Again, manure or compost or a mixture of these and garden or vegetable soil are suitable for this. So that the nutrients can be distributed and settled, fertilization should be carried out in the autumn before the celery is grown, but at least two to four weeks before planting out.
Planting out
As mentioned, planting should only take place after the Ice Saints to avoid frost damage. The young plants are planted at the already listed distance of 20 to 30 centimeters in the row and around 40 centimeters between the rows. The soil should then be thoroughly moistened. In addition, it is important to ensure that the substrate remains moist in the first few days.
Pouring
The celery is watered abundantly and regularly. Drying out should be avoided as it is not well tolerated by the aromatic plant. However, persistent moisture or a small amount of water in the saucer or planter is not a problem.
Fertilize
If a nutrient-rich substrate has been chosen or the soil has been prepared accordingly, there is no need to additionally fertilize in the first one or two months. Fertilization can then be carried out using nettle manure. Alternatively, untreated pond or aquarium water, manure or compost can be used in small quantities. Nutrients are added every two weeks for plant manure and pond water, and once a month for manure and mature compost.
Culture in a bucket
Pure leaf celery is best suited for cultivation in pots, but this form of cultivation is also possible with celery stalks. In addition to what has already been mentioned, the following should be noted:
- Watering if possible without wetting the leaves and not using water that is too cold
- water frequently and prevent the substrate from drying out
- to bring the planter indoors when the temperature falls below 15°C
So the planter can be left outdoors during the summer. If you want to be able to harvest leaf celery in autumn and winter, you should move it from the balcony to a sunny window sill as early as possible to avoid major temperature fluctuations. It would therefore be ideal to change location to suit the room temperature. Due to their sensitivity to frost, the plants quickly become damaged in cold weather. Overwintering outdoors is therefore not possible.
Pests, diseases and care errors
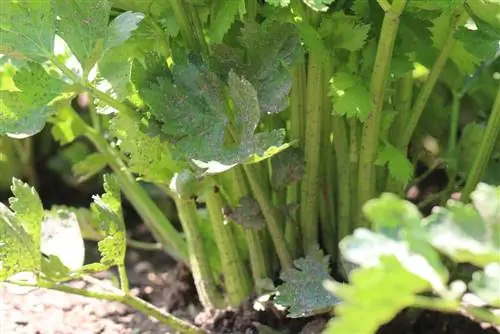
Cut celery is not particularly susceptible to pests and diseases, although leaf spot disease can certainly occur. The signs of this are brownish spots and black spots on the leaves. It is a fungal infection that occurs primarily when the planting distance is too small, watering from above or in very wet years. It can be prevented if the celery plants are allowed to dry quickly after watering.
A horsetail broth is also preventative, as it strengthens the plants thanks to the silica it contains and also has a defensive effect on the spores. Another typical problem is the seemingly sudden death of the heart. This can also be due to a fungal infection, but is usually due to a deficiency. The measures already mentioned and fertilization with algae lime can help.
Harvest
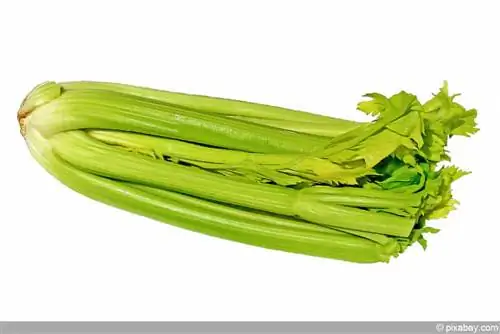
If planted after the Ice Saints, the leaf celery can be harvested from around July. The outdoor harvest season usually lasts until October. When grown in a container, growth slows down in autumn, but the leaves can still be harvested by cutting them off individually.
Tip:
If you don't cut the celery into the heart or cut it too deeply, the plants will sprout again. This works even if the entire perennial has already been separated from the roots. Then it should be placed in some water.
Storage
The leaf celery loses its aroma through drying or freezing, so it is recommended to use it fresh. For normal use in the kitchen as an ingredient and decoration, a small pot of the herb is usually sufficient. In a bright, warm location and with regular watering and fertilization, harvesting is possible all year round. It is advisable to start new plants before flowering occurs in the second year. However, if the leaves are used regularly and the resulting constant waste, this is usually prevented anyway.
Conclusion
Celery and leaf celery are easy-care plants that can be easily grown in beds or containers. For a rich yield, only a few points need to be taken into account, which makes celery ideal for beginners in plant care.

