- Author admin caroline@plants-knowledge.com.
- Public 2023-12-17 03:39.
- Last modified 2025-06-01 06:48.
It's not that difficult to lay paving slabs. Read what you need to consider and which work steps you need to follow. This way you can do this job easily and well.
Laying pavement slabs - planning and preparation
Thorough planning and preparation lay the foundation for the success of the project. Measure the area and create a floor plan. For new paths that are used often, choose a width of 120 cm. For less used paths, 80 cm is sufficient. For the necessary material, select the paving slabs that you want to use. If you want to pave a driveway, choose slabs with a height of at least 8 cm wide. This makes the path or driveway passable. A border provides solid stability. The edge border can consist of clinker bricks, concrete palisades or wooden palisades.
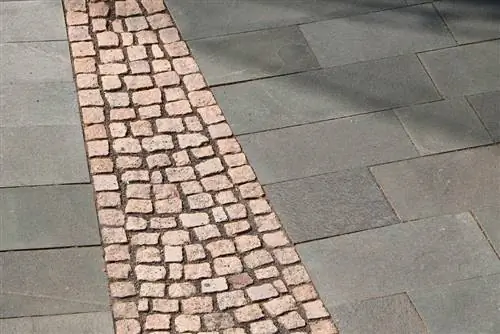
Having decided on the slabs, you now have the dimensions and can calculate and procure the paving slabs required based on the size of your project. You can plan the laying pattern on squared paper and have a good template for implementation.
The soil determines the substructure
If you want the path to last for a long time, you must ensure a stable and frost-proof substructure. First, calculate the height:
- Pavement slabs are usually 5 cm thick, the sand layer is 5 cm and the base layer of gravel is around 20 cm in water-permeable sandy soil. For clay or clay, expect 30 to 40 cm.
- Dig the ground for the path to the calculated height and fill it with gravel, anti-freeze gravel or concrete recycling in grain size 0/32.
- While filling the individual layers, the soil is repeatedly compacted with a vibrating plate.
- A gradient of at least 2 percent must also be incorporated.
The right slope for the sidewalk
When creating the path, you must create a gradient of 2 to 4 percent so that the path's drainage works adequately and later damage is avoided. To do this, you work with guide lines.
- Determine the later height of the path and calculate the height of the pavement slab.
- Stretch a horizontal cord to the left and right of the path.
- Lower the guide line along the path by exactly 2 cm for every meter of path.
This is how you get a reliable slope and can align the substructure accordingly.
Substructure for the paving slabs
- For the substructure, an almost 30 cm thick blanket of gravel or concrete recycling is first placed on the excavated area.
- Determine the exact height beforehand and tension the cords according to the gradient.
- Once the layer has been applied, first smooth it out with a rake or shovel and compact it with the vibrating plate.
- Continue filling until the necessary height is reached. In between, compact the filling again and again.
- Always move the vibrating plate lengthwise and crosswise. In hot and sunny weather, it is recommended to water the area before shaking to avoid dusting.
- The gravel bed or sand with the appropriate grain size is then placed on top of this base layer.
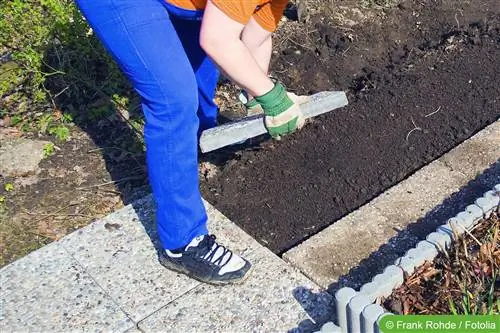
- In order to be able to pull off a flat surface for the plaster, metal pipes are brought up to support the pull-off board.
- The height is the bottom edge of the plaster plus 1 cm allowance. When the plaster is shaken off later, it lowers.
If the pipes are in the correct position with the respective gradient, the top sand surface is removed using a straight edge or a long spirit level so that a uniform and smooth surface is created!
Laying the paving slabs
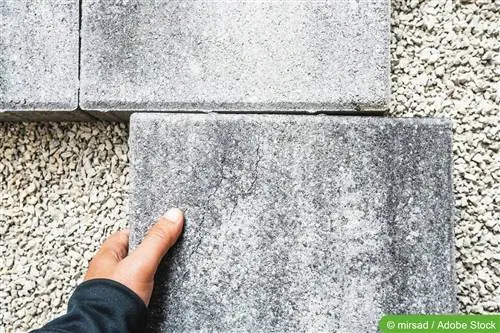
You have already determined the position of the paving slabs using the guide lines. Lay the first row on the strip in front and follow the tensioned cords that determine the height and direction. The slabs can be laid more easily using a paving hammer with a rubber attachment. To ensure that the stones are firmly connected, start the second row with half a plate. This means that the stones cannot tip over under load or become wedged. The plates are placed together with a minimum distance of around three millimeters. Some manufacturers offer paving slabs with spacers that ensure a minimum distance.
To get the half stones, cut them with an angle grinder with a cutting disc. For large projects, a cutting table is worth it, which can be rented from any hardware store. A wheelbarrow placed vertically as a dust collector prevents excessive dust from forming.
Always refer to the laid cords so that the gradient is maintained. Once all the panels have been laid, spread joint sand and sweep it dry. Sweep off too much joint sand. Use a vibrating plate with a rubber mat to carefully shake the pavement in the longitudinal and transverse directions. The entire area increases by approximately one centimeter. To ensure long-term stability of the path, use water and a broom to brush as much joint sand as possible into the joints. Then the work is finished.
What you should know about laying in brief
When laying paving slabs, follow the correct order and pay attention to the slope of the path or surface. This way you can enjoy your journey for a long time. With a little practice, you will soon be laying the panels with a complicated laying pattern and creating beautiful areas on the terrace or seating areas in the garden.
- Pavement slabs are available in different thicknesses. When buying, you should take the future load into account in order to choose the right one.
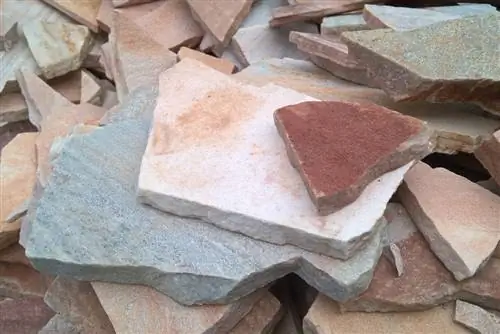
- They should also be frost-proof and weather-resistant. The preferred material for paving slabs is concrete, but there are also ones made of natural stone, which often look more elegant.
- Before laying the paving slabs, the layer on which the slabs are to be laid must be removed. 10 to 25 centimeters are recommended for this. That depends on the soil underneath
- It is important that the layer directly under the paving slabs is permeable to water. When waterlogging occurs, the paving slabs bloom and become unsightly.
- To ensure water permeability, a layer of gravel is applied as drainage, the thickness of which depends on the existing soil.
- A layer of chippings with a height of 3 to 5 centimeters is piled onto the gravel and leveled or - as it is called in technical jargon - removed. A slat or a pull-off rail is ideal for this.
- To avoid subsidence, the gravel and chippings layer should be compacted.
This is best done with a vibrating plate, which you can borrow. Now the pavement slabs can finally be laid. When laying, make sure that you do not lay panel to panel, but that a joint is left on all sides. It is advisable to measure the width of the joints so that they are even and do not disrupt the overall picture.
A rubber or wooden mallet is suitable for tapping the paving slabs into place and bringing them to the same height. But be careful: please knock with feeling, otherwise damage could occur. Once the entire surface has been laid, the joints are filled with sand and then brushed firmly with a broom. This completes the laying of paving slabs.


