- Author admin caroline@plants-knowledge.com.
- Public 2023-12-17 03:39.
- Last modified 2025-06-01 06:48.
In the bathroom area, but also in other rooms in the house, a flat floor is a bad idea: after all, water can build up here and cause damage. A slope is the solution, although you have different options depending on the type and construction of the screed. If you want to create a sloped screed yourself, it is best to use cement screed. This is easier to process than other types.
When and where does a sloped screed make sense?
A sloping screed is used where water has to drain away. This can be the case, for example, in a bathroom with a walk-in shower, but also in
- a balcony
- a terrace
- a flat roof
- the driveway to the garage
- or the handling area in a swimming pool
The slope should have an angle of inclination of around one and a half to two percent, as water only begins to flow from this point. In fact, this means that the screed should have a gradient of approximately two centimeters per linear meter. The quicker drainage of the water has several advantages: Not only does it prevent mold from accumulating moisture, the flowing water also washes away fine dirt particles.
Tip:
The slope of a flat roof (e.g. on a garage) is constructed according to a similar principle. Here you can either apply a sloping screed or appropriate insulation, which directs the water directly to the gutter.
What types of falling screed are there?
Basically you have two options for building a sloping surface. In the first variant, you lay a substructure that ensures the necessary slope. Only on this do you lay the actual screed, which must be the same thickness in all places.
Alternatively, you can also use the slope directly in the screed: This is the actualSlope screed.
Sloping substructure
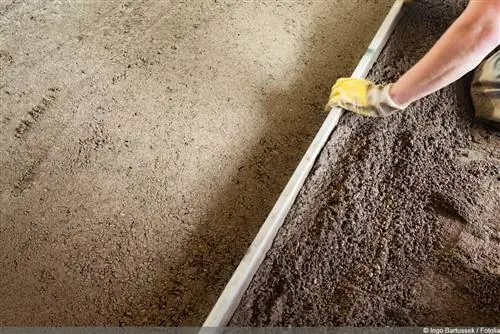
A sloping substructure with a screed of the same thickness laid on top can be built from prefabricated components or other materials. Solid Styrofoam panels have proven to be effective here, but they must be provided with an adhesive base: otherwise the screed simply will not hold. This variant is only suitable for small slopes of less than two centimeters per running meter. If the slope is larger, the construction would no longer be load-bearing, which is why another solution must be considered in such a case.
Classic falling screed
The classic sloped screed is a good solution here. This is necessarily a composite screed in which the slope is poured in directly. This variant also has the advantage that it is easier to implement - after all, there is no need for a substructure. Furthermore, the classic shape scores with high stability and durability. You should just make sure that the screed reaches the required minimum thickness even at its deepest point - the higher area is correspondingly thicker.
Tip:
By the way, a sloping screed can also be installed later if you want an absolutely straight floor to have the necessary slope. You can achieve this with leveling mortar, which can be used to level out individual areas. After all, you don't have to redo the entire floor.
Make your own sloped screed
It's not just that there are different types of screed - the specialist also differentiates between different forms of installation. In this section you will find a list of the advantages and disadvantages of various screeds as well as simple instructions for laying cement or concrete screed in seven steps for the experienced do-it-yourselfer.
Types of screed
Cement or high-speed screed is usually used when expanding houses and yards. There are also other types, although they are used less frequently and are often used on specific occasions. Mastic asph alt, for example, can not only be used in road construction, but is also ideal as a screed indoors and outdoors. The material is waterproof and extremely robust, but easy to process.
Mastic asph alt indoors
In interior construction, however, you do not use conventional mastic asph alt as in road construction, but rather so-called hard bitumen. However, it is not suitable for a sloping screed as it usually has to be laid floating. Anhydrite or calcium sulfate screed is also a flowing screed and is therefore unsuitable for slopes. In addition, this material does not tolerate water and therefore cannot be used outdoors or in damp indoor areas (bathroom, kitchen).
Cement or quick screed? Advantages and disadvantages
cement screed
A simple cement screed is most commonly used. This is a cost-effective mixture of cement and building sand or fine quartz sand that can be mixed in any consistency - just the way you need it and can best process it. Cement screed can be used as a flowing or earth-moist screed, although the latter option would be ideal for a sloping floor.
Earth-moist cement screed, however, requires a lot of work and has to be laboriously applied, removed and smoothed by hand. This screed also requires a lot of time to dry and set: it must rest for at least 28 days before you can cover it with a floor covering (such as tiles). However, the result is extremely hard, resistant and insensitive to water.
Advantages of cement screed:
- cheap
- easy to mix
- can be processed in different consistencies
- extremely resistant
- very hard
- resistant to water
- perfect for outdoor use
Disadvantages of cement screed
- takes a long time to dry and set
- must not be covered prematurely - risk of mold
- tears easily (prevent by incorporating reinforcing fabric)
- Quick dash
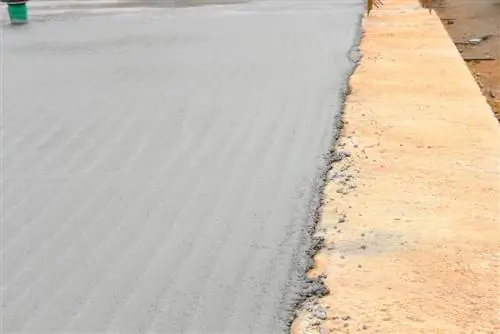
The disadvantage of the long setting can, however, be avoided with a so-called quick screed. These are mostly cement-bound mixtures, which, in contrast to conventional cement screeds, dry within around 24 hours and can then be covered.
Tip:
Cement screed is also a good choice if you want to install underfloor heating in the bathroom with a walk-in shower. When choosing the screed, pay attention to the note “heated screed”.
Laying types
In addition to the different screed materials, there are also different ways to lay them:
- Dry screed: laying finished screed elements
- Wet screed: moist to liquid screed is poured onto the substrate
- Composite screed: Screed is poured directly onto the substrate, without insulation
- Floating screed: is laid on an insulation layer
If the screed is to have a slope, the raw material must not be too liquid - otherwise it will not be possible to apply it evenly, as the material will then simply flow away to the lower area. A bonded screed makes the most sense as it ensures the greatest possible stability.
Materials and tools
You need:
- Cement or quick screed
- if necessary, polystyrene panels for impact sound insulation
- if necessary PE cover film
- Shovel
- if necessary concrete mixer
- Spirit level
- Steel Trowel
- cutter knife
The polystyrene panels are only necessary if, for example, impact sound insulation needs to be installed in the bathroom of an apartment building. The concrete mixing machine, on the other hand, is not absolutely necessary, but it makes mixing the screed much easier. You don't need to buy such a machine, you can rent it on a daily basis from any hardware store.
Costs
Cement or concrete screed enables cost-effective expansion: A 25-kilo bag of cement screed costs around EUR 5.50, although you have to calculate around 20 kilograms per square meter of screed - the specific amount depends on the chosen layer thickness. Fast screed is slightly more expensive at around nine euros per 25 kilograms. For 100 square meters of PE covering film, depending on the quality you choose - branded product or own brand - you have to expect between around eight and 14 EUR, while the optional insulation panels cost around three to six EUR per square meter.
Laying concrete screed - step by step
There is not just one, but many different ways to lay a screed with a slope. In the following section you will find ways to introduce the bevel as easily as possible.
Preparation of the subsurface
However, before the screed is applied, preparatory work must first be done. First, lay the edge insulation strip, which is particularly important as an expansion joint - not only on floors with integrated underfloor heating, but also on balconies and terraces that are in full sun. Then lay the insulation panels if necessary. Both should be applied seamlessly.
Laying the PE film
If you install impact sound insulation, it should be sealed with a PE film. It serves as a separating layer between screed and insulation and can be easily cut with a cutter knife.
Mix cement screed
Now you can start mixing the cement screed: The correct mixing ratio between screed and water can be found in the manufacturer's instructions printed on the packaging. However, a mixing ratio of four to one is usual - i.e. four parts screed and one part water, which must be mixed well together. The screed should be as solid as possible and not flow. Please also note that some manufacturers recommend adding additives (such as screed adhesive), which must be purchased individually.
Applying and laying the screed
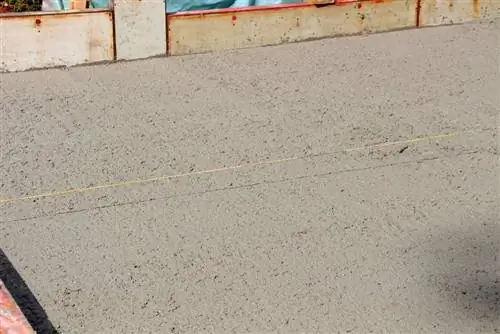
First, divide the room into individual sections using roof battens to make it easier for you to apply and remove the screed. Spread the finished screed with a shovel, whereby the thickness in the middle should be approx. four to four and a half centimeters. The material thickens evenly on one side, while flattens equally evenly on the other. This can be achieved, for example, using a tool: cut the roof battens to size beforehand so that they reflect the desired gradient. Alternatively, you can also draw guide lines using strings.
Pull off
Then use another batten and a spirit level to pull off the screed so that the surface is smooth and level to the desired gradient. Check the correct slope using the spirit level.
Smoothing
Finally, smooth the screed using a float and a steel trowel.
Drying
Depending on the type of screed, the fresh floor must dry between a few hours and 30 days without being walked on or covered. During this time, you should ventilate thoroughly every day. You can then cover it with flooring. If this does not happen, you will have to seal or coat it. Coatings based on epoxy resin are very suitable for this.
Do you have to sand screed?
So that the screed then provides a slightly sloping but still flat surface (and does not have any humps or cracks or is too high for a possible door, you can then sand it down. Slight unevenness can be wonderfully leveled out, Sanded screed also makes a beautiful floor covering. You can use an angle grinder, a single-disc machine or a diamond rotating plate for this. Due to the heavy dust generation, be sure to wear protective clothing including mouth and eye protection.

