- Author admin [email protected].
- Public 2023-12-17 03:39.
- Last modified 2025-01-24 12:45.
The tasty avocado fruit is popular in local cuisine because it can be used in a variety of ways. But the plants are also suitable for growing in a pot as houseplants, although they can also be moved outdoors in a protected area in the summer. If you still have a kernel left after processing the fruit in the kitchen, you can simply plant it and grow your own plant.
Tropical Tree
The decorative avocado plants are not hardy due to their origin in the tropical, warm, humid areas of southern Mexico and should therefore always be cultivated in a pot so that they can be moved indoors during the cold season. If you have a heated winter garden, you can also let the plant grow larger here. In the pot, the avocado tree usually grows up to 1.50 meters high. In its homeland, however, the avocado can grow into a stately tree up to 20 meters high. The following should also be taken into account when it comes to room culture in this latitude:
- grown from seeds, the trees become wild
- therefore there are no fruits
- evergreen tree
- decorative leaves
Tip:
Especially for families with children and plant lovers, it is a nice experiment to see how, after a while, a small, pretty tree emerges from the pit of an avocado that comes from the supermarket or greengrocer.
Core/Seed
Since the avocado is not a vegetable but a fruit, it has a pit. This is very large, light brown and oval with a flat and a pointed side. If an avocado is used in the kitchen, the pit does not necessarily have to end up in the trash. Because every hobby gardener, even inexperienced, can grow their own avocado plant from this. This can be done with the following instructions.
Growing in a water glass
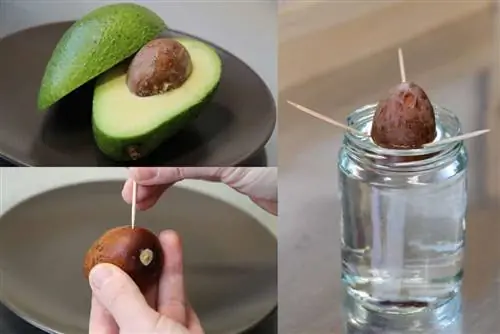
It's not difficult to germinate an avocado pit from a fruit from the supermarket or greengrocer. This usually always works. Just a little patience is required, as the seed takes a long time until it finally shows the first shoots and roots. This can take several months. The water method is very common for germinating the seed. You should proceed as follows:
- Remove the core from the fruit
- wash and dry well
- prevents mold formation
- insert three toothpicks all around at equal distances
- about five millimeters deep
- around the core center
- place on a glass with the flat side down
- this is filled with water
- the lower third of the core is in the water
Since the kernel sits in the water for a long time until it germinates and puts out roots, it is important that new water is added as it evaporates. A third of the core should be in the water the entire time.
Tip:
The glass is the right size if the toothpicks can hold the core well, i.e. rest on top of the rim of the glass. Preserving jars from grandmother's cellar, for example, have proven useful in terms of size.
Time
The time at which the kernel is prepared for germination is completely irrelevant. This means that the seeds can be used for propagation and cultivation all year round. There is no preferred time here either, as germination is carried out in a warm room that is independent of the seasons.
Location
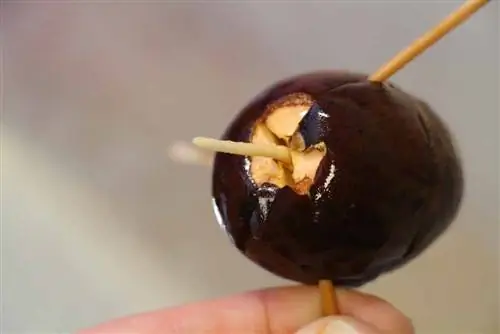
The location chosen for the glass in which the avocado seed will germinate is also important so that it works well. The ideal location for the germination period should look like this:
- ideal is 20° Celsius and a little warmer
- do not expose to direct sunlight
- a dark place with little light is ideal
- this is how you can choose a corner of the room
- not directly near the heater
- not directly on windowsill
- a shelf or wall opposite a window
- A mini greenhouse is ideal
- the temperature remains constant here
Tip:
As soon as the shoot appears at the top and the first leaves develop, the seedling can be made a little brighter. However, direct sunlight should also be avoided here, otherwise the delicate, light green leaves would burn immediately.
germination
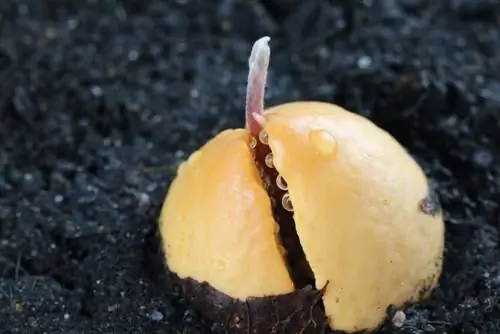
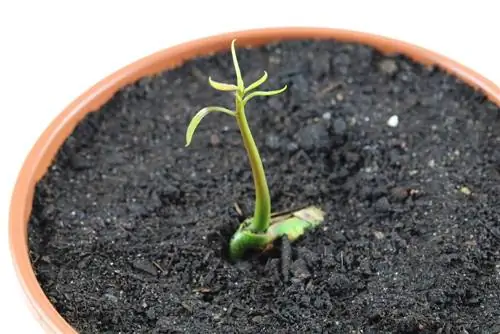
About six weeks after the seed is placed in the glass on the water, a germ appears at the tip. Since transparent glass was used, the process can be watched. Because the first roots quickly form here at the bottom end. These are straight and long. But only when enough roots have formed in the lower area will a shoot emerge from the upper area. When the shoot has become strong and has several leaves in the upper area, the small tree can be planted.
Plants
Since the small plant already has very long roots, a tall pot should be provided for it. Because the avocado grows deeper rather than wide. When planting, you should then proceed as follows:
- Create drainage to prevent waterlogging
- to do this, place gravel or pottery shards over the drain hole
- Consider plant fleece to prevent constipation
- Fill in soil
- potting soil from the store is ideal
- for potted or green plants mixed with peat or sand
- dig a deep hole in the surface
- Insert core halfway
- Roots all underground
- water lightly
It is important that the soil remains evenly moist, but never wet. When there is drought, the core and thus the plant dries out. If there is too much moisture, however, the core will dissolve over time and rot. Therefore, it makes more sense not to water but to spray the soil and the plant with water. This guarantees consistent moisture.
Tip:
If you don't want to wait so long until the upper shoot has developed well, you can plant the core in a pot when the first roots appear.
Growing in soil
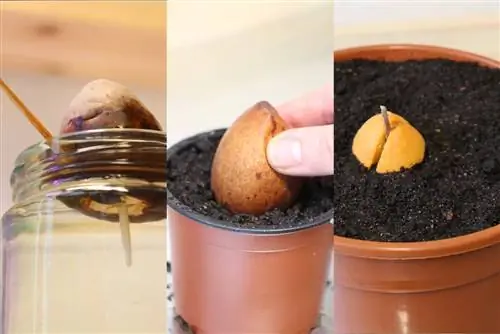
If it's too much effort for you to germinate in a glass of water, you can also start growing directly in a pot with soil. The water method has the disadvantage of several work steps as well as frequent mold infestation of the core. When growing in a pot, which is above all much more practical, the procedure is as follows:
- Clean the core and let it dry
- choose a sufficiently large and high pot
- Create drainage over the drain hole
- fill with commercially available potting soil for potted plants
- mix with sand and peat for better permeability
- Insert the core with the flat side down
- should be about half covered with soil
- choose a bright and warm location
- no direct sunlight
- Always keep the soil moist, but not too wet
This method also takes some time, but has the advantage that the plant does not have to be repotted immediately after sprouting. If the bucket is large enough, it can remain in it for the next few years until it is repotted for the first time. After a few months, a central shoot appears directly from the core, which grows steeply upwards.
Tip:
Avocados are trees that do not need to be trained to be a standard tree, as they usually only develop one central shoot. Side shoots are hardly to be found, and so the plant becomes tall and slender, bushy only if it is trimmed accordingly.
Further care
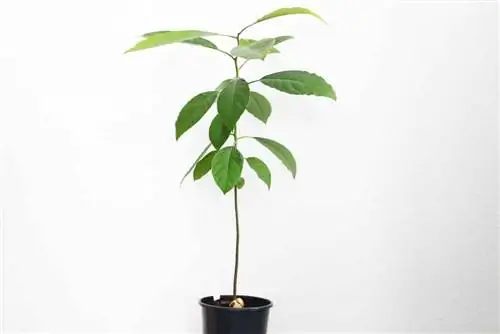
If the avocado plant was successfully grown from the pit and a small plant was formed, then it needs further care in order to become large and decorative. This includes the following points that should definitely be taken into account:
- bright and warm location
- high humidity
- also outdoors in summer
- older plants tolerate direct sunlight
- inside in winter
- don't water but spray from above
- fertilize every two to three weeks
- with liquid fertilizer for citrus plants
- Cut the shoot of a well-rooted plant to 30 cm
- then side shoots form and the tree grows bushier
Tip:
When the home-grown avocado is between six and ten years old, it will develop green-white flowers that can be very numerous. However, the plants cultivated in these latitudes generally do not produce any fruit from the flowers. The plants are too small and the summers are not warm enough here. Avocado trees also need a second tree nearby for pollination.

