- Author admin [email protected].
- Public 2023-12-17 03:39.
- Last modified 2025-06-01 06:48.
If you want to grow celery in the vegetable garden, you don't need a green thumb or experience - the right knowledge of preparation and easy care is completely sufficient. With a few tips, growing vegetables becomes even easier and is particularly suitable for beginners in plant care. The reward for the little effort is particularly fresh and aromatic celery, which is not only tasty as raw food.
Choice of varieties
Pear celery can be grown from any celery stalk or celery stalk with the right approach. However, this requires more effort when it comes to care. It is much easier to choose celery directly. This is also known as white, self-bleaching celery.
Location
Garden or balcony - the main thing is sunny. The vegetables can still cope with light shade, but this does not optimally promote growth.
Substrate and soil
Pear celery is a heavy eater and therefore requires large amounts of nutrients. The substrate should also be as follows:
- loamy and not too loose or sandy
- moist
- calcareous
- nutrient-rich
If these conditions are not already met, some help can and should be made. Algae lime and horn shavings increase the pH value if it is too low. Manure or mature compost enriches the soil with nutrients. As a rule, around five liters per square meter is sufficient.
Preparation
Ideally, the vegetable patch for growing celery is prepared in the fall. The soil is dug up or at least loosened and, if necessary, lime and compost are incorporated. If you missed the time for this in the fall, the preparation can still be made up in the spring. But then as early as possible so that soil organisms can still decompose the nutrients.
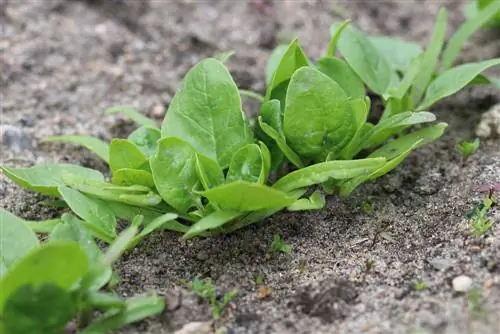
Sowing and pre-breeding
Sowing directly outdoors is easy in itself, but is not recommended when growing celery. If the seeds are brought directly into the bed, growth takes a very long time and the harvest is delayed. Celery should therefore either be grown indoors or planted as a seedling.
When growing and planting, please note the following:
- Sowing takes place in potting soil, around the end of February and at a temperature of at least 15°C. The seeds should be about five centimeters apart.
- The substrate must be kept moist throughout.
- After the Ice Saints, the seedlings can be planted outdoors. Of course, this also applies to purchased seedlings.
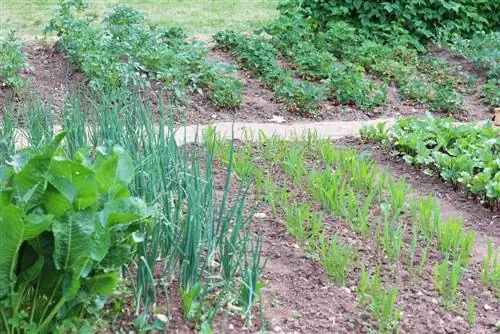
- The young plants are each planted two centimeters deep and should be 20 to 30 centimeters apart within the row and 30 centimeters between the rows.
- After planting, the young celery is watered well so that the water reaches deeper layers of the earth. It is important to ensure that water is not used that is too cold, as the seedlings are initially quite sensitive.
Bleaching
If a self-bleaching celery variety was not chosen, the stalks must be protected from the sun. This is done gradually by piling up the soil around the plants.
As soon as a piece of the poles is visible above the ground, they are surrounded again with soil and the substrate is lightly pressed down. In this way, a kind of wall is gradually created and only the upper leaves - i.e. the celery green - are visible.
Pouring
Celery needs a lot of liquid and moisture - so it needs to be watered accordingly. It is optimal if the substrate is always kept slightly moist but does not become waterlogged. Watering must therefore be carried out at least in summer and during periods without precipitation. It can also be tap water, because celery is not sensitive to limescale.
Fertilize
While growing, the celery is fertilized and watered with pond water or nettle manure at the same time. Alternatively, a small amount of compost can be applied and incorporated again before watering. Fertilization occurs approximately four weeks after planting and from then on once a month until harvest. If the soil is very poor, fertilization can also be carried out twice a month.
Harvest
Harvesting can begin around August and continue until October. It should be completed before the first frost hits. Until then, however, you can harvest as needed. To remove the stalks from the soil, self-bleaching celery is grasped and pulled out of the substrate. If the celery was grown in a place protected from light by piling up the substrate, the soil around the plant is first carefully removed and the vegetable is then pulled up.
Storage
If the celery is not to be used immediately, it is roughly removed from the soil and covered with sand or wrapped in newspaper. Stored in the dark at 1 to 5 °C, the sticks will last for several weeks.
Tip:
If it is a very large harvest, the celery can also be frozen and will then last for several months. However, it should be cleaned well beforehand, blanched in boiling water for three minutes and then quenched in ice water. This way it retains its consistency and color.
Pests, diseases and care errors
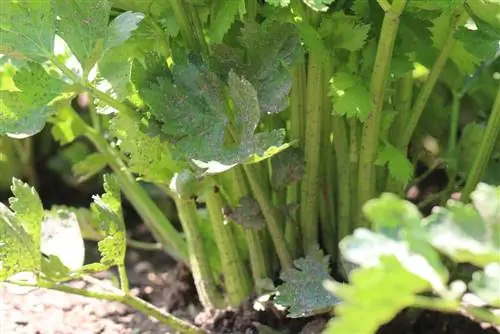
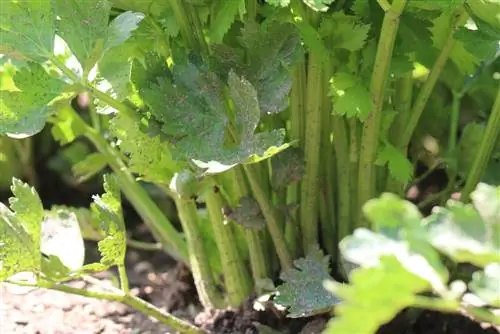
White celery is generally spared from pests. However, illnesses and care errors are certainly possible, the most likely being the spread of a fungus. The leaves wilt and change color, and a black fruiting body can often be seen on them. The spread of the fungus is promoted by damp weather, moist soil and planting distances that are too close. Watering from above can also increase the risk. If there is an infestation, the culture conditions should be adjusted and affected plants removed. An appropriate fungal agent can and should also be used to prevent further spread.
In addition to the factors mentioned, other care errors can be responsible for losses in yield. Below:
- lack of nutrients, too poor a substrate
- too loose, sandy soil
- lack of watering
- location too dark
- planting too early and damage caused by late frost
- Pouring with water that is too cold
If you follow the instructions for growing celery, you won't have any problems with it.
Growing in a container
You don't necessarily need a bed to grow celery. A large, shallow bucket or a waterproof bag will also do. A self-bleaching variety should be chosen for the bucket so that there is no need to pile it up to bleach the poles. If necessary, a little more substrate can be filled into a bag for this purpose. In both cases it is important to ensure that:
- water drainage is ensured
- the plants are well ventilated
- the plant container is sunny
- avoiding the substrate from drying out
Growing in a bucket means minimally more effort, but it also makes regular checks and harvesting easier.
Conclusion
Growing celery in the vegetable patch is very easy if you have the appropriate knowledge. With this and a little patience, good yields can be achieved and the vegetables can be harvested crisp and fresh for weeks.

