- Author admin [email protected].
- Public 2023-12-17 03:39.
- Last modified 2025-06-01 06:48.
For “normal plants”, repotting is important so that the plant receives the right care in the root area. When it comes to bonsai, repotting is a crucial part of the overall measures that are necessary to develop dwarfism, because repotting also includes root pruning:
Why repotting is particularly important in bonsai
Every plant in the pot needs to be repotted occasionally because its roots hit the pot walls and start to develop unhe althy twisting growth and because the soil in the pot no longer offers good growing conditions. However, normal plants can survive in their pots for quite a long time.
A bonsai is not a normal plant, but a plant that is artificially encouraged to grow in a way that has nothing to do with its growth in nature. Most bonsais would become meter-high trees with thick trunks if they were allowed to and no, the bonsais are not special bonsai varieties of plants, but rather the normal plants that you may already have in the gardens in the maxi version have seen. Of course, when growing a bamboo bonsai, you will not necessarily choose a Dendrocalamus giganteus, which grows to a height of 40 m and grows four to five times as much every single day as the total size of a bonsai, but rather one of the smaller species.
But still - bonsais grow much larger in nature than they are supposed to be in bonsai culture. A plant that is actually a meter high should be “coaxed” into an artistic miniature growth, and this is only possible with many tricks that the Penjing gardeners (that’s what the bonsai gardeners are called) have developed over the centuries.
What is important when repotting a bonsai?
Such short stature can e.g. B. can only be achieved if there is noticeable intervention in the root space, by removing tap roots and shaping the root itself. How growth takes place in the deliberately limited root space in the shell plays an equally important role in the formation of the desired miniature. Short stature such as the constant pruning of the shoots and leaves.
As part of this part of growth limitation, repotting is a very important process. Inactive older root parts must be removed regularly so that the few small roots in the bowl can develop their full growth potential. After root cutting, new fine suction roots form around the trunk, which help the bonsai to cope even with the limited root space available to it. If the roots can grow well, more shoots and buds will form at the top and the foliage will become denser.
Regular repotting also prevents the root ball from becoming so compacted that the bonsai simply starves because it can no longer draw nutrients from the substrate. And when repotting, it is provided with fresh substrate, with a complete package of new nutrients.
When repotting, the bonsai also gets a new bowl, so you have to choose the right size. The size of the pot has a major influence on the development of the bonsai. If the new pot is chosen too large, the bonsai can form a lot of roots and can no longer be kept in the fence due to the cut. As a rule, it has proven to be a good idea to choose a bowl that is slightly smaller than is aesthetically necessary. However, if the pot is too small, the bonsai needs a lot of water, will soon show deficiency symptoms (nitrogen and iron) and will more or less stop growing.
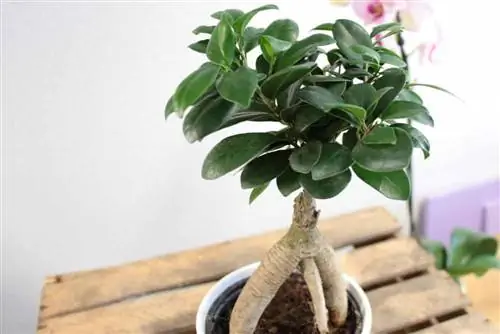
The new bowl should of course also aesthetically match the respective design of the bonsai, as it forms the framework of its appearance. Bonsai pots are offered in many different colors, textures and shapes, so individual design within a specific tradition is no problem.
The bonsai substrate
To repot you need new substrate, a ready-made bonsai substrate mixture that you have bought or mixed yourself. It should dry quickly enough to protect the roots from unhe althy moisture, but store enough water to nourish the tree.
Ingredients for mixing a bonsai substrate
- Akadama: clay soil from Japan that reliably neither clumps nor compacts and is therefore often used for bonsais
- Chabasai: Natural zeolite made from volcanic ash, permeable to water but has good storage properties, long-lasting, lowers the PH value
- Garden soil: An insider tip for bonsais should be well-loosened and fairly seed-free molehill soil
- Humus: The content in normal land soil is sufficient
- Canoe soil: Japanese substrate with low pH value for lime-tolerant bonsai (azaleas, rhododendrons)
- Kiryu soil: dimensionally stable Japanese vitamin soil with a high iron content, good for maple, pine, juniper (mix in 1/3 to 1/2)
- Perlite: Volcanic pore rock, for loosening compacted substrates and as a drainage layer
- Sand: As mineral quartz sand with a grain size between 2 and 4 mm
- Other loosening materials with a few nutrients: pumice gravel, coconut fibers, lava, baked clay, pieces of bark, normal zeolite
With all of these substances you can create mixtures that combine all the properties of a good bonsai substrate: particles around 4 mm, no dust and no coarse organic material, absorbing, storing and releasing water, dimensionally stable, light and of inconspicuous appearance.
The following mixtures are suitable for most bonsais (some bonsais need very special substrate mixtures, but you will definitely know that if you grow such a bonsai):
- 50% akadama, 25% pumice gravel and 25% humus
- Substitute for humus: quality potting soil
- Universal mixture 2: 1 part soil, 1 part coconut fiber or other suitable peat substitute, 1 part sand
- Bonsais that are rarely watered get a more water-storing mixture with a little more humus
- Bonsais grown in humid climates are kept in a quick-drying mix with more akadama and gravel
- Deciduous tree bonsais need more humus or soil
- Coniferous tree bonsais can be grown in equal parts Kiryuerde and Akadamaerde
- Young bonsais grow faster in light soil with more loosening components
- Larger solitary bonsais (e.g. maple) that are not supposed to grow anymore can be kept in 50 - 70% Kiryu soil and Akadama soil
- Mixture for indoor bonsai: 3 parts acadama soil, 5 parts coconut fiber, 2 parts sand
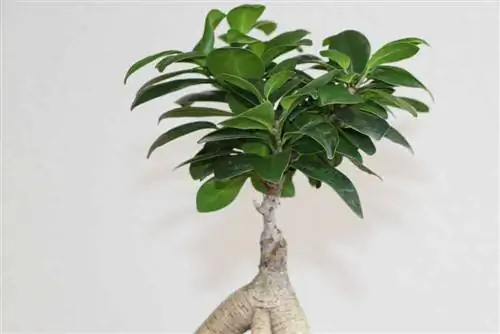
Today, bonsais are increasingly kept in so-called “modern substrates”, in pure lava, zeolite or pumice gravel without any organic material, to prevent root browning and excessive watering. If your bonsai has previously been kept in such a substrate, it will of course continue to do so after repotting.
Repotting a bonsai - instructions in 7 steps
1. First the new bowl is prepared:
- Bonsai pots that have already been used are freed from limescale deposits and dirt
- Cover the drainage holes in the ground with a bonsai cover grid and secure this with a wire loop
- Run bonsai wires from the outside through the drainage holes, with which the bonsai will later be fixed in the pot
- Now the bottom of the bowl can be covered with a drainage layer of gravel, perlite or coarse Akadama soil
- The drainage layer should be at least 1 cm and a maximum of 3 cm thick, depending on the size of the bowl
- On the drainage layer there is a centrally raised layer of the prepared substrate mixture, on which the bonsai is immediately placed
2. When the pot is ready, the bonsai can be potted:
- Carefully remove the bonsai from the old pot
- If it is too tight, a repotting tool can help, e.g. B. a sickle knife (see potting tools below)
- The old soil needs to be partially removed, you can use a wooden chopstick or a special root hook
- Until you can clearly see the roots that now need to be untangled
- But if possible, don't remove all the soil, otherwise mycorrhizal fungi in your culture could suffer
3. Now it's time to cut the roots:
- All long roots are cut back so that the tree develops the most finely branched, compact root system possible
- Rotten and downward-growing roots are removed first and definitely
- The upper root system in particular should be encouraged to develop well and strongly
- Then the lateral roots are cut back, and poorly placed upper roots
- In total, about a quarter of the root mass should be removed; the goal is a fine but strong root structure (Nebari)
- Finally, the root collar is z. B. exposed with chopsticks, all thicker roots should be visible on the surface
4. The bonsai “moves into its new bowl”:
- Now the bonsai can be placed in the new pot; it is worked into the small substrate mound using slightly rotating movements
- Until the root collar protrudes slightly over the edge of the bowl
- Bonsai in oval or rectangular pots are placed from the middle in the center of one half of the pot
5. Embed bonsai in soil:
- The prepared substrate mixture is filled in dry
- The substrate must be worked well between the roots
- This works best again with the famous chopstick
- Carefully poke around in the root area until the substrate is crumbled into all gaps
- It should reach just below the edge of the bowl
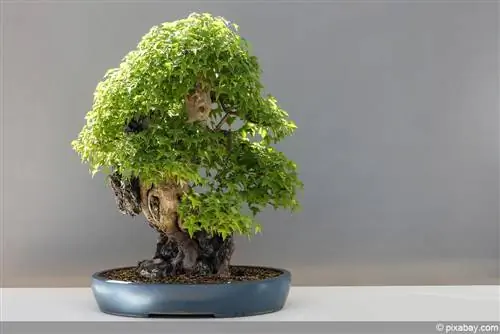
6. Trim, align, fix:
- Now shorten the upper area to the same extent as the root so that the balance between root and leaf mass is correct again
- Check from all sides whether the bonsai is standing correctly
- If it is well aligned, it can be fixed crosswise over the root ball using the previously inserted wires
- And further secured with wire as necessary
7. Pour and fill up:
- Depending on the substrate mixture, water thoroughly now
- Or put the whole bowl in a water bath where it can soak up well
- The substrate can settle again, which can create cavities
- These cavities must be filled with substrate
- The top layer is applied last, e.g. B. a thin layer of sifted, crumbly akadama
The soil tool for bonsais
During repotting you have to do all kinds of fine work, original Japanese bonsai tools are offered for all of them:
- Small bonsai soil shovels in a set of 3
- Bonsai soil sieves made of stainless steel, 30 cm or 37 cm
- Bonsai root claws called 'Bon-Kumade' or 'Ne-Kagi'
- Bonsai root knife (professional)
- Bonsai sickle saws
- Bonsai hand broom
- Bonsai net panels or covering nets
Wooden chopsticks are indispensable for some fine work and are definitely the cheapest purchase of these tools, which usually cost double-digit euro sums. But if you can tolerate a few not completely authentic Asian tools, you will get pretty far with your normal garden tools and e.g. E.g. instead of chopsticks, simply use a few shish kebab skewers.
Repotting bonsai - when and how often?
Both must be decided depending on the type and age of the bonsai:
Time
For deciduous trees, repotting is best done in early spring, when the bonsai is still dormant during the winter. Repotting is significantly less stressful if the tree does not yet have any fresh shoots to grow. In addition, the bonsai can easily compensate for the interventions at the roots if it starts growing shortly afterwards. Depending on the species, the period for repotting is between March and the end of April.
Coniferous trees should be repotted between September and October, depending on the species.
Indoor bonsais are also best planted at the beginning of spring, but tropical bonsais can also be transplanted at other times of the year if necessary, just not in the middle of the main growing season.
Distance
Young bonsais that are still in their basic structure are repotted every year. You often need a larger bowl because the soil volume has to be adjusted to the increasing plant mass. If the small bonsai appears rather weak, you should wait until the second year to repot it.
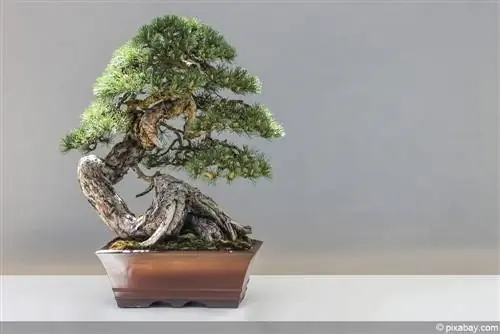
For adult bonsais, the frequency of repotting depends on their growth rate. Fast-growing bonsai quickly become too cramped in their pots and need to be repotted at least every two years. Slower growing bonsais (and older, more mature bonsais that are often no longer in such a hurry) only need to be repotted every 3 to 4 years.
Really old bonsais can “live” in their pots for quite a long time, while decades-old solitaires can live for five to six years or more. They are usually no longer “re-potted”, but rather repotted into the old bowl after root care and soil renewal.
In any case, repotting should never be done routinely because so much time has passed. The bonsais are checked every year in early spring and carefully removed from the pot to examine the roots. If you only see soil, you still have a year.
A bonsai urgently needs to be repotted if you notice the following:
- The substrate is completely riddled with roots and these begin to grow in circles along the edge of the bowl
- You notice root rot
- The bonsai has already shown signs of deficiency at the top and the roots are very densely grown together
The bonsai needs some aftercare after repotting, about four weeks of no direct sun, no wind, no fertilizer. When the bonsai sprouts, it can be returned to its sunny regular spot and fertilized. If necessary, you can now start laying the moss layer on the surface of the earth.
Conclusion
Repotting is an important care measure for bonsais, because only repotting and root care at the right time will encourage a bonsai to develop an expressive miniature growth.

