- Author admin [email protected].
- Public 2023-12-17 03:39.
- Last modified 2025-01-24 12:45.
The stream design essentially depends on the conditions of the respective garden. Planning is particularly important here, namely the entire stream from the source to the mouth.
Preliminary considerations
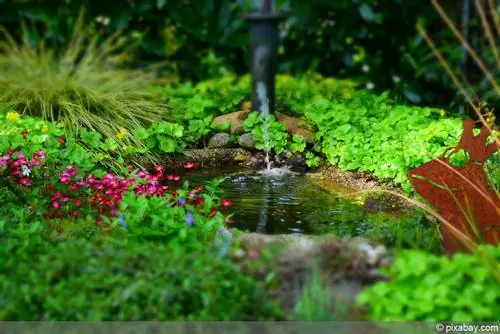
First it must be clarified whether the stream should flow into a pond or enhance the garden on its own. In combination with a pond, it is fed by this, for which a water pump must be deposited either in the pond or in a special shaft. The pump delivers pond water to the source of the stream via a hose. Streams without pond mouths, on the other hand, form their own water cycle. The water flows into a collecting pit and is also transported back to the source by a pump using a hose.
Consider the conditions of the garden
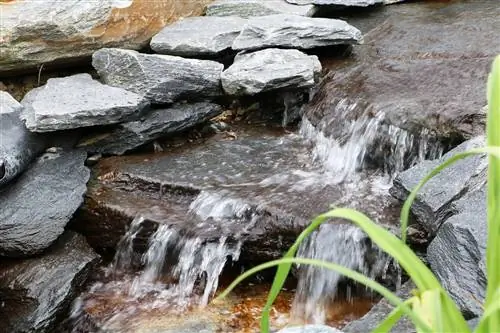
Next, the conditions of the garden, in particular the gradient, determine what kind of stream you create. Two basic models are distinguished here. If there is little or no gradient at all, a meadow stream is used, as is often found in nature. It is designed in large meanders (S-shape) with small spillways, small waterfalls, narrowings and widenings of varying depths to keep the water moving. If the gradient is steeper, several barrages, the trademark of the Plätscherbach, must be created in close succession. Depending on your wishes and circumstances, these can be short or long steps, but the height between the individual sections should not exceed 10-20cm. With this type of stream, narrowings, widenings and different stream depths should also be created.
Width, length, shape
The average stream width should be approx. 50cm, although it can be varied with narrower and wider sections. A small island is also possible. The stream should be at least 3m long, although it only begins to flow properly when it is longer than around 6m. The meanders should form long S-lines, not sharp angles, as the water easily overflows the banks here. It also seems unnatural. The stream should be an average of 25cm deep, with different water depths providing variety.
Expectations of a stream
A really rushing stream is not only unrealizable for the garden, but it also makes life impossible for most plants and animals in and around the stream, which is why even a babbling stream should only flow slowly. The desired and ideally different speed of the water can be achieved using various tools. A deeper or wider section, perhaps even at ground level, allows the water to accumulate and thus almost stand still. Narrower sections, shallower depths, stones or wood in the stream allow the water to flow faster, as do barrages that act as small waterfalls and enrich the water with oxygen. With a few stones placed on the barrages as a flow breaker, the water doesn't just rush down.
A sketch on paper of how the future stream should run in the garden makes sense.
Construction instructions
It's always best to start digging at the mouth. The different zones are defined here, such as swamp zones, islands, deep and shallow places, spreads and narrow places.
Now it's time to get the necessary materials. If the stream is longer (from approx. 3m) and/or needs to be varied, a special pond liner is recommended, which should ideally have a thickness of 1mm in order to withstand the load caused by the water, stones, barrages and also roots can. The film must overlap 20-30cm on both banks of the stream, i.e. it must be wider than the length of the stream. Pond liner is usually sold by the meter from 2m wide. You can also have the film glued to you by the manufacturer. PVC film is the most suitable as it can be glued into suitable strips and can be patched later if necessary.
A special adhesive is available commercially. It goes without saying that there should be as few adhesive spots as possible, as they always pose a risk of leaking. The gluing points should definitely be lengthwise (facing downstream) and not horizontal, otherwise sand and other small dirt can quickly get caught. Pond liner with a thickness of 1mm costs around 5-5.50/square meter, so it's worth looking at special offers. It is even more expensive but easier to use ready-made stream shells, which are only suitable for shorter streams. They are available in natural stone or plastic and can be easily combined with each other.
In specialist shops there are also complete modular systems made of plastic parts, which are the easiest way to design a stream from the source to the mouth. However, this is also the most expensive option for a stream and you cannot design it individually. Gravel and larger stones are needed to cover the membrane around the stream bed, the edges or to create obstacles that stir up the water. It is important to make sure not to use calcareous pebbles so as not to unnecessarily increase the acidity of the water. You can also use wood to cover the pond liner on the bank and build barrages. However, under no circumstances should you use impregnated wood, as toxic substances get into the water. Normal wood rots at some point and therefore has to be replaced every now and then.
If the terrain is very stony or has a lot of roots, a special pond fleece or a layer of sand is recommended as protection. The foil is then placed on top. Of course, you have to take these layers into account when excavating and therefore dig deeper if necessary.
The most important thing is to attach the foil to the edge. In places that are supposed to be accessible, the bank reinforcement must be solid. Paving slabs that find support in a bed of sand help here. Several slabs, stacked in a slight staircase shape, reach outside the membrane from the bottom of the stream to the surface. The foil is laid along them, with the penultimate panel being covered with a piece of fleece in order to then pull the foil over it. Then there is also a piece of fleece and finally the last panel, which is the only one visible.
No matter whether the edge should be accessible or not, the film must be attached correctly so that no water can flow from the stream into the surrounding area. To do this, make a small wall of earth or stones along the bank over which the film is placed. The end is then placed vertically upwards to counteract capillary action where the stream water flows into the adjacent beds. Unnecessary foil ends are now cut off and covered with pebbles or wood.
Many of the most beautiful stream flowers require a swamp area. This means that they like wet feet but no current, which is why they have no place in the stream bed. Swamp zones can be easily created with flat grid tiles or natural stones without sharp edges, stacked on top of each other in a staircase from the bottom of the stream to the surface. This area, separated from running water, is filled with nutrient-poor soil. The stones provide enough water to keep the soil permanently moist and swamp plants prefer a water level of 0-5cm.
When everything is done, it's time for the best part: planting. The range of plants for the stream and its surroundings is diverse. Here you just need to pay attention to the respective location requirements. If you plant in the stream itself, mesh baskets or small plant bags that are filled with nutrient-poor soil and weighted with pebbles can help. The selection should be made so that the bank is no longer visible (takes about a year) and bright color accents shine from spring to autumn.
A stream is not only simply beautiful and (unfortunately) very rare in gardens, it also offers a habitat for many living creatures and anyone who allows it to flow into a pond improves the water quality of the pond enormously. It therefore contributes significantly to biological balance. However, in order to perform its filter function optimally, it should be in continuous operation from the end of April to mid-October; also at night. If it is not used for longer than 2-3 hours, the important microorganisms die.

