- Author admin [email protected].
- Public 2023-12-17 03:39.
- Last modified 2025-01-24 12:45.
A wooden stud wall can be used to redesign rooms without actually having to build a wall. This not only saves costs, but also a lot of dirt. The wall construction itself is simple and can even be done by non-professionals. However, there are a few basic rules to consider. There are also tips and tricks that make construction even easier.
Basic principle
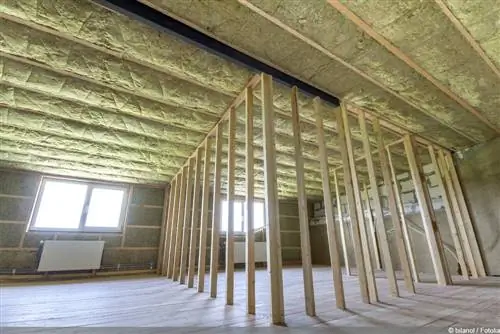
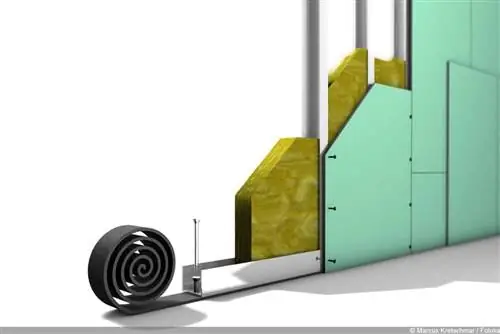
Wooden stud walls are usually used as interior walls. They are only suitable as an external wall if they have a very specific design, but that is not the topic here. If you want to build a new external wall, you would usually do well to use other construction methods. At their core, wooden stud walls consist of a framework that acts as a kind of supporting framework. Alternatively, it is also called a lattice framework. It is made of either wood or metal. However, as a natural building material, wood is definitely the better choice for interiors. Drywall panels are then attached to this grid, which extends from floor to ceiling - on both sides, of course. This creates a closed wall that can then be plastered, painted, wallpapered or even tiled.
Note:
The spaces in the lattice framework can be filled with commercially available insulation materials. This ensures cozy warmth in the room and helps save energy.
Concrete construction
1. Step:
The construction of wooden stud walls always begins with the installation of a beam on the floor and on the ceiling. They should extend from one existing side wall to the next. It is particularly important that the two beams are placed exactly on top of each other, otherwise a straight wall surface cannot be achieved. Very careful work is required here. It's best to draw the gradients at the top and bottom and use the distance to one of the other walls in the room as a guide. So it doesn't work without a ruler, spirit level, plumb bob and pencil. The beams themselves are screwed together. In order for this to be successful, holes must first be drilled in the floor and ceiling and dowels inserted. The number of screws depends on the length of the beams. As a rule of thumb: place a screw every 30 to 40 cm.
2. Step:
Once the two beams have been attached, it's time to build the latticework between them. As a rule, it is sufficient to attach wooden strips vertically. The easiest way to do this is to mount metal brackets on the beams, to which the strips are then screwed. Here too, a distance of 30 to 40 cm is recommended. Strips and beams must be flush on both sides.
3. Step:
Then initially only one side of the wall is completely closed with the drywall panels. The assembly is also carried out here by screwing. The screws are placed so that they can penetrate through the plate into the vertical strips. The joints between the panels are closed or plastered with a special adhesive tape. Once one side is closed, you can start to insert insulation material between the scaffolding strips. These will usually be insulating panels that can be cut and inserted very easily. Once the insulation has been completed, the wall is closed on the second side.
4. Step:
Now it's time to design the bare wall. Drywall panels can either be plastered or covered directly with wallpaper or tiles. However, care must be taken to ensure that both the plaster and the respective adhesive are actually suitable for dry construction. Depending on the product, it will usually take a few days for the material to dry completely. Only when this is the case should you hammer nails into the new wall to hang pictures or shelves on it.
Tips
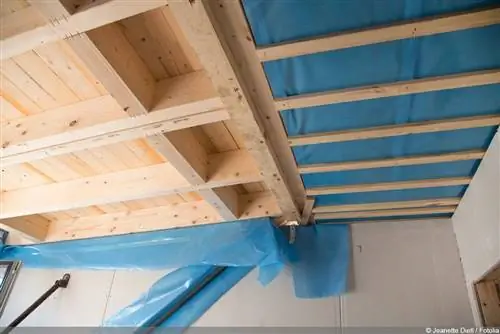
Building a wooden stud wall is not particularly difficult. The most important thing is to work as carefully as possible. In addition, it is usually easier when four hands are involved. Above all, attaching the ceiling beam should be done in collaboration with another person. Otherwise, here are a few tips that will make wall construction easier and safer:
- Use squared timber measuring 8 x 5 cm. They can also be used for the bottom and top bars.
- The distance between the vertical stand parts should not be more than about 55 cm.
- For wooden ceilings, the wall should run parallel to the support beams of the wall.
- If a door is to be integrated, an appropriate distance must be maintained between the vertical timbers.
- The door should be installed at the second vertical strut at the earliest.
- The vertical timbers should completely fill the length of the distance between the two beams.
- Check again and again that the timbers and beams are actually level and readjust if necessary.
- If you want to save yourself the metal brackets for assembly, you can also nail the wood from the sides.
Exterior wall
The structure described above refers to interior walls. In principle, however, it can also be used on external walls. However, there is a crucial difference in the material. Only solid construction wood may be used here. Which one fits exactly should be clarified in advance by a structural engineer. In addition, wooden stud walls with external contact also need a so-called vapor barrier and suitable sound insulation. All in all, it is highly recommended to have the wall construction for an exterior wall carried out by professionals. The devil is often in the details, not least because safety aspects play a larger role.

