- Author admin [email protected].
- Public 2023-12-17 03:39.
- Last modified 2025-06-01 06:48.
If you want to keep ducks yourself, you have to offer them appropriate protection. This can be easily accomplished with a duck coop and a duck brooder. However, ready-made models from retailers are often very expensive and not adapted to the local conditions or your own wishes. Building a duck house yourself is child's play with the right instructions.
Legal information about keeping ducks
Keeping runner ducks and muscovy ducks is particularly popular, but not only in rural areas. If you have a sufficiently large property available, you can purchase the animals without any problems - there is no obligation to provide proof of expertise or certain structural requirements. However, some points must still be adhered to.
These include, among others:
- registration of the animals at the responsible veterinary office
- no solitary keeping
- no exclusive keeping in cages
- constant access to water and food
- Free-range farming with duck coop or duck house
- Daily access to sunlight or daylight
- In the event of poultry diseases or epidemics, comply with the stable requirement and transport ban
- professional and animal welfare-compliant slaughter
If these requirements can be met, nothing stands in the way of the attitude. In order to be kept in a species-appropriate manner according to the Animal Welfare Act, the ducks need an appropriate enclosure and a stable. While the enclosure serves he alth and well-being, the purpose of a duck coop or duck house is protection from the blazing sun and strong weather influences. In addition, together with the enclosure, it serves to protect against predators. This protection is essential, especially for smaller breeds of ducks or chicks.
Duck coop - preparation

In order to be able to build a duck house yourself, you must first know the general conditions. As a guide, there should be a floor space of 120 x 80 centimeters available for two ducks. A height of 50 to 60 centimeters is completely sufficient. Depending on the number of ducks, the duck house can also be built with several floors. This means that less floor space or standing space is required - but the animals still have plenty of space.
This means that the duck coop can also be used as a duck breeding house. The following utensils are required for construction:
- Wood panels that are suitable for wet areas - for example OSB panels
- 2 Euro pallets as a basis
- Styrofoam plates or flakes
- Wood screws
- Cordless screwdriver or drill with appropriate attachment
- Jigsaw or circular saw
- Sandpaper or sander
- Exterior paint
- Hinges
- Angle
- if necessary roofing felt
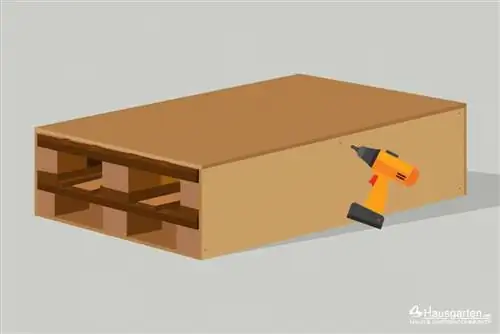
The following step-by-step instructions will help you build the duck house:
Step 1
First, the Euro pallets are placed on top of each other and screwed together tightly. They form the basis, insulate the house and protect against cold ground.
Step 2
The base is covered on three sides with cut OSB panels. A fourth plate is screwed to the surface and a fifth plate to the bottom. Because the side is still open, the cavities in the pallets can now be filled with Styrofoam flakes or cut Styrofoam panels. The fourth side is then closed with an OSB board.
Step 3
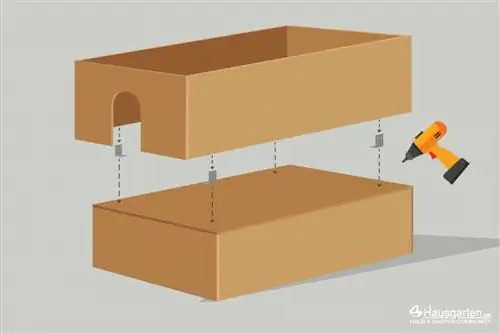
The body of the duck house is now placed on this base. To do this, both side walls and the rear wall are first screwed together. Sufficiently large openings must be sawn into the front panel as entrances before it is also screwed to the side walls. This body is connected to the base on the inside using angles.
Step 4
Three to four hinges are screwed to the inside of the upper edge of the back wall.
Step 5
Now the last OSB board is put on as a roof and connected with the hinges. In this way the roof can be folded. This makes it easy to check the interior of the duck coop and clean it if necessary.
Step 6

If the house is firmly attached to the base and the roof can also be opened without any problems, two further protective measures can be taken. On the one hand, the wood can be impregnated with varnish. This offers additional security against moisture, mold and swelling of the wood. On the other hand, roofing felt can be applied to the roof. This is particularly useful if the coop is outdoors and significantly extends the lifespan of the duck house.
Tip:
To enable rainwater to drain away quickly, the roof can also be slanted. To do this, the upper edges of the side parts are sawn off at an angle of ten to 45 degrees. The dimensions of the front panel and back of the stable must of course be adjusted accordingly. It is ideal if the front is higher than the back wall and the water drains to the rear.
Multi-story duck coop
A multi-story duck house can be built in the same way as described in the instructions above. Several bodies simply have to be placed on top of each other. Instead of a sloping roof, the upper edges of the different floors are kept straight and separated from each other by an intermediate floor.
An alternative to this is a stable that is set up like a shelf. The body is made up of two side parts and a back wall. With the estimated dimensions of 120 x 80 centimeters and a height of 50 centimeters, OSB panels in the following dimensions would be required for a three-story stable:
- two side panels, each 80 cm wide and 150 cm long (each with an opening for the top two floors)
- a back wall 120 cm wide and 150 cm high
- three front pieces, each 120 cm wide and 50 cm high
- a roof 120 cm wide and 100 cm long as an overhang
Two intermediate shelves are also required. However, caution must be exercised when it comes to dimensions. If OSB panels with a thickness of 18 millimeters are chosen, the intermediate floors must be a total of 36 millimeters shorter. The front pieces also have to be kept a little narrower than 50 centimeters so that they can still be opened. Depending on the thickness of the panels, one to two centimeters less - i.e. 48 to 49 centimeters - is sufficient.
Important:
Don't forget to saw an opening in the front piece for the lowest floor.
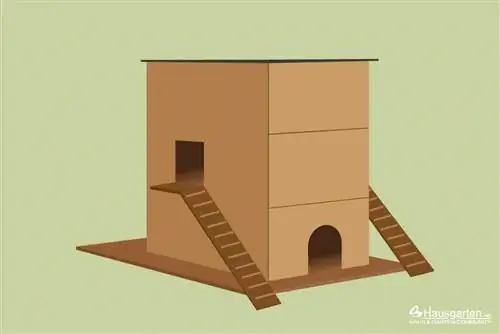
It is necessary to open the fronts so that the individual floors or bays can be easily and thoroughly checked and cleaned. To do this, three to four hinges are attached to the underside of the fronts and shelves. At the top end they are attached to the body of the house using an appropriate device - for example using hooks and eyebolts - so that they can be opened if necessary.
Build a duck ladder
It should be noted that in multi-story stables or stables that are insulated from below, ladders must be provided. For this purpose, boards about 20 centimeters wide are used, on which flat strips can be used as “steps”. The term commonly known for this is “chicken ladder”. Since the climb must not be too steep for the ducks, there must be enough space for the ladders at the front and on both sides. If there are three floors, it is advisable to position the lowest ladder towards the front, while placing the ladders for the upper floors to the side. The ladders for the upper floors should be at least 1, 20 to 1, 40 meters long so that the ducks can reach their pens safely and easily.
Strips as steps are nailed to the ladder every ten to 15 centimeters. The ladders themselves can be attached to the stable with brackets. It can also be beneficial to choose the subfloors a little wider. Instead of 80 centimeters, for example, 100 centimeters and attach the duck ladder to the protruding piece of the intermediate floor.
Duck breeding house

Additional duck breeding houses can be provided for wild ducks as well as specially bred ducks. Since there will only be one duck in these, smaller dimensions are sufficient. A base area of 60 x 60 centimeters is sufficient. The height should be between 50 and 60 centimeters. Since ducks breed in the warm season, there is no need to insulate the floor or even the entire floor. It is enough if the duck breeding house consists of four walls and a roof. Of course, a floor can also be attached. The construction is not fundamentally different from that of the duck coop. The following steps are necessary:
Step 1
The side walls and the back walls are screwed together.
Step 2
An entrance is sawn into the front. It is then also screwed to the side walls.
Step 3
If you want to add a floor, you can now connect the body of the house to it.
Step 4
To finish building, hinges are first attached to the back wall and connected to the roof panel. It is also a good idea to let the roof protrude slightly. An OSB board that measures 60 x 80 centimeters can be used for this.
Step 5
In order to make the duck breeding house more weatherproof, a varnish can be used and the roof can be separately protected with roofing felt.
Floating duck house
If you have a larger pond in your garden and want to place a highlight on it for the ducks, you should think about building a floating duck house. These smaller duck houses provide protection from predators that cannot swim and are a decorative addition to duck keeping or for wild ducks.
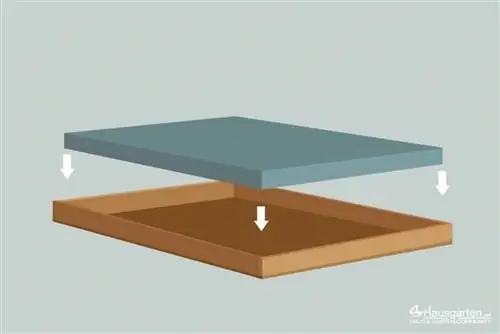
The construction of the house is no different from the construction of the duck house or the breeding house on land. However, it must have a floating body or a floating base.
Step 1
Square pieces of wood are screwed onto all four sides of a light, thin wooden board. The wooden panel should be large enough to leave enough space for a walkway around the house. The house for the ducks should sit in the middle of the plate.
Step 2
Boards about ten centimeters wide are screwed onto the board and the wood.
Step 3
Duroplastic foam is now inserted into this frame, which is closed at the top. It is used to insulate houses, is moisture resistant and has high buoyancy. For the floating house it should be at least eight centimeters thick and completely fill the base.
Step 4
The bottom is now closed with another plate.
Step 5
An eyebolt for an anchor chain or a connecting chain is attached to the side of the frame.
Step 6
The house is fixed to the base and a chain or durable rope is attached to the eyebolt.
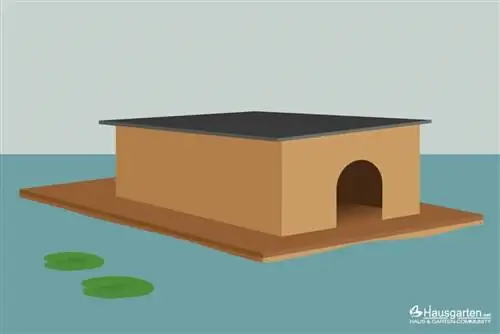
Once these steps have been completed and the house has been additionally protected against water with paint, it can be placed on the water. The anchor chain can either be attached to a heavy object and sunk or it can be attached to the bank. The advantage of an anchor is that the floating base and house stays in the predetermined location and does not drift randomly through the pond. The advantage of being attached to the shore is that the house can be easily pulled ashore if necessary.


