- Author admin caroline@plants-knowledge.com.
- Public 2023-12-17 03:39.
- Last modified 2025-01-24 12:45.
The ingredients are most effective when freshly processed. The taste is also usually the most intense. It is therefore important that the herbs are processed quickly after harvesting. Contact with atmospheric oxygen often leads to a change in color. But what's worse is that the vitamins and other valuable substances are also more or less lost. Not all herbs are suitable for all types of preservation. Some are easier to freeze, others are easier to dry or pickle. So before you start working, it is advisable to find out more about it.
Drying herbs
The classic method of preserving herbs is drying. It is crucial that the water contained is removed slowly and gently. You have to expect about 3 weeks of drying time until the herbs are properly dried, which is important so that mold does not form. Almost all herbs can be dried. Exceptions are cress, chives and borage. Basil isn't ideal either. Mint, rosemary, thyme, savory, dill, marjoram, oregano, sage, lemon balm and lovage are well suited. Almost all herbs are best harvested on a sunny day in the late morning. This is when the water content is lowest and the concentration of essential oils is highest. It is important not to wash the herbs. This should only happen in absolutely exceptional cases. First spread out washed shoots and let them dry before further processing.
Air drying
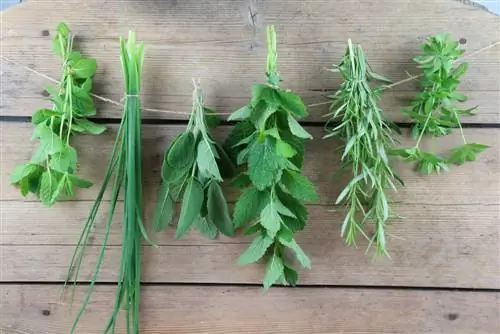
The freshly cut herbs are bundled to air dry. It is crucial not to bundle the herbs too thickly. The thicker and denser a bouquet of herbs is, the harder it will dry. The bundles are hung up to dry in a dry, airy and warm place, simply overhead. Exposure to sunlight must be avoided at all costs, as the sun and the associated high temperatures destroy the aroma, color and ingredients. After drying, pluck the leaves from the stems and place them in dark glass or ceramic containers with a tightly sealing lid for storage. Alternatively, the leaves or flowers can be plucked from the stems and dried without them. You lay them out on a rack covered with kitchen paper or gauze. This will be placed dark, warm and well ventilated. The papers can then be placed straight into the containers.
Dehydrator
If you have a dehydrator at home, you can also dry herbs in it. This is done quite gently and doesn't take long. A temperature of 30°C is ideal. The leaves or flowers of the herbs are plucked and distributed on the sieve bases. The device is switched on and has to run for hours until the herbs have dried properly. You can tell by touching them. The shoots or individual leaves rustle. The drying times are usually between 4 and 8 hours, depending on which and how many herbs are being dried.
Oven drying
The drying process in the oven only takes a fraction of the time of air drying. However, this process is not quite as gentle and some of the aromas and valuable ingredients are lost.
- Place herbs on the oven rack or tray
- The shoots should not be too close together, ideally not at all
- Put in the oven
- Set to 35°C
- Place the wooden spoon in the oven flap so that the resulting water vapor can escape.
- It takes a few hours until the herbs are sufficiently dry
- You can tell because the herbs rustle.
Freezing herbs
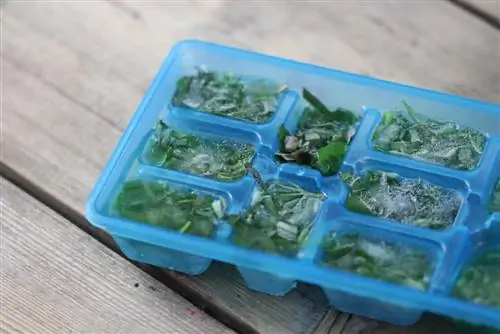
Frozen herbs are closest in taste and effect to freshly harvested herbs. Apart from the fact that the color and consistency remain largely the same, the herbs do not lose their aroma and valuable ingredients when frozen. If you like things very hygienic, you will like this method because the herbs are washed before processing. They can be frozen whole or already chopped up, depending on your preference and space. If you take the trouble to chop up the herbs before freezing, they can be used directly from the freezer. For me this is the most sensible option. Parsley, chives, dill, basil, thyme, tarragon, chervil, mint, sage, coriander, lovage, fennel, marjoram, oregano, savory, thyme and lemon balm are ideal for freezing. Another advantage of freezing is that the herbs last up to a year.
- Wash herbs after harvesting and dab with a cloth
- Then pluck the leaves from the stems
- Either leave whole or chop into small pieces
- Then place in small containers that are suitable for the freezer and close
- You can also add some water to the containers, but that doesn't necessarily have to be the case.
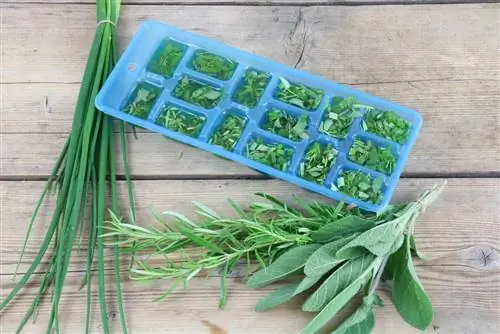
- Ice cube trays are ideal for freezing portion-sized quantities.
- You fill it two thirds with herbs and one third with water. The portion can be added directly to the food shortly before the end of the cooking process. It couldn't be easier.
S alting
Herb s alt is delicious and very easy to make. It is important that the herbs are no longer moist, otherwise the s alt will form lumps. The herbs are weighed very finely. Then fill a glass with a layer of herbs and a layer of s alt. The ratio is 5 parts herbs to 1 part s alt. Parsley, dill, celery, tarragon, lovage and chervil are well suited. Herbal mixtures are also great, e.g. sage, marjoram, rosemary and thyme. Even better than chopping them is to grind the herbs in a mortar. We always work with small portions because it is easier to mix the pieces with sea s alt. Grind the herbs finely, causing the cells in the leaves to break open and the essential oils to escape. Due to the moisture-attracting properties of the s alt, it literally absorbs the aromas and preserves them. This prevents the flavors from dissipating. The finer the leaves or flowers are ground, the better the s alt can absorb the taste. In this type of preservation, herbs and s alt can be mixed in a 1:1 ratio.
- Chop the herbs very finely
- It's better to grind them in a mortar
- Mix with s alt and store everything for a while so that the flavors can fully develop
Pickling herbs
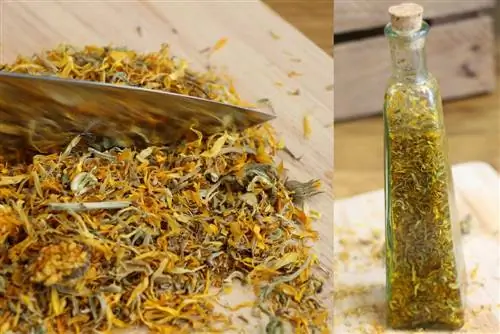
Herbs are mainly preserved in vinegar or oil. You can preserve a wide variety of herbs together and create creative mixtures. Olive oil is often used, especially for all Mediterranean herbs. Sunflower oil or rapeseed oil are tasteless. All herbs can be preserved with them. Garlic is often added to the herbs. Chili peppers are also popular. If you use vinegar for preservation, you should make sure it is a tasteless variety. When preserved in vinegar or oil, herbs can last almost indefinitely, at least if they are kept dark and cool. It is important that only perfect quality is used. It is best to dry the herbs a little so that the moisture escapes and then place them in a sealable jar or bottle that is protected from light. Then add oil or vinegar until all parts are well covered. It makes sense to move the container a little every day, i.e. shake it slightly, at least as long as the herbs are steeping. In oil this should take about 4 weeks, in vinegar 2 is enough. Then it is filtered.
- Wild garlic and basil, but also rosemary, sage and savory are ideal for pickling in oil.
- Thyme, sage, rosemary, mint, lemon balm, bay leaf, basil, dill, chervil and tarragon go well with vinegar.
Conclusion
Herbs can be preserved in different ways. They taste and look best when freshly harvested, but there is often a surplus and preserving them is a good way to stock up for the winter. The right harvest time is important. In addition, the herbs should be processed as quickly as possible so that they retain as much of their valuable essential oil as possible. Not all types of preservation are suitable for all herbs. Some are easier to freeze, others dry or pickle better. To find out which herbs are suitable for which method, you can experiment a bit. However, the herbs should not be stored for too long. Over time, the color often changes, the consistency, the taste and the essential oils disappear.

