- Author admin caroline@plants-knowledge.com.
- Public 2023-12-17 03:39.
- Last modified 2025-06-01 06:48.
Granite is an exclusive building material that should not be installed without detailed installation instructions. However, you can do the most recommended open laying of granite slabs yourself, even with a substructure:
Does your granite slab covering need a substructure?
1. If a covering made of granite slabs is subjected to heavy loads, e.g. If, for example, vehicles are to be driven on, this surface also needs a resilient substructure:
- As a resilient base layer for vehicles, at least 25 cm of gravel-sand mixture (grain size 0/32) must be applied under the surface
- Free the area to be paved from soil at the required depth
- For the base layer that can be driven on, you have to excavate 29 to 31 cm depending on the bedding + thickness of the slabs (at least 3 cm)
- A gradient must be created so that rainwater can drain away
- Usually a 2.5 percent gradient is set
- The gravel-sand mixture is now evenly distributed on top
- Compact this layer with a vibrator
- The bedding, 4 to 6 cm of crushed sand or fine chippings, is placed on this base layer.
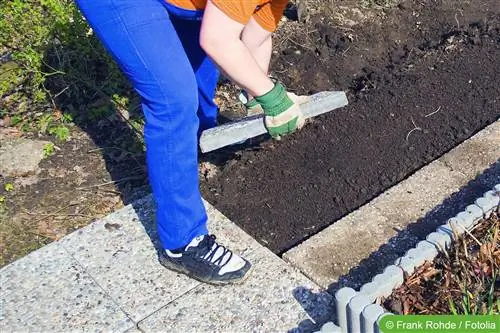
- This leveling layer is distributed horizontally using a long aluminum lath
- This is called pulling, previously laid pulling irons or ropes on the sides serve as an aid
- This layer is also compacted and filled again if necessary
- Always keep an eye on the desired gradient
2. If the granite slabs are only used by pedestrians, around 15 cm of base layer is sufficient. For example, for granite patio slabs, which are best laid loosely on a bed of gravel or sand. Here, the high weight of the granite slabs ensures that the slabs are securely positioned, and the base layer of sand or gravel ensures good water drainage, which is absolutely necessary so that the granite slabs do not suffer any damage in the long term. How to proceed:
- The earth subsoil is excavated to a depth of around twenty centimeters
- Here, too, a little slope is introduced for the water drainage
- Cover the area with a fleece if the bottom of the excavated pit is moist or loose
- Fill the area with the first layer of 5cm gravel
- Compact this layer, you need a vibrator to do this
- Fill the second and final layer of fine chippings
- This layer is compacted again
- If the height of the bed is correct (measure with a guide and spirit level), the following deduction is made:
- Paint the finishing layer straight with the squeegee (taking into account the inclination)
- The alternative is laying on plate supports, which is based on the respective manufacturer's instructions
3. If you want to lay granite slabs on concrete, you may come across the idea that it is not possible. That's not entirely true, but the prerequisite is that the concrete surface is intact and has the required gradient. However, the slope is usually present outdoors, so you can easily lay the granite slabs on the concrete. It should first be painted with a special adhesive primer, then a formwork frame at least 10 cm high is nailed around the concrete surface, then the bedding can be installed. If the frame is to be replaced later by a border, it must be permeable to water.
Laying granite tiles
Now you can start laying the granite slabs, if necessary following the manufacturer's instructions for a specific association. The following points apply to virtually every installation:
- Start laying on surfaces in a corner
- If it is to be a path, the curbs are usually laid first
- Place the panels and first align each individual panel horizontally across the direction of the slope
- For the next panel, the surface is leveled with a rubber mallet until the edges are even
- The joint width should be exactly the same for each panel; spacers or frequent checking with the joint trowel can help with this
- In between, you should always check whether the entire surface is laid evenly and horizontally
Grouting granite slabs
There used to be divided opinions about grouting granite slabs:
- The “Lords of the Stones” in the granite factory recommended open or sand-filled joints of at least 0.5 cm wide, which permanently protects the stone from chipped edges
- The horticultural companies recommended seamless joint laying, which would prevent weed growth
- The manufacturers of grout always advised against open joints (as there was a high risk of the joints being washed out) in order to sell grout.
Today, even in public areas, care is taken to create as many green joints as possible. Anyone who has ever been to the mountains knows that laying them in a joint manner will definitely not prevent any plant from growing. And the washed-out joints, they occur during storm surges, certainly during hurricanes, but with average German rain.
Open joints in the gravel-sand bed allow seepage, and everyone has heard that seepage is a good thing. The alternative would not only involve grouting, only granite slabs laid on a bed of mortar would be grouted with grout, resulting in a closed surface from which rain runs into the sewage system. There are many arguments against such a closed surface and in favor of seepage, see next paragraph. One can say that the dispute has now been clearly decided: outdoor granite slabs are laid in a bed of gravel or sand and equipped with unsealed joints. These joints should be filled with sand or fine chippings. This supports the even drainage of water because the slightly capillary effect of the filling slows down the water seeping through the joints and thus prevents it from being washed out or washed out. The joints are filled with sand or fine grit; Fine sand 0 - 2 mm, diabase crushed sand, bas alt flour, quartz sand or crushed lime sand. You know the colors of normal sand, bas alt sand produces dark joints, quartz and lime sand produces light to white joints.
How to grout:
- Bas alt flour is a special case, it is swept dry into the joints and brushed in
- Otherwise: Spread the filling compound in an even layer of approx. 5 mm on the granite slabs and slurry it in
- Sludging: Wet thoroughly with a fine jet from the garden hose.
- Sweep the wet filling into the joints with a broom
- Use a brush to trace all joint lines without applying pressure
- Sweep in the filling slowly and carefully again up to the height of the plate
- The area is now allowed to dry, excess joint sand is removed with a broom (and collected)
- The finished granite slabs are shaken evenly over the entire surface
- Then you can clean the area:
- The panel surfaces are sprayed with a strong jet of water
- At an angle and never in such a way that you hit a joint lengthways until all sand residue has been completely removed
- After two to four weeks, grouting is carried out, i.e. wet filling compound is added again
- Now the edges can be attached to the sides
- This will e.g. B. made with mortar, which is applied diagonally to the edge of the paving with a trowel (so-called back support)
- You can then cover the slope with curbs, which creates a very neat edge
If you e.g. For example, if you lay a terrace area with granite slabs, you would then have to consider whether you should seal or impregnate the surfaces, but that is another topic of its own that is not entirely easy.
Would you rather have a mortar bed and mortar joints?
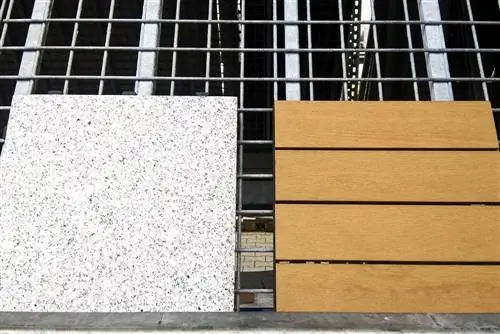
The installation shown above is a classic way of laying granite slabs. Still or increasingly standard today; Granite slabs in a loose bed react elastically to static and dynamic loads, so temperature stresses can be easily reduced. The surface also remains permeable to water, a big advantage over a non-permeable installation, even if a little of the joint filling compound will “disappear” over time and even if greenery could settle in the joints (this is often deliberately sown today). This “unbound laying” is contrasted with “bound laying,” in which the slab bed and joints consist of cement mortar with additives. Such a bonded installation is often considered because it seems so neat, but it is quite complicated: you have to apply a particularly deformation-stable base layer that still has very little expansion orcan withstand voltage, this is only recommended in exceptional cases.
There are also many good arguments for unbound installation:
- We are constantly building, natural areas are constantly being sealed to create waterproof surfaces
- When it rains down on these areas, this rainwater no longer trickles through layers of earth and arrives purified in the groundwater
- But is led directly into the sewage system without natural groundwater recharge
- Too much rainwater is led from the sewer system into the nearest body of water, which is significantly polluted by untreated rainwater
- This rainwater is also missing from the groundwater; groundwater levels are already falling in many regions
- Only 0.3% of the total of around 1.5 billion cubic meters of water on our planet is usable drinking water
- Even in water-rich Germany, clean drinking water is not unlimited
- Good reasons to make every area suitable for infiltration where this is possible; this also improves the urban climate
- Infiltration also saves you money because you pay for the water that flows from your property into the sewer system
- Also for clean rainwater, in Berlin e.g. B. a rainwater fee of €1,804 per m² of drained area
Advantages of outdoor granite slabs
Are you still hesitating, granite slabs are so expensive? Here are a few arguments for the beautiful surface:
- Natural stone is a very old and very durable surface that shows the same color for decades
- Granite is available in many different colors that can be laid in a variety of combinations
- Depending on the surface, granite slabs can appear playful and lively, calm and straightforward, very modern - everything is possible
- The aesthetic value of a granite pavement is certainly higher than that of a concrete pavement, and it is also easier to maintain:
- Granite is resistant to abrasion, easy to clean, resistant to stains, embers, cigarettes
- Aging granite slabs eventually developed their own charm
- Granite slabs are offered in surfaces that always remain non-slip and easy to grip, brushed, flamed or bush-hammered, for example
- While concrete blocks inevitably become slippery when there is dew or some green growth
The natural stone, when bought new, is more expensive than concrete stone, you have to expect at least €50 per square meter for the most commonly required minimum thickness of 3 cm. However, you don't necessarily have to buy the granite slabs new; granite slabs are also available in stores selling historical building materials, often at the same price per square meter as concrete paving or even cheaper.
Granite slabs in combination with granite paving stones
If you are still thinking about which paving it should be - here is a classification of granite slabs and granite paving. Granite is a natural stone, granite slabs are one of the many forms in which natural stone paving is made. The natural stone paving has certain classification names depending on the size of the stones:
Granite paving
Granite for paving is available in many variations, here are the common and frequently used pavings that are offered in addition to the granite slabs made of granite:
- Mosaic plaster: Smallest plaster size, is now machine-made, common sizes 4 cm (3/5), 5 cm (4/6), 6 cm (5/7) and 7 cm (6/8)
- Small paving stones: Square stones except for dimensional tolerances, usual sizes 8 cm (7/9), 8.5 cm (7/10), 9 cm (8/10), 9.5 cm (8/11) and 10 cm (9/11)
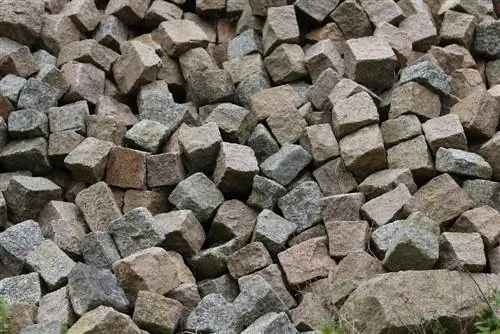
- Large stone paving (colloquially cobblestone): Large-format natural stone cubes with edge lengths of 14 cm (13/15), 16 cm (15/17) and 18 cm (17/19)
- The numbers in the brackets indicate the dimensions by which the edge lengths may vary; natural stone cannot be broken precisely
Granite slabs
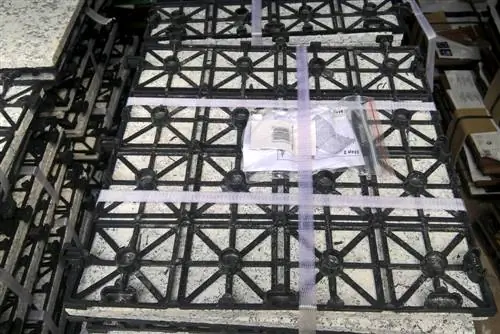
With the granite slabs you have already chosen a very special natural stone paving, which also has very special regulations. Here is an overview, including how to differentiate between granite slabs and granite paving:
- " Slabs made of natural stone for outdoor areas - requirements and test methods" are regulated in DIN EN 1341:2013-03 (paving stones, natural stone, outdoor areas: DIN EN 1342)
- Granite slabs are therefore natural stone slabs “where the nominal width exceeds 2 times the thickness”
- If this ratio is not achieved, the slabs are called “paving slabs”
- The paving stone is a “natural stone for paving, the length or width of which does not exceed twice the thickness and the length does not exceed twice the width”
- Standard sizes for granite slabs: 30 x 30, 30 x 40, 40 x 40, 40 x 60 and 60 x 60 cm, the larger, the faster to lay
Important Shopping Information
There are a few other things to consider when purchasing granite slabs:
- If you buy the granite new, you should ask for stone that has a guarantee that it was created without child labor
- The voluntary commitments/certificates of Asian natural stone exporters should be viewed more critically
- Internationally recognized certificates such as Xertifix or Fair Stone offer more security
- Certificates from UNICEF or UNESCO are fake, both organizations do not award natural stone seals
- The following information should be included when purchasing:
- Designation: trade name, petrographic name, typical color, place of origin (may be specified using GPS coordinates)
- The petrographic name is the scientific name of the rock
- In addition, DIN EN 1341 requires testing of water absorption, bulk density and open porosity; in the case of chemical treatment, the type must be specified
- Dimensional tolerances in several directions must be shown: Permissible deviations in panel dimensions, diagonals and thickness, permissible flatness deviations in visible surfaces and edges
- Further information relates to testing the freeze-thaw cycle, bending strength, abrasion resistance and possibly grip
- A data sheet with the tolerances according to DIN EN 1341 can be found at granitpflasternaturstein.de/wp-content/uploads/2013/04/Granit Platten-Masstoleren.pdf
- Natural stone slabs are offered with various, precisely defined surfaces according to DIN EN 1341:
- Finely machined: Surface processed using stone technology on which there is a maximum of 1 mm distance between the apex and the lowest point (e.g. sawn, ground).
- Roughly processed: Surface processed using stone technology on which there is a distance of more than 1 mm between the apex and the lowest point (e.g. bush-hammered, flamed, blasted)
Conclusion
Granite slabs when laid unbound result in durable and at the same time shape-variable coverings. The production of the beautiful and long-lasting panel surfaces is easy for DIY enthusiasts; the relatively high price when buying new is amortized over time.

