- Author admin [email protected].
- Public 2023-12-17 03:39.
- Last modified 2025-01-24 12:45.
Pavers can be made of different types of rock, with granite, porphyry and bas alt being the most common types. These rocks are characterized not only by their very high strength, but also by their longevity. However, in order to achieve an optimal result, careful preparation of the surface is extremely important. Because the correct design and the load-bearing capacity of the floor are ultimately crucial for the stability of the entire covering.
Material and tools for laying cobblestones
- Cobblestones
- Laying sand
- lime chippings
- Deep curbs/edges
- gravel
- Quartz sand
- Shovel
- Wheelbarrow
- Calculations
- Spade
- Inch rule
- Wooden pegs
- Mason's cord
- Spirit level
- rubber hammer
- Surface vibrator with rubber plate (can be rented from hardware stores)
- Metal rail
1. Step: Prepare paving
First, the path should be marked with wooden stakes and a string stretched on both sides, which marks the exact course of the area to be paved and at the same time specifies the final paving height. Not only the paving, but also step dimensions and light wells must be taken into account. So that the leveling and supporting layer can be installed at the exact height, it is recommended to insert metal rails into the floor, which will be used to remove the covering later.
While a depth of 20 cm is usually sufficient for fastening sidewalks, the ground should be excavated to a depth of 30 to 40 cm for more heavily loaded areas such as a gate entrance. If there are any unevenness, these must not be leveled out with the paving bed as otherwise depressions could arise after shaking off.
An important criterion when laying cobblestones is the slope, which should be planned for and be at least 2 to 2.5 percent. A 1 percent gradient means nothing more than a height difference of 1 cm per meter.
2. Step: Substrate and bedding of the paving
First, a 20 cm to 40 cm deep pit is dug, which is compacted using either a vibrating machine or a surface vibrator. If cobblestones are only to be laid on a small area, the floor can also be firmly trampled with your feet if necessary. Now the frost protection and supporting layer made of chippings or gravel is applied to the ground and compacted 10 cm at a depth of 15 cm or, for example, 20 cm at a depth of 25 cm, taking into account the side slope of around 2 percent.
Tip:
The better the subsoil is compacted and shaken, the better the cobblestones are protected from frost. An aluminum or wooden peel plate can be used for distribution, which is guided on the metal rails. Since the paving bed sinks again by around 1 cm when shaking, this aspect should be taken into account when filling the base layer. Special laying sand of 3 cm to 5 cm is applied to this covering, which is roughly smoothed out with a rake. Moist sand is recommended as it can be compacted much better.
3. Step: Setting curbs
Since cobblestones are not laid together like concrete pavements and therefore the outer stones are not tip-proof, the stones should definitely be secured. To do this, the gravel bed can be bordered on the sides with curbs or deep curbs. Alternatively, a concrete edge can also provide stability, especially in cases of high stress or larger areas. For quick production, the best solution is precast concrete for outdoor use, which is mixed with water to create a moist mix. This mass can then be filled into a gap of approx. 15 cm between the edge and the paved surface from the outside at an angle to the cobblestone. Tip: The concrete needs to dry for approx. 2 days until it has completely hardened.
4. Step: Laying cobblestones
Cobblestones are made of natural material and are therefore not standardized to the millimeter, so each stone is placed individually in the sand bed and brought to the correct height and position using a rubber mallet, whereby it should be fixed approx. 8 mm higher than the ground level. It is advisable to only drive flat stones lightly and thick stones deep into the sand bed. However, it can also happen that more sand needs to be filled under flatter stones. The distance between the joints should be minimal and when laying cobblestones should be approximately 20 percent (around 5 mm) of the stone length. You can check regularly using a spirit level whether the gradient is consistent.
Cobblestones are placed directly into the sand bed and may no longer be walked on after being removed. The natural stones are arranged “overhead” according to the desired laying pattern from the outside to the inside, starting from the existing area. Depending on your preference and taste, arched patterns, straight lines or symmetrically arranged stones can also be incorporated. To compensate for the inevitable color difference, stones from multiple packages should be used.
5. Step: Grouting paving stones
After laying the paving stones, the joints are completely filled with bas alt sand (black joints) or quartz sand (white joints). To do this, the special sand can be sprinkled over the surface and swept into the joints with a coarse broom. Once all the joints are filled, the plaster is watered with a hose so that the material in the gaps can compact. If larger paving stones were used, chippings should be used to fill the joints.
Finally, the laid area is thoroughly swept again and carefully shaken with a surface vibrator, which ideally has a rubber pad so that the surface of the stones can be protected, until the ground level is reached. After the joints have been compacted, the area should be slurried again with sand and water.
What you need to know about laying cobblestones
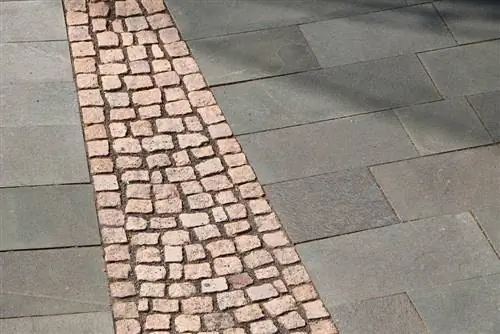
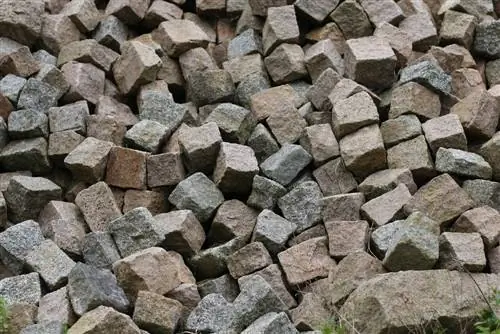
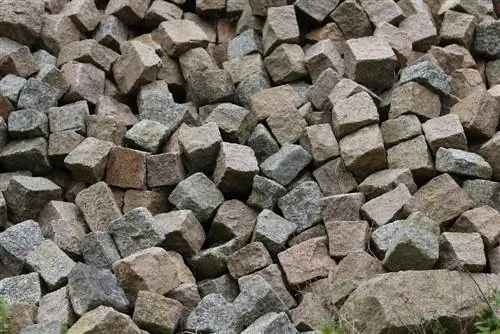
Cobblestones are slightly rounded at the top and are also known as cat heads. The cobblestone is divided into bound and unbound versions, which are very similar in appearance but have completely different properties.
Cobblestones are colored in many shades of gray, black and sand. The paving surface itself only has a very low load-bearing capacity, so the layer under the paving surface must consist of gravel, drainage concrete or drainage asph alt to support it. The thickness of this sublayer depends on the expected load - i.e. whether pedestrians or vehicles are moving on it.
How to lay cobblestones
- Theunbound laying method is the most frequently used and also the oldest type of construction. The stones are placed on a bed of grit, sand or granules. The joint material usually consists of the same material as the substrate. This construction reacts to static or dynamic loads with elastic deformation, which means that thermal loads can be reduced and no tensions arise. Basically, a paving surface installed in this way is permeable to water. The disadvantage here is the loose joint material, which can be washed out of the joint and is also sucked in by sweepers. The stones can lose their grip and the weeds also have a much better chance of spreading.
- Thebound laying method is usually only used for natural stone. The paving bed and the joints consist of a cement mortar that is improved with additives. This construction does not cause any deformations, so it is also referred to as a rigid construction. Actually, this is not entirely correct, because bound paving slabs also move, but these movements are so small that they do not require any mention. However, if the slight expansion is exceeded due to weather influences, such as frost, and the tensile strength is reduced, cracks appear and the joints become loose. This means that individual stones can become loose.
To counteract this, there is a special two-component resin-based grout. This special grout is permeable to water and prevents it from freezing. This means that no cracks can form and no individual stones can come loose. The material consists of quartz sand and a packaged resin; the colors also differ depending on the provider. The grout is available in the colors sand, bas alt and gray. Attention: With the bound construction method, the base layers below the paving must be made particularly resistant to deformation. Therefore, this construction method can only be realized with precise planning, coordinated materials and complex production.

