- Author admin [email protected].
- Public 2023-12-17 03:39.
- Last modified 2025-01-24 12:45.
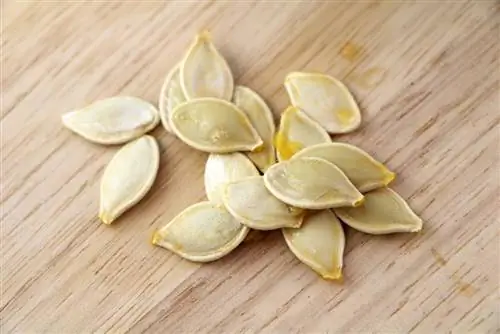
In autumn they are back in the vegetable displays in stores, the tasty pumpkins. There are around 700 varieties, and if you want to know what's on your table, you can sow the seeds yourself in spring to get a rich pumpkin harvest in autumn. This means that every hobby gardener can dry the pumpkin seeds after harvesting and use them for new sowing. Of course, snacking on pumpkin seeds is also allowed here, because they are not only tasty but also he althy.
Drying pumpkin seeds
If a pumpkin is eaten in the fall, then the hobby gardener should also think about next year. The pumpkin seeds are not used in food and are usually thrown away. But if you dry them over the winter, you will have wonderful seeds next spring that can produce a rich harvest of pumpkins in the fall. Drying should be done as follows:
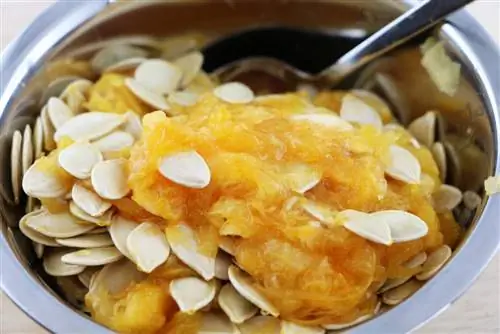
- Separate pumpkin seeds from the remaining pulp that can be used for food
- remove the fibers that hold the kernels together as much as possible
- then place in a warm, dry place to dry
- A warm southern windowsill or a warm basement, preferably the boiler room, are ideal for this
- A dry storage can also be used for the pumpkin seeds
- Make sure that the pumpkin seeds are not “stacked” on top of each other but are spread out well so that they can dry faster
- An oven tray can be used for this
- If there is no convenient place for drying, the kernels can also be placed in the oven at around 60° C for a longer period of time, for example overnight, then it will go faster
- After drying, put the seeds in paper bags (not plastic) and store in a dry place until sowing
Tip:
If you want to snack on the dried pumpkin seeds, you can do so without any risk. After drying, the seeds taste even better when lightly roasted in a pan and sprinkled with s alt. Since one pumpkin produces many seeds, not all of them have to be used for sowing but can also be eaten.
Location requirements
Before sowing, the hobby gardener must find the right place for his pumpkin patch. Because all types of pumpkin, including zucchini, need a lot of space to be able to spread close to the ground. Pumpkins are ground creepers that do not shoot upwards but along the ground. The other requirements of pumpkin plants for the ideal location are as follows:
- bright and sunny
- well fertilized with compost
- little water, otherwise the shoots and leaves may rot
- A minimum distance around the individual plants of around two square meters is ideal
- The size of the bed required can be calculated according to the number of plants you want later
Tip:
Spread dried grass on the ground around the pumpkin plants! On the one hand, this prevents water from being lost too quickly on warm days and the soil can store it better. On the other hand, weeds have no chance of growing between the pumpkin plants.
Pre-culture in the pot
Sowing pumpkin seeds in pots has the advantage that this can be done regardless of the weather, as the pots can be placed in a warm place to germinate. This means they can be sown as early as February. When sowing in pots, proceed as follows:
- Mix the potting soil with a little sand and put it in small pots and put two to three pumpkin seeds in each pot
- water little
- place in a warm, bright place
- Ideal for germination is around 20 to 25 °C
- the seeds begin to germinate, move them to a cooler but still bright place
- After the Ice Saints in May, plant the seedlings outside in the bed
Tip:
If the hobby gardener wants to know whether they are capable of germinating before sowing their seeds, there is a simple test. The dried pumpkin seeds are placed in cold water for about 6 to 7 hours. The seeds that rise to the surface can be used because they are capable of germinating. There is no need to sow the remaining seeds.
Sowing outdoors
The pumpkin seeds can also be sown directly in the bed. The ideal time for this is late April. To ensure that the seedlings do not suffer frost damage during the Ice Saints period, the bed should be covered with foil. Otherwise, please note the following:
- prepare the soil with compost and sand for better permeability
- Place pumpkin seeds about 15 mm deep in the soil
- To avoid frost damage to the entire harvest, the seeds can also be planted at different depths in the soil
- so the seeds planted deeper survive a frosty day better, but also start to germinate and develop later
- Put a plastic film over the sowing, which protects against too much moisture, especially in a cold, rainy spring
- water only in very dry periods
- Remove the foil in May after the Ice Saints so that the seedlings can develop better.
Tip:
If the seeds are planted in the ground at different heights and there is no frost damage, the harvest in autumn is extended. The reason: The plants grow at different speeds.
Harvest
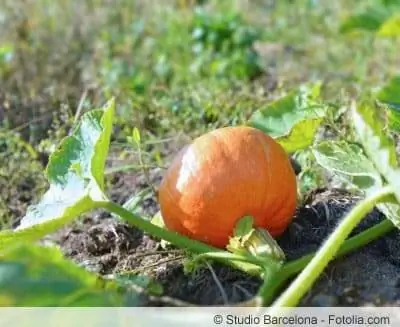
Pumpkins usually become ripe for harvest at the same time in autumn. If the first small, tender fruits are harvested in summer, tasty dishes can be brought to the table. Later in the fall, when all the pumpkins have grown, they are harvested. But the ripe fruits have a firm shell and do not need to be eaten immediately after harvest. They can therefore be stored until winter in a dry, dark, not too warm place, such as a cellar, for later consumption. The pumpkin flesh can also be frozen for later use.
Tip:
If you have planted a lot of plants, you can harvest the pumpkin flowers in summer. They are also very tasty and can be found in many dishes, especially in Greek cuisine.
Conclusion
Anyone who has ever bought a pumpkin in stores to use it should not throw away the pumpkin seeds. These can be dried and sown again in your own garden next spring. Drying, sowing and caring for pumpkin plants is relatively easy and can be done even by inexperienced hobby gardeners. If you have enough space in your garden, you can sow many different types of pumpkins in spring and enjoy a bountiful harvest from summer until well into autumn.
What you need to know about pumpkin seeds soon
Sowing
- Pumpkins are known to be an autumn plant. So the seeds are sown at the beginning of a year.
- It is important to know here that pumpkin seeds need a lot of warmth to germinate.
- To pre-cultivate them, you should sow them in small pots with soil in April and leave them at around 20 °C.
- It takes about a week for the first germs to appear.
- After three to four weeks, the seedlings should have grown large enough to be moved to larger, individual pots.
- The seedlings can only be planted outside when there is no more frost.
- The seedlings should be transplanted outside by mid-June at the latest.
- If they are suspended later, there will only be minimal returns.
- If the pumpkins are to be sown directly outdoors, this should be done in early to mid-May, after the frost period.
- However, this is quite risky if it gets frosty again.
- When sowing, make sure that the pointed side of the pumpkin seed faces downwards, as this is where the root will sprout.
- In addition, the seeds should not be planted too deep in the soil. Around 1.5 cm should be sufficient.
- Since pumpkins grow very large, the seeds need an appropriate distance from one another.
- Although there are differences in tendrils between individual species, one to two square meters should be planned for each plant.
Tip:
The seeds here are so-called oilseeds (similar to sunflowers). This means the seeds are good for sowing for around five years. Older seeds will often germinate more irregularly and produce poorer yields.
Planting out
- As soon as the seedlings are large enough and the weather remains consistently frost-free, they are placed in the garden or in the selected field.
- Here you should make sure that the plants have enough space, because vegetable pumpkins in particular are very large and heavy plants.
- Pumpkins grow very quickly, so you can soon notice flower formation on the more or less large tendrils.
- The flowers of the pumpkins are very large and yellow in color. They also like to be surrounded by bumblebees and bees.
- Snails love pumpkins, by the way, so adequate snail protection should be provided.
- The soil for planting pumpkins should always be heavy. By the way, compost heaps are very suitable for planting pumpkins on.
- In dry periods, the pumpkin plants should be watered to ensure good yields.
- If you don't have a compost heap, you will have to fertilize the pumpkins later.
- Home-made compost is generally sufficient, but special fertilizers are also available commercially.
Harvest
- The first pumpkins can be harvested at the end of August - depending on when they are sown.
- In general, pumpkins should be harvested between September and November, i.e. before the first frost.
- You can tell whether a pumpkin is ready to harvest or not by its bright color and woody stem.
- If you are still not sure whether the pumpkin is ripe, you should simply knock on it: if you hear a hollow sound, the pumpkin is fully ripe.

